


If you are the .01% of the population that needs a plastic Birkenstock repair hack to fix the stretched out toe post on your Gizeh-style sandals

I fear the following disaster has only happened to me, but on the off chance it has happened to another Birkenstock fan, here’s what happened and the repair hack I used to fix it.
I was wearing my plastic Birkenstocks
No.
Fine. I’ll tell you. It was a Culligan water dispenser and I was taking it to the barn to add to the pile of things I need to sell or donate.
The important part of this story is that I couldn’t see my feet. Therefore, I couldn’t see the hole in the yard.
I stepped into the hole and jammed my foot into the toe post (the part that goes between your big toe and second toe) of my plastic Birkenstocks. I jammed it so hard that I couldn’t shake the Birkenstock back into place. I had to set the water dispenser down and use my hand to adjust the Birkenstock.
That was when I realized that my foot really, really hurt. There was definitely going to be a bruise.
I also realized that my sandal no longer fit. When I jammed my foot into the end of the Birkenstock, the plastic toe strap stretched out. This meant that the top of the sandal wouldn’t stay snug on the top of my foot. You can’t walk around with your sandal flopping around on your foot.
I had just ruined my new plastic Birkenstocks
*sigh*
I did an Internet search to figure out if I could fix these Birkenstocks, but no one else seems to have stepped in a hole in their yard had this problem. Go figure.
You know me – I couldn’t let this problem go. And mainly, I didn’t want that hole in the ground to get the best of me and my new sandals. There had to be a solution.
All I needed to do was to shrink the toe post back to its original length.
I figured out that the plastic Birkenstocks are made from the same substance (EVA or ethylene vinyl acetate) that craft foam is made from. Craft foam is used to make those puffy stickers that kids love. Craft foam shrinks if you get it hot enough. I learned that by watching this video.
A hair dryer won’t get hot enough to shrink EVA as those usually have a max temperature of 140°F. A heat gun
Except I don’t have a heat gun
I could buy one. They only cost $25. But if I was going to do that not knowing if this solution would work, I might as well buy a new pair of plastic Birkenstocks for $35.
Do you know what gets hotter than a hair dryer? A curling iron. A curling iron can easily heat up to 200°F – 300°F. Some of them even go up to 400°F. It was worth a try!


I cranked my curling iron to its hottest setting. I don’t know how hot mine gets and I did not want to risk the Birkenstock melting onto my curling iron.
That would be bad.
To prevent that from happening, I wrapped a thin, linen towel around the toe post and then clamped my curling iron around the towel-wrapped toe post. It was a bit of an awkward fit, but it worked. I thought a cotton bath towel would be too thick for the heat to transfer.
The below picture was recreated just for you. My curling iron has a 1-inch diameter.
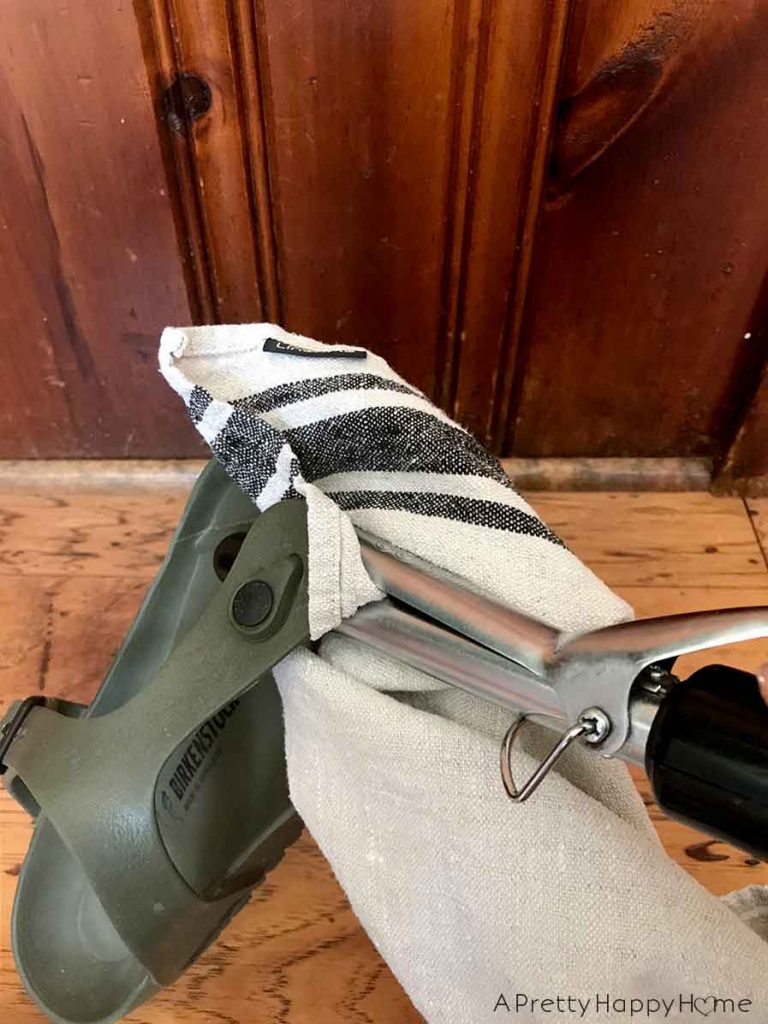
I’m not exactly sure how long I held the curling iron around the toe post that first time, but I’m guessing at least 30 seconds. I was SHOCKED and GIDDY when I unclamped the curling iron and checked the toe post to see that it had SHRUNK!
Not enough, but it was shorter!
I repeated the process several more times until the toe post was back down to more or less its original length. It wasn’t perfect, but it was pretty close. More importantly, it felt normal when I tried the sandal on.


You can bet your bottom dollar that I did a happy dance when this repair was done!
If you look at the toe post now you can see that it’s not exactly shaped like the one on the shoe that wasn’t damaged. The only way to find out if this repair hack had compromised the structural integrity of the plastic was to wear the sandals.
I’ve been wearing the repaired Birkenstocks for a month now with no issues, so I’m fairly confident the repair is permanent. I also spent two days walking around an amusement park (6 miles each day) with these Birkenstocks and did not experience any problems with it stretching out. They seem pretty much as good as new!
For the record, I still want a heat gun, but I’ll wait until I have a really good reason to buy one.
I hope this plastic Birkenstock repair hack helps someone out there!
P.S. If you don’t have a curling iron, a small flat iron should work too.
Thanks for hanging out with me today. Here are some other hacks you might enjoy.
Vinyl Flooring Scratch Repair Hack
*affiliate links in this post*