Stone Carriage House Gym: Part 3, Old Windows
Work on our stone Carriage House gym continues and today we’re going to discuss old windows.
It is hard to explain the window situation on this half of the building.
I think the short answer is someone thought windows were overrated.
Natural light? Who needs it?
Glass panes? Metal grates are stronger.
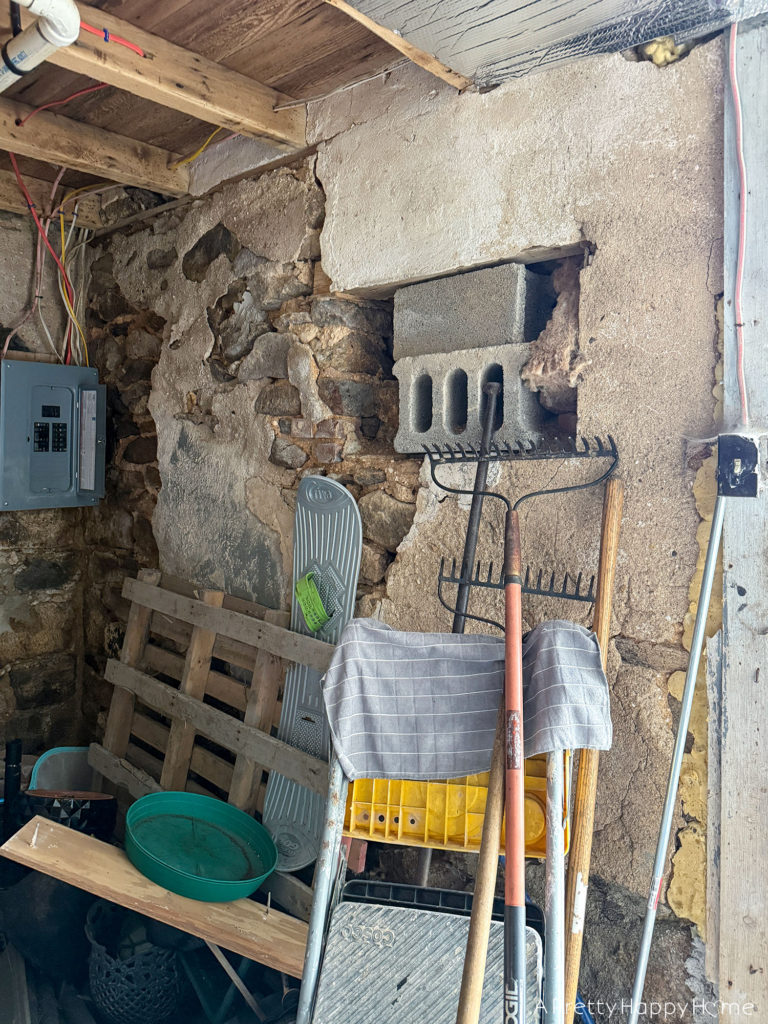
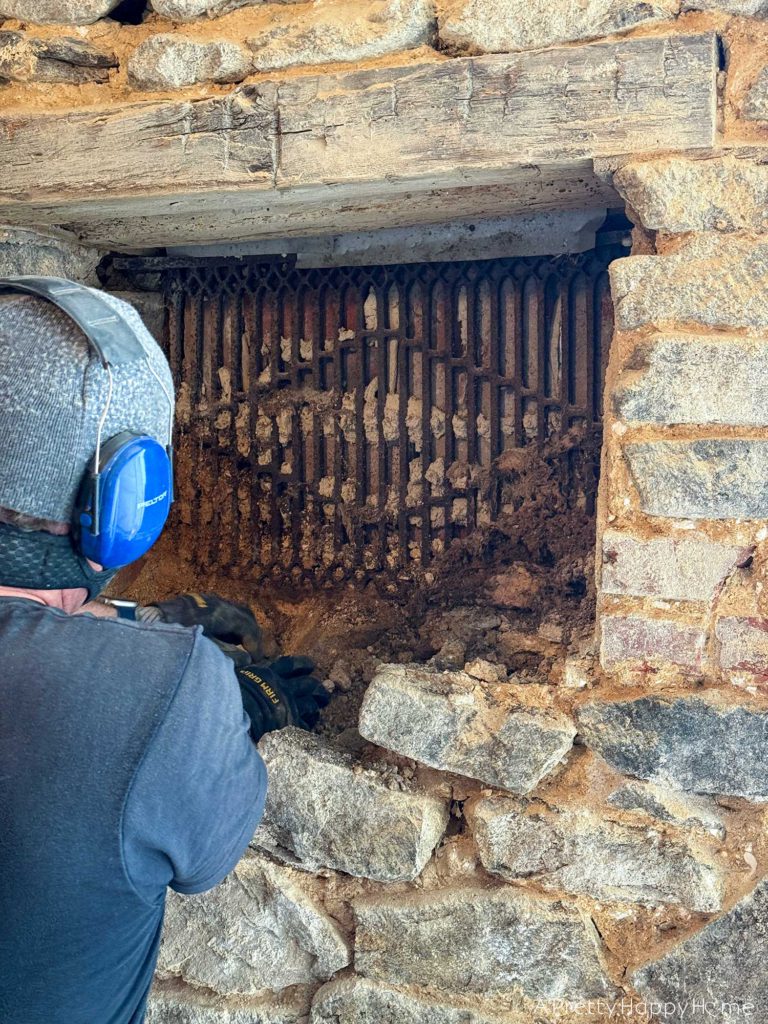
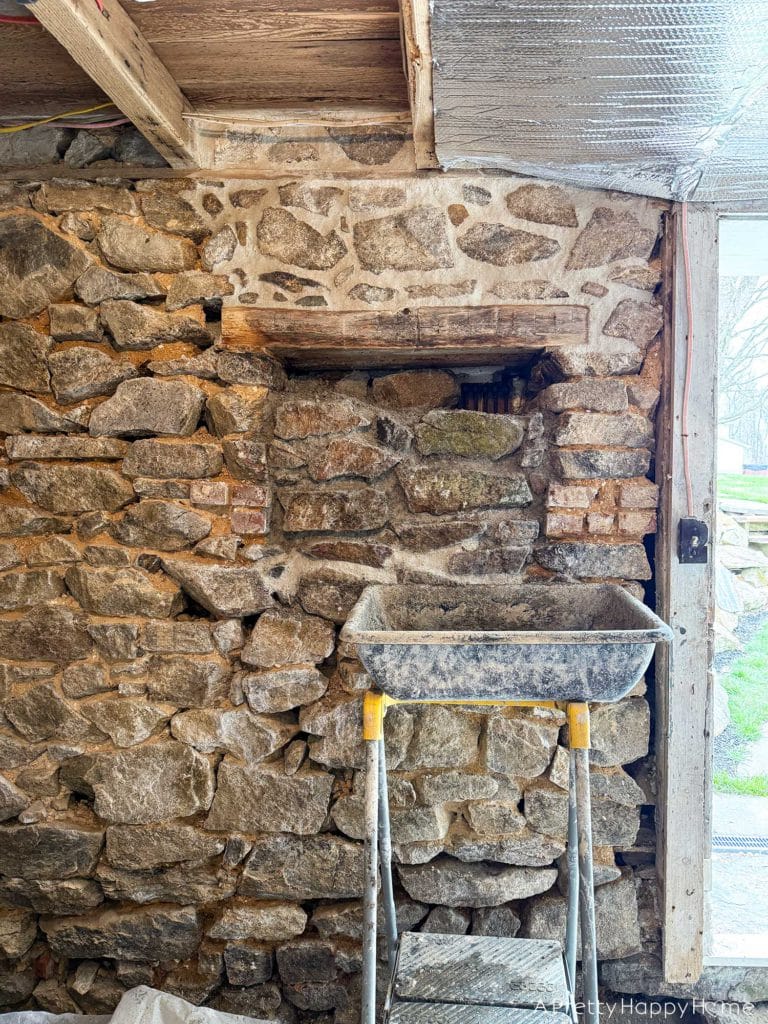
The longer answer is that on the end of the building we are currently restoring, there are two small window openings with cast iron grates instead of glass panes. Were glass panes ever there? Maybe. There is no longer evidence of them if they were there. Poof. History erased.
One of the grates on the west facing side of the building has been covered over on the outside so that you would not know a window once existed there. On the inside, the window opening was clearly still there. You just had to look for it around the cinderblocks.
My best guess is the cinderblocks were put there to hold up the old window headers (wood beams), but they also made a nice place for mice to nest. Yep. I went there. I’m sorry.
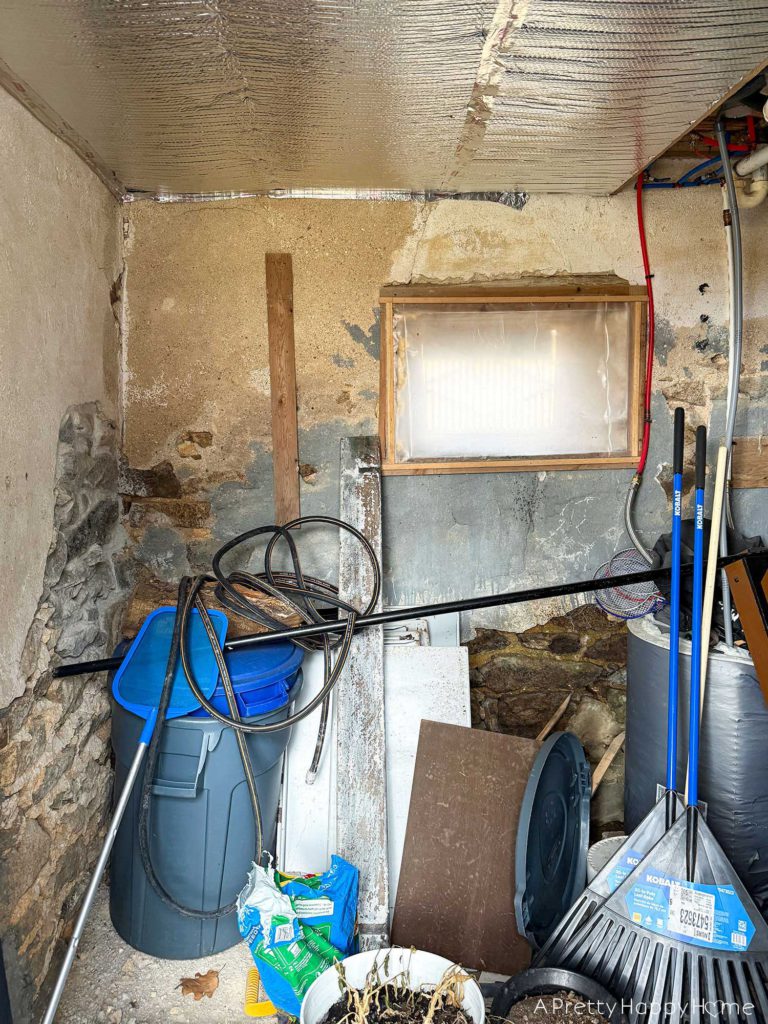
The other window grate on the east side of the building was open, meaning not covered. Think of it as a fancy window screen that lets all the cold air and moisture into the building. Probably small creatures too.
We did the classy thing and covered it with plastic to try and prevent the pipes inside the building from freezing.
Our solution did give off serial killer vibes, but the pipes did not freeze. So, mission accomplished?
We have a different plan for how to handle each window area because what this restoration project definitely needs is more complications.
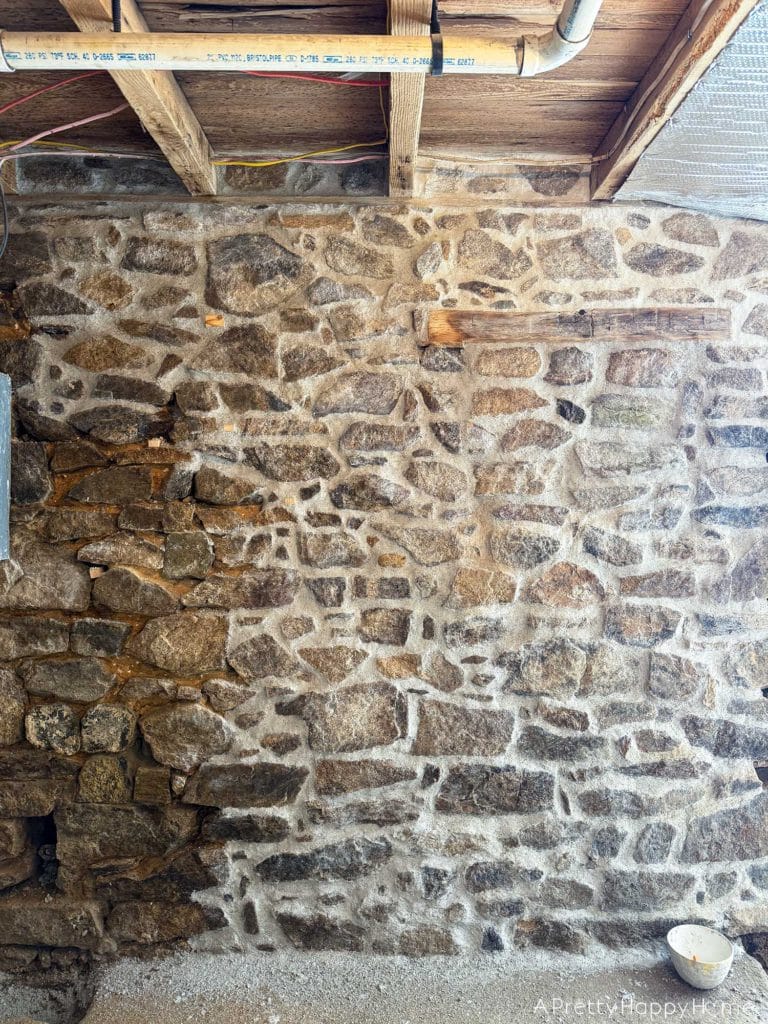
We decided to completely fill in the window well that was covered over from the outside. Since we don’t have plans to open up that window, we didn’t need a big hole in the wall.
It took 300 pounds of sand and 55 pounds of lime plus a whole slew of rocks to fill that window opening in.
I left the window grate in place because it was mortared into the wall from the inside and the outside. There was no way to remove it without causing damage to the outside of the building.
Here it is partially filled in.
Here is the window all the way filled in, but not fully finished.
I tried to overlap the stones as I placed them so that should all the mortar collapse, the stones would be sort of interlocked together. This should help keep the building upright. *crosses fingers and toes*
If you’ve ever put a puzzle together, you’ll know that it can be fairly strong once all the pieces are interlocked and you have to work to take it all apart. This stone wall is a bit like that.

Here is this section of wall mostly completed.
What a difference time and a lot of lime mortar makes, right?
Lime mortar has been used for thousands of years and is made of limestone (there’s a firing process that turns it into powder), sand, and water.
It is different from mortar used on newly built homes with stone facades. That mortar is typically Portland cement-based and should not be used with old buildings made from natural fieldstone. Portland cement-based mortar cannot breathe, but lime mortar does, meaning it can take on and release moisture. This is important to the health of the building as lime mortar can heal itself if micro cracks appear.
Portland cement is also harder than the fieldstones themselves. This can cause undue pressure on the stones, which can make them break over time. No one wants that!
I’m not saying any of these problems will happen in a year or ten if the wrong kind of mortar is used on a fieldstone building. I’m thinking about the health of the building over hundreds of years. This one has already lasted 250 years. It is not going to fall down on our watch!
*crosses fingers and toes again*
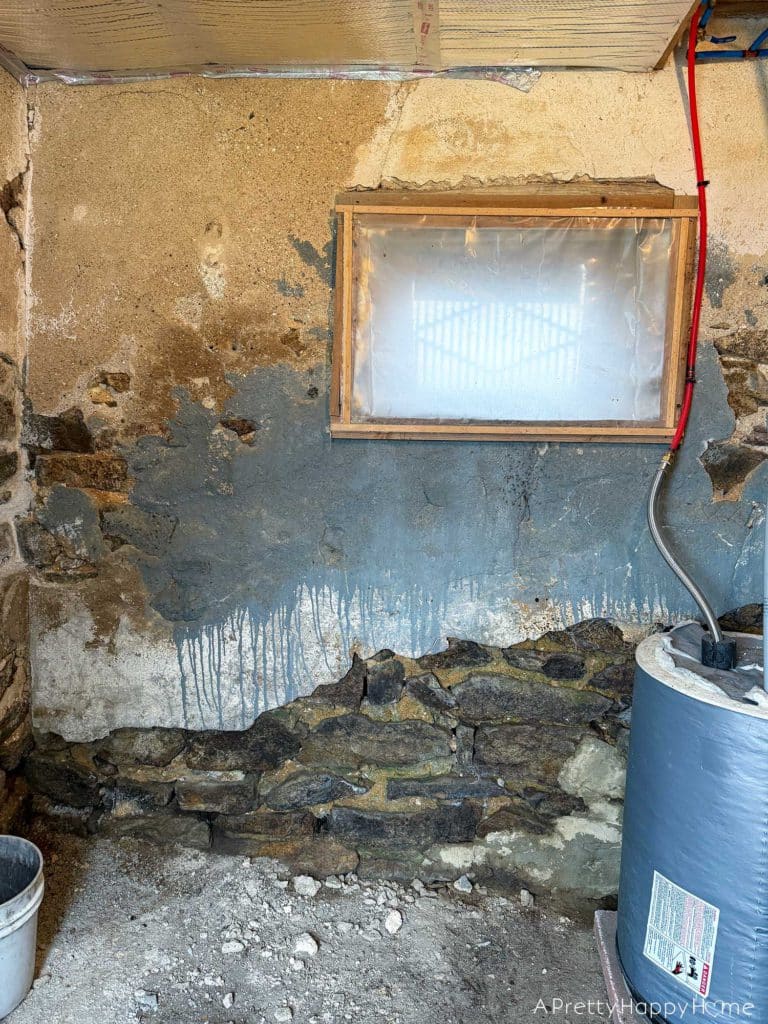
As for the window on the east side of the building, we are keeping it.
Oh, yes we are.
Big fans of natural light here.
We will remove the grate, even though it’s great. (Sorry, I had to say it just once.)
Then we are going to install a window in a stone wall. We have an old window that we’ve been storing in our basement that should fit.
Have we done this before?
Of course not.
We have a general idea of how it works though after restoring the other half of the building, which has proper glass-paned windows. That restoration project gave us a glimpse at how the windows were installed in the stone wall. It’s really quite clever.
We have the false confidence that is similar to that which comes from watching a single YouTube video and assuming we could now safely land a plane despite not having a pilot’s license or successfully perform an emergency appendectomy with no supplies while stranded on a deserted island.
What could go wrong?

All that to say, we’ll figure it out as we go and happily report back to you on the process.
The good news is that no lives will be on the line while we wing our way through another project.
Pretty sure.
What do you think of this stone building restoration process so far? Are we nuts for taking it on? You can always comment on this blog post, email me here, or reach out via Instagram or Facebook. I respond to all of your comments.
P.S. We left the wood window headers (three beams) above the window we filled in because there was no reason to take them out. The exposed beam will give us an easy place to hang things on that wall.
The window that we will be installing needs one new header to replace a rotten one. You can see the rotten beam on the photo at the top of this blog post.
Thanks for hanging out with me today! I appreciate you spending part of your day here. If you’d like another blog post to read, I’ve got you covered.
Stone Windowsills and Wooden Doorsills


You May Also Like

Stone Carriage House Gym Expansion Part 1
Potting Shed, Part 1