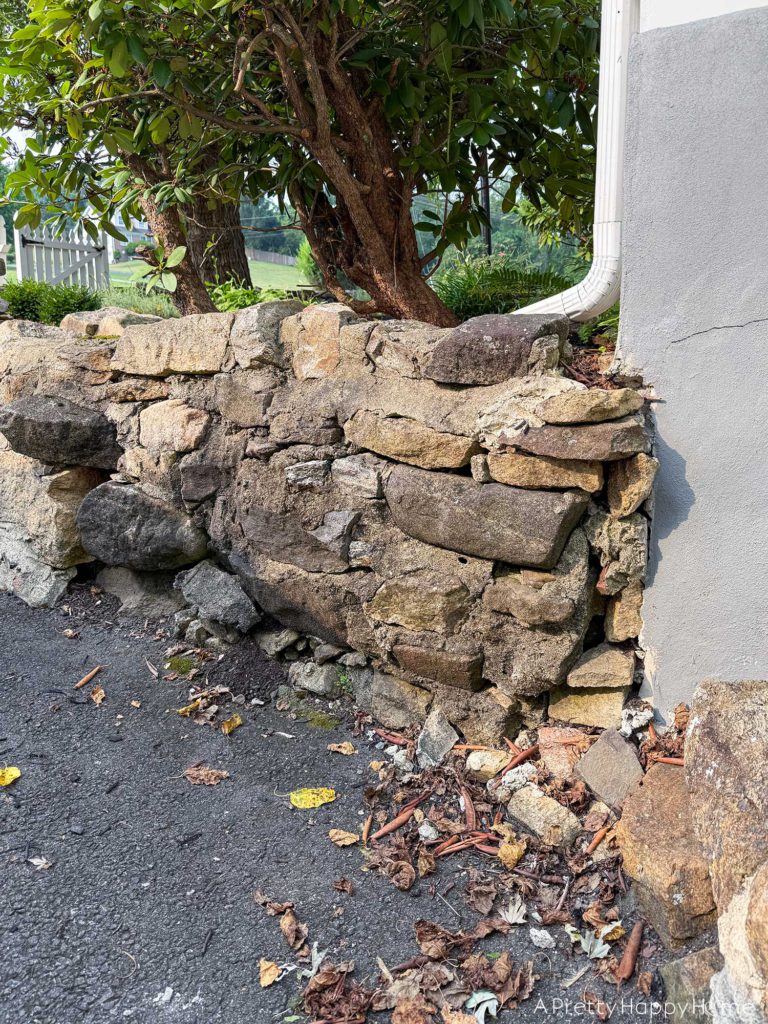
Curved Fieldstone Wall: Part 2, Demo Section 1
In case you missed Part 1, we are building a curved fieldstone wall. Or, perhaps, it is more accurate to say we are rebuilding a curved fieldstone wall.
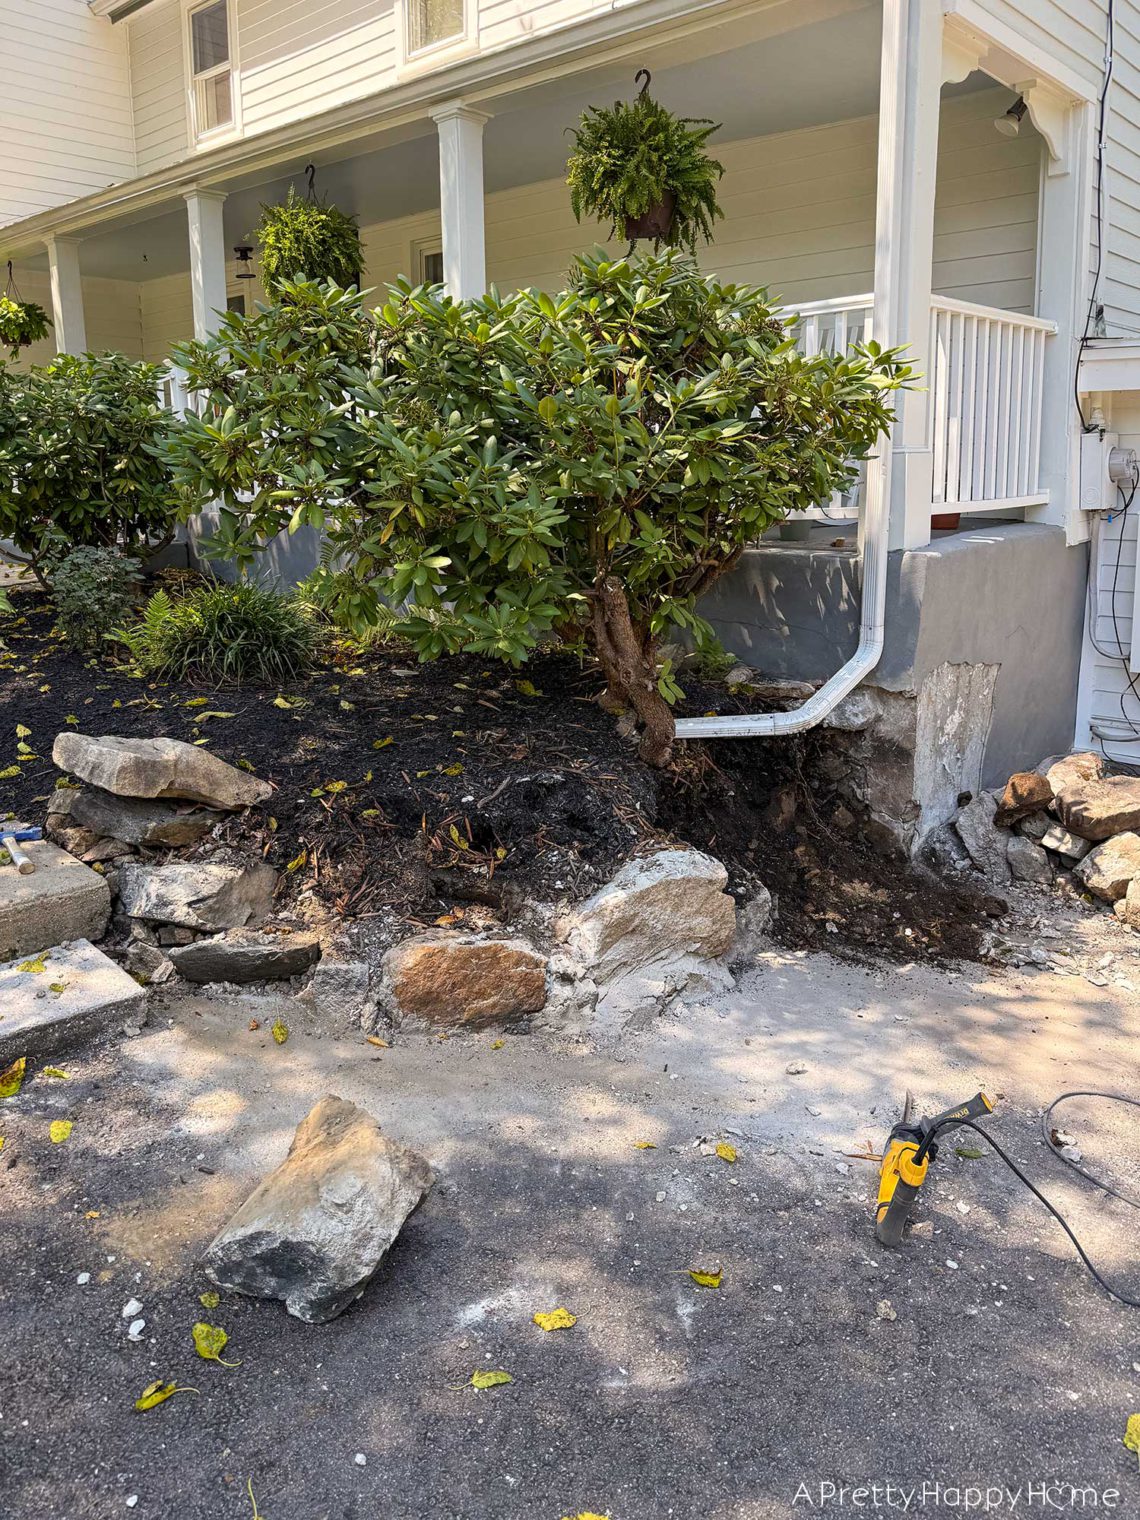
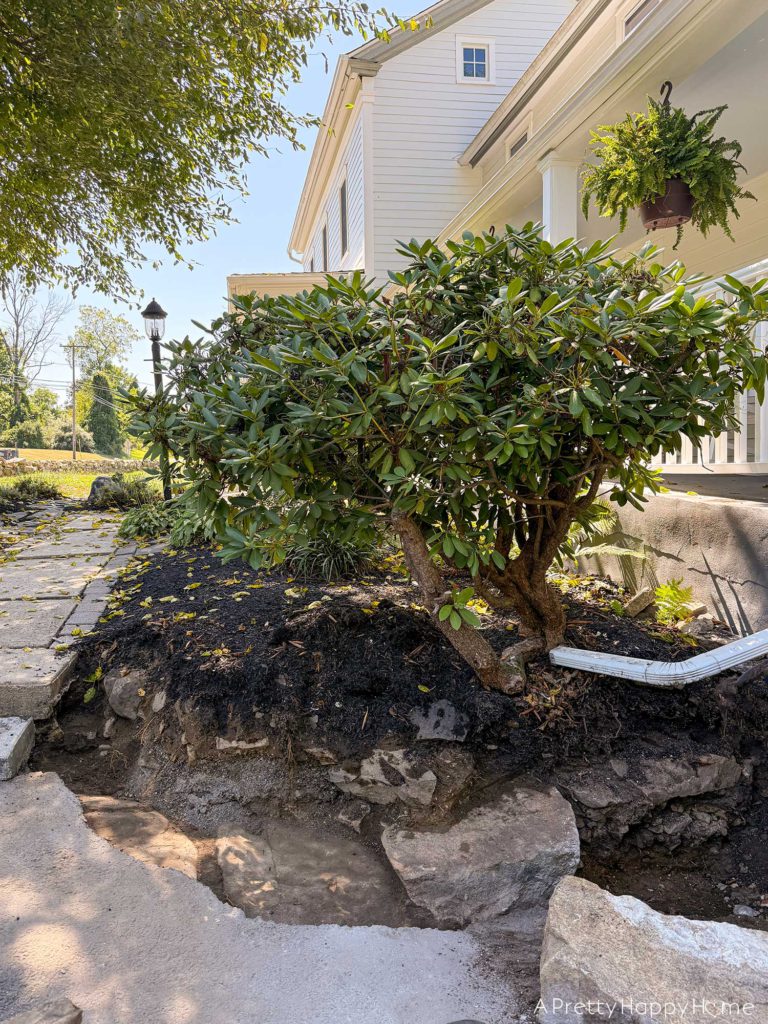
Today’s post is all about demoing the first section we are rebuilding. This section of wall connects to the front porch and serves as a retaining wall for a flowerbed.
Demo is supposed to be the easy part of any project, right? Hahahahahaha.
Easy might not apply to concrete.
Or maybe easy just doesn’t apply to anything we do.
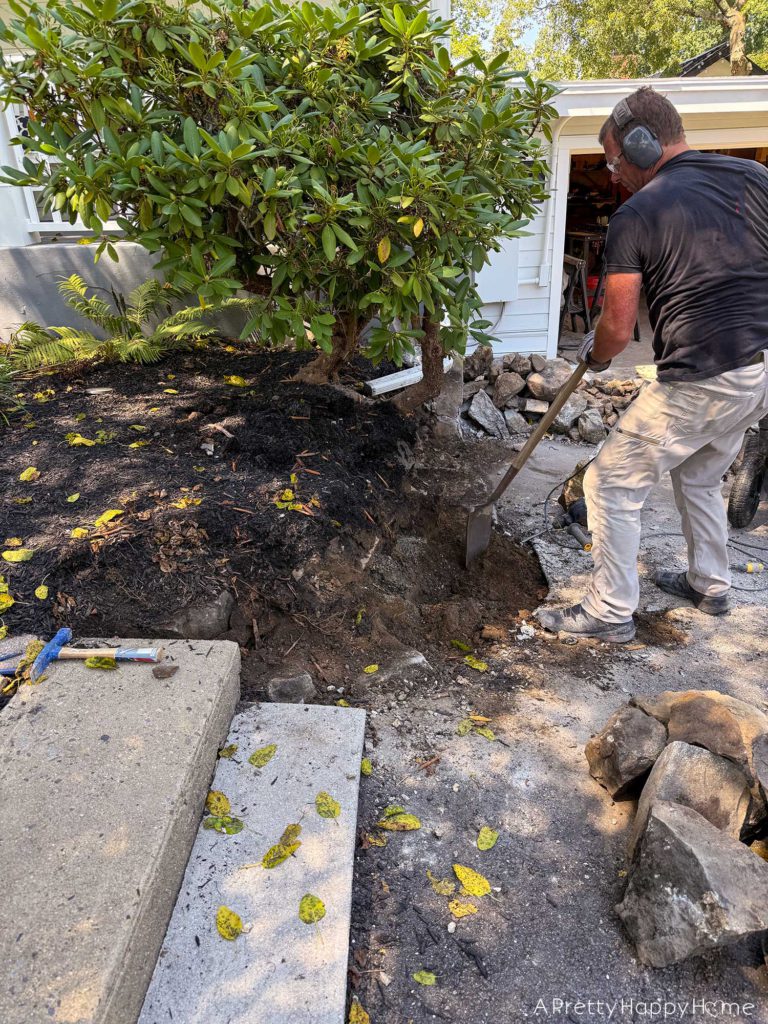
Once again, the hammer drill with a chisel attachment was our MVP for taking down a stone wall, but we did use a hammer and hand chisel a little too.
Then we had to dig out the area under the stone.
This section of the wall for sure had some concrete holding it together, but that seemed to have been an afterthought or later repair.
It appears that the wall was dry stacked originally.
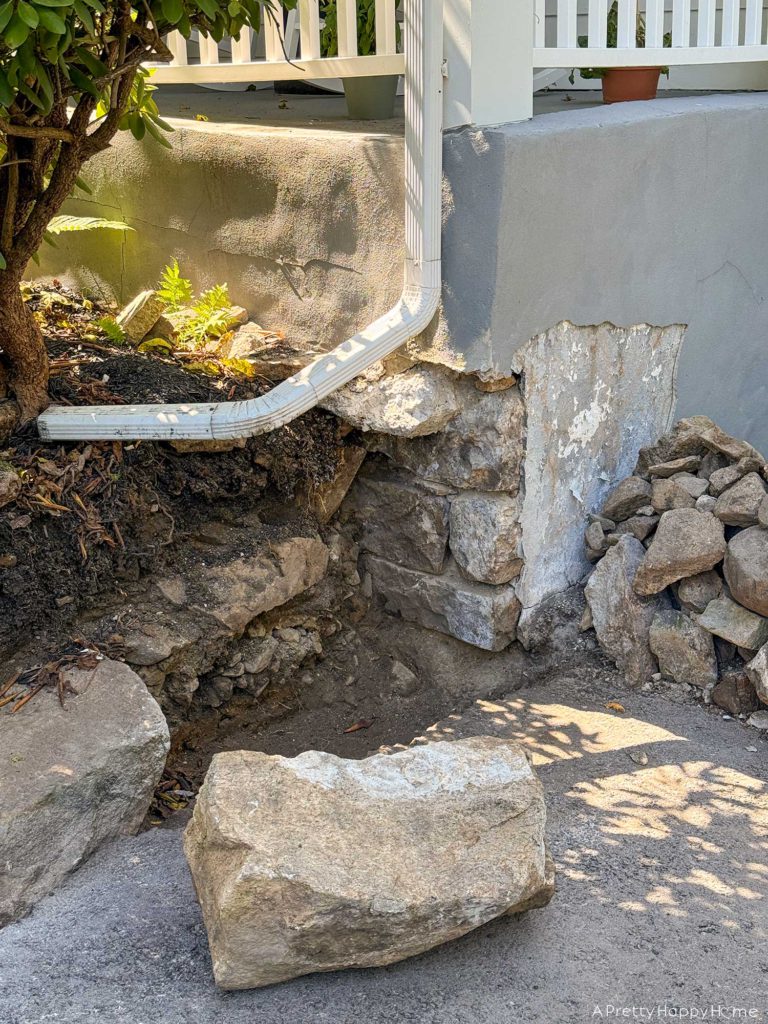
After we had the wall removed down to the edge of the asphalt driveway, our next task was to dig down under the wall area until we reached something solid.
We had no idea when we started demo that 3 inches below the asphalt driveway would be bedrock.
I’m sure it’s not actual bedrock, but we’re talking MASSIVE flat stones.
If my whole driveway is made of these stones…actually, nope. I’m not going to wonder. Just the thought of someone paving over these beauties makes me want to scream into the abyss. So, we’re not thinking about that.
Quick! Someone distract me! Or, I could just continue the story…

The good news about finding these stones is that we don’t have to worry about having a stable base to build our wall on. Either nature or a really strong person(s) 200 years ago already did that for us.
There was also another MASSIVE rock sitting on top of this bedrock situation that was not going to budge without mechanical help. This rock was already a part of the wall. It will now stay a part of the new wall, and in that exact location.
We’re one stone ahead of the game, and we haven’t even started. Go us!
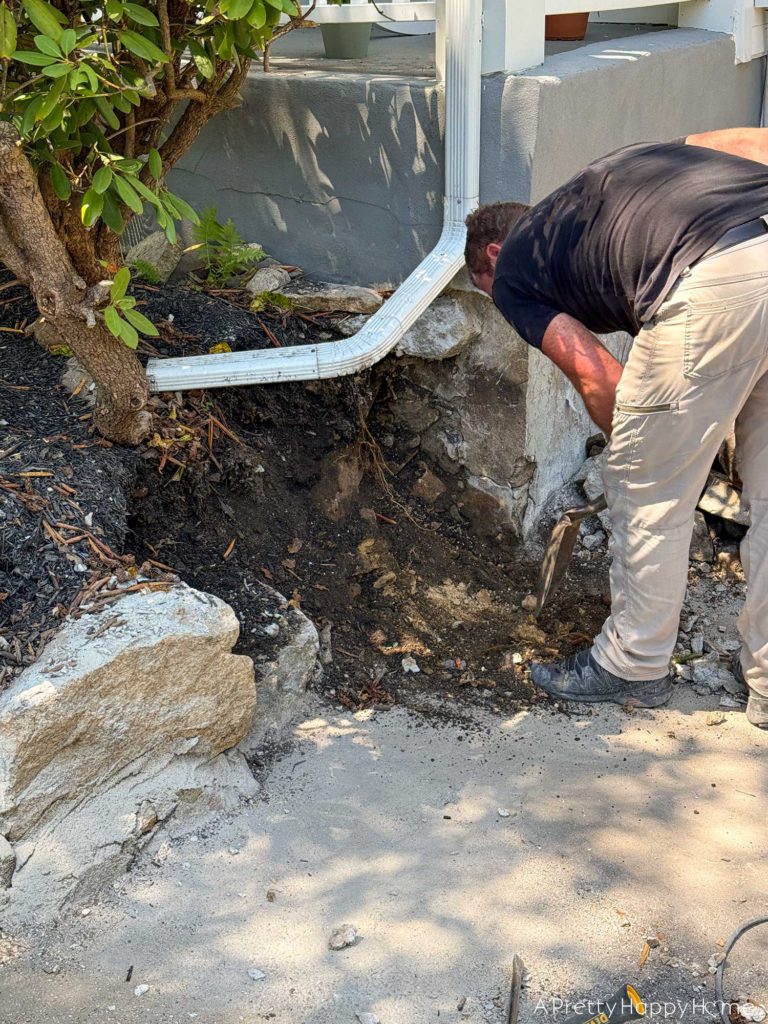
The only small escalation thus far in the project is on the front porch itself.
Our front porch is built on a stone foundation. However, someone skimmed over that foundation, and the entire porch, to make it look like solid concrete. It’s not.
Not only did they skim over it once. They skimmed over it twice, which does not make it twice as nice. It makes it twice as worse.
The vibration from the hammer drill cracked the outer skim coat. Then a big section fell off.
It looks extra terrible because the first skim coat had been painted. Now it’s a peeling exposed mess. I think what we will do is remove the rest of the skim coat and repoint the foundation wall properly.
Don’t tell Handy Husband, but the prospect of doing that makes me GIDDY with delight because I know it will look SO GOOD.
It took us three hours to remove this 10-foot section of curved fieldstone wall.
It will probably take thirty hours to rebuild it.
Gosh. I hope it doesn’t take that long. I guess the only way to find out is to keep following along! Stay tuned for my next update.
If you have any questions about the process thus far, let me know! You can ask away by leaving a comment on this blog post, emailing me here, or reaching out via direct message on Instagram or Facebook. You can also follow along on stories to see all the nitty gritty details as the happen!
Happy DIYing.
P.S. We were trying to be very careful to not disturb that rhododendron. Hopefully, it will come through this process unscathed.
Thanks for following along with our DIY adventures. If you’d like another blog post to read, I’ve got you covered.


You May Also Like

How To Make Wood Heart Planters

Sneak Peek: Ana White Bed Design
