Curved Fieldstone Wall: Part 5, Porch Wall
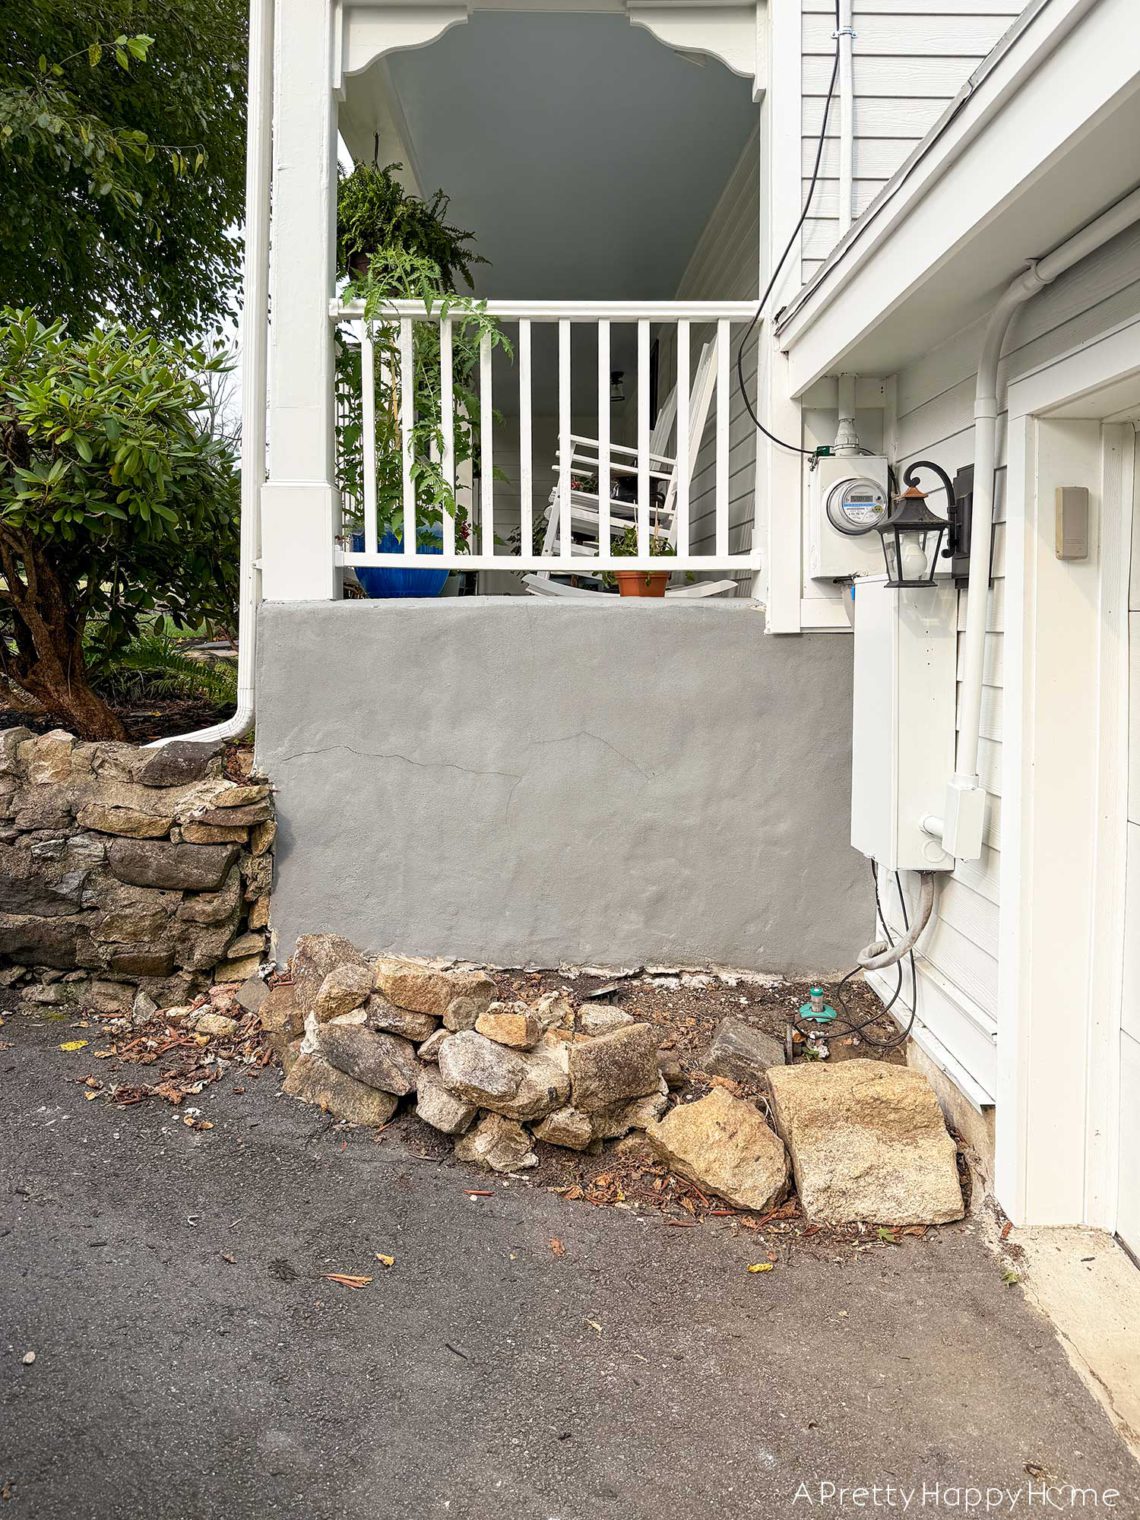
We’ve been working on rebuilding a curved fieldstone wall in front of our house. Part of that wall connects to our front porch, and a little oopsie occurred to the porch wall while doing demo.
We didn’t intend to touch the porch while doing this curved fieldstone wall project. We know when our plates are full.
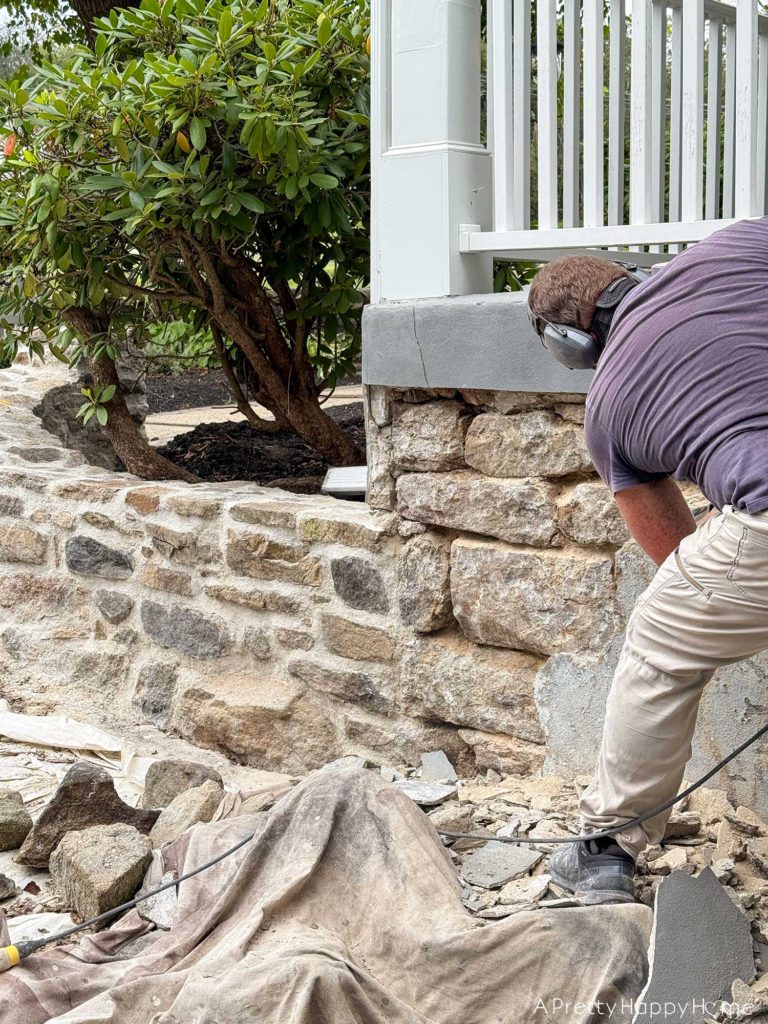
Unfortunately for us, the unintended consequence of jackhammering three inches away from the porch was that the vibrations traveled, and we cracked a section of the skim coat covering the porch foundation.
That was fine. We could probably fix it.
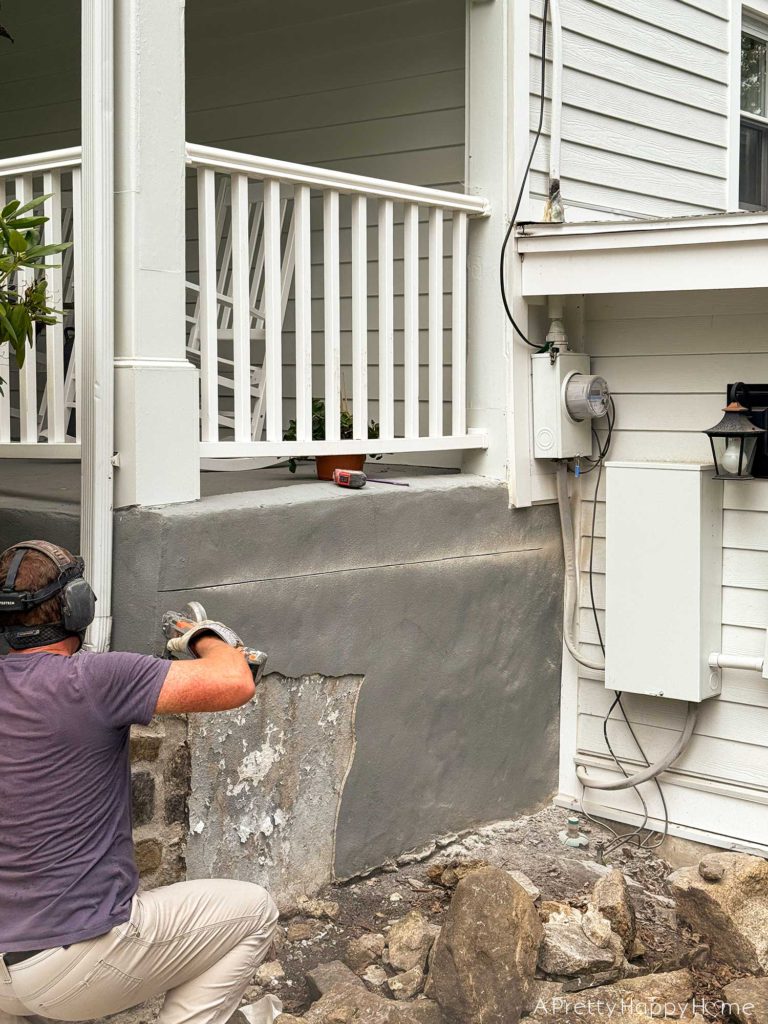
Then, much to our horror, the cracked portion of skim coat FELL OFF the wall and revealed another layer of skim coat.
This porch appeared to be the nesting doll of skim coats.

Handy Husband had some choice words over this situation. One of them was one of the worst four-letter words imaginable.
Lazy.
(Pardon my French.)
Then there were other words such as why, absolutely unacceptable, and not the correct way to do things.
I know he’s really steamed when he says, “Absolutely unacceptable.”
The porch had been painted. That’s why the first skim coat was peeling. There’s always a reason why people do things, but we aren’t certain yet why a second skim coat was warranted. It might have something to do with covering the wood floorboards with concrete.
*sigh*
We know, without a doubt, that this entire porch is the biggest can of worms imaginable. We do not want to fully open that can right now. There are only so many “absolutely unacceptables” we can manage at a time from a budget, workload, or mental sanity perspective.
On the other hand, have you met us? We couldn’t leave the side of the porch looking this terrible.
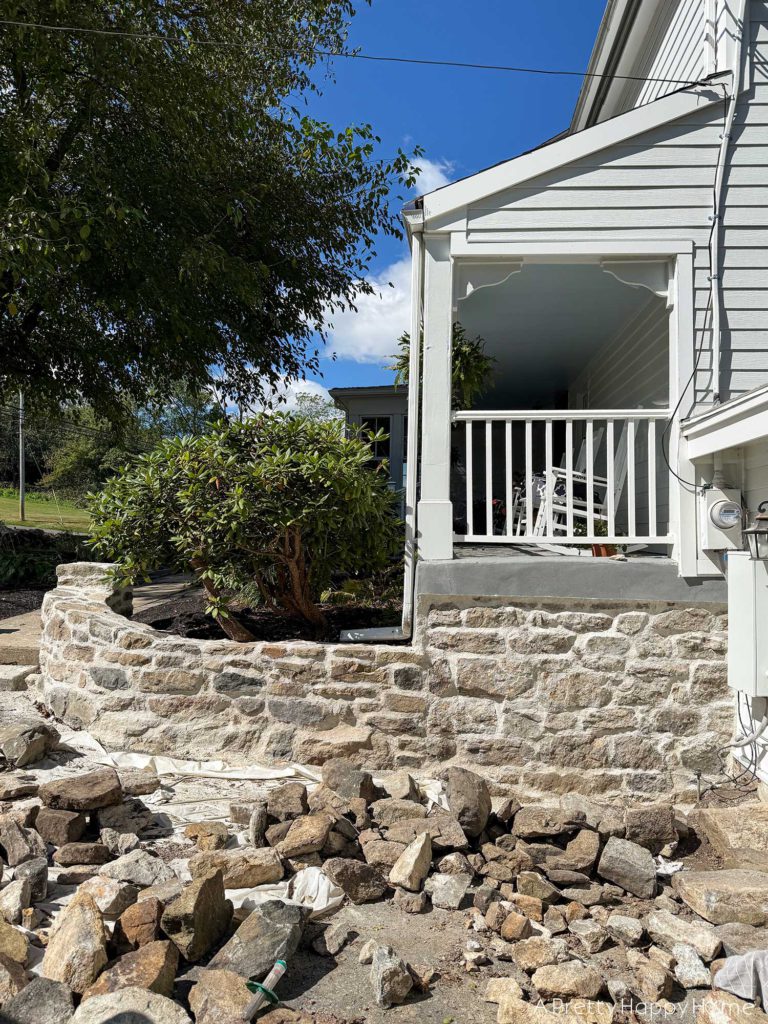
We decided to ever-so-slightly crack the can of worms open by removing the concrete or mortar covering this section of the porch. This would expose the stone foundation. We knew there was stone under there because we could see it from inside the garage.
However, we couldn’t remove the skim coat all the way to the top of the porch because we don’t know what it is covering at the very top. It’s likely nothing we want to see right now.
See no rot, have no rot to repair. That’s our motto.
How do you precisely remove only a section of a mortared skim coat from a wall? By carefully cutting a straight line through it with a saw.
This allowed us to remove the skim coat below that line without compromising the integrity of the skim coat above that line.
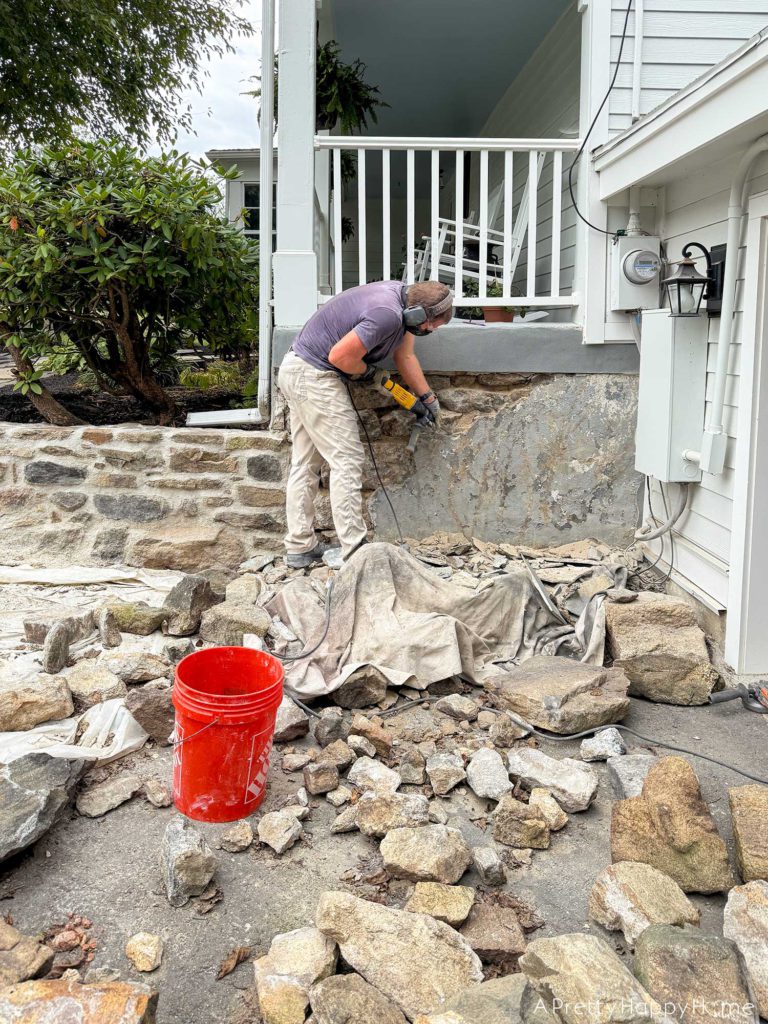
It didn’t take too long for the wall to start spilling its secrets.
We could tell that the first section of skim coat extends behind the garage wall, so it is likely very old and was there before the garage was added.
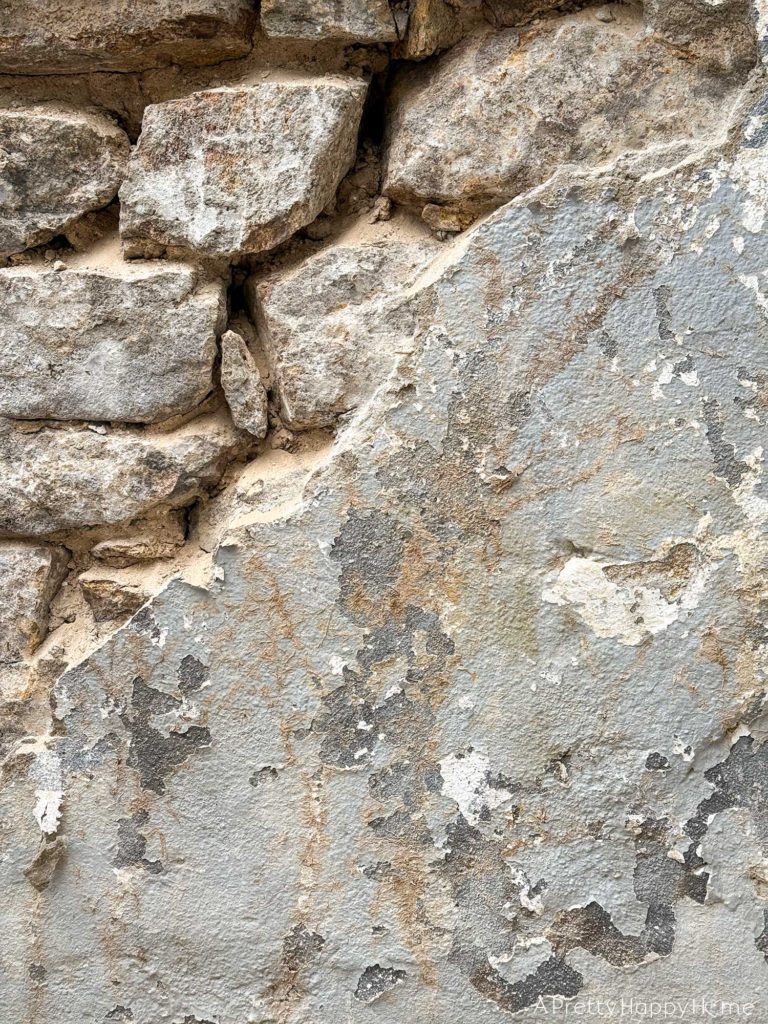
It also had vines growing on it.
Vines are horribly destructive and leave marks on the concrete.
You can see the brown lines from the vines in the photo below. It isn’t staining. It’s part of the vine. I can’t think of a better word for it, so I’ll say those brown lines are little, dried fibers from where the vine attaches itself to the surface.
It took a couple of hours to chip everything off the wall, but it was already looking better.
When I built the new section of fieldstone wall, I knew I was connecting it to this porch foundation, so my goal was to make the transition seamless. I think I did a pretty good job of that.
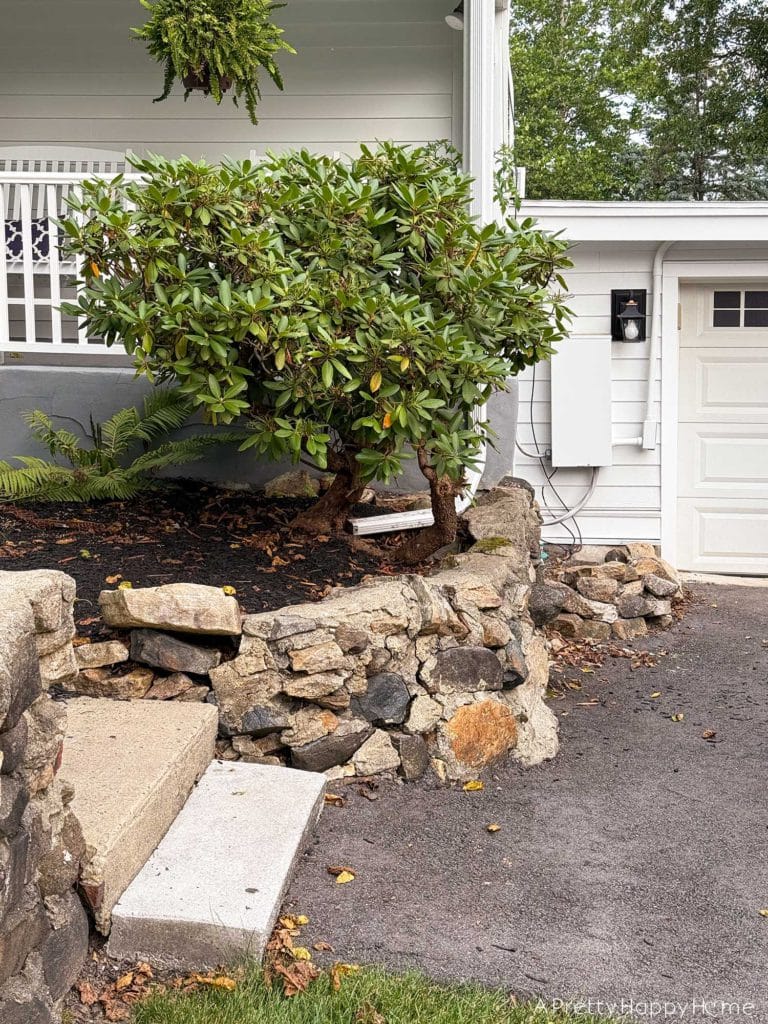
There was a small flowerbed below this section of the porch. We had planned to remove it anyway as part of the fieldstone wall project, so now was as good a time as any to tackle that.
You can see how the flowerbed was originally set up in the photo below.
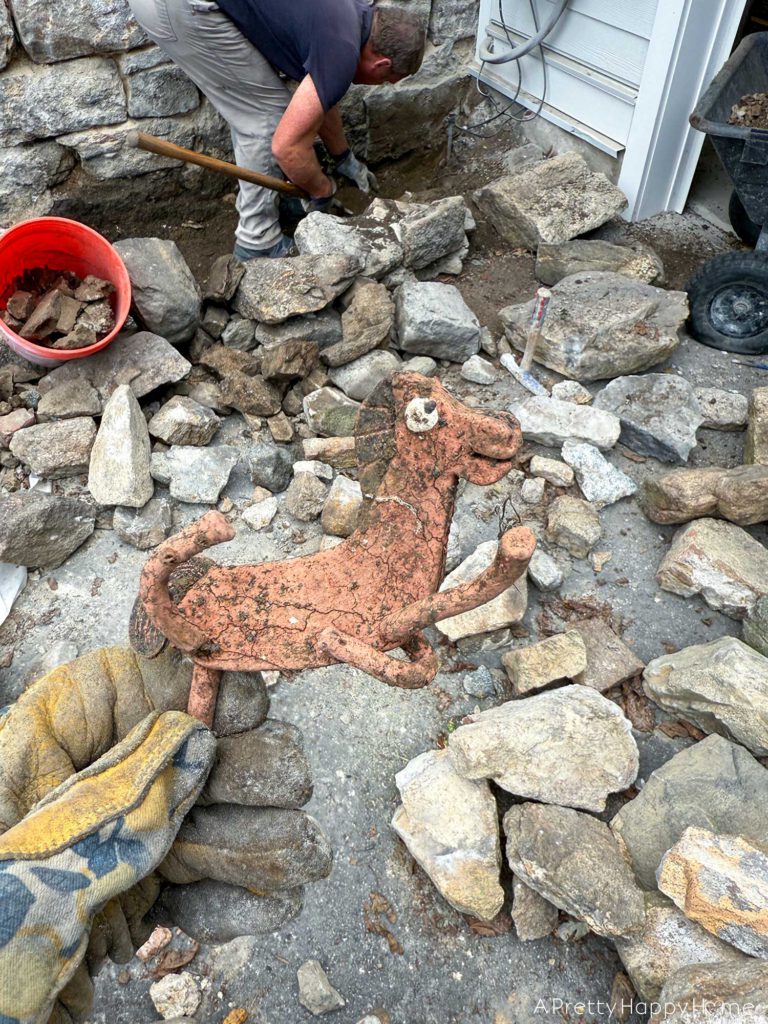
I’m on a thrilling quest to find buried treasure on this property, so it is always exciting when we get to dig in the soil.
Sadly, we didn’t find any gold coins, but we dug up something almost as valuable – flower bulbs. I hope they are daffodils. I planted them, so I guess I’ll find out in the spring.
We also dug up Pokey, who was Gumby’s sidekick and best friend. Does anyone remember that show?
Pokey’s favorite food was tacos, and he first appeared on the show in a 1956 episode. I know this because there’s a Gumby and Pokey fandom website. It just goes to show there is something for everyone in this world.
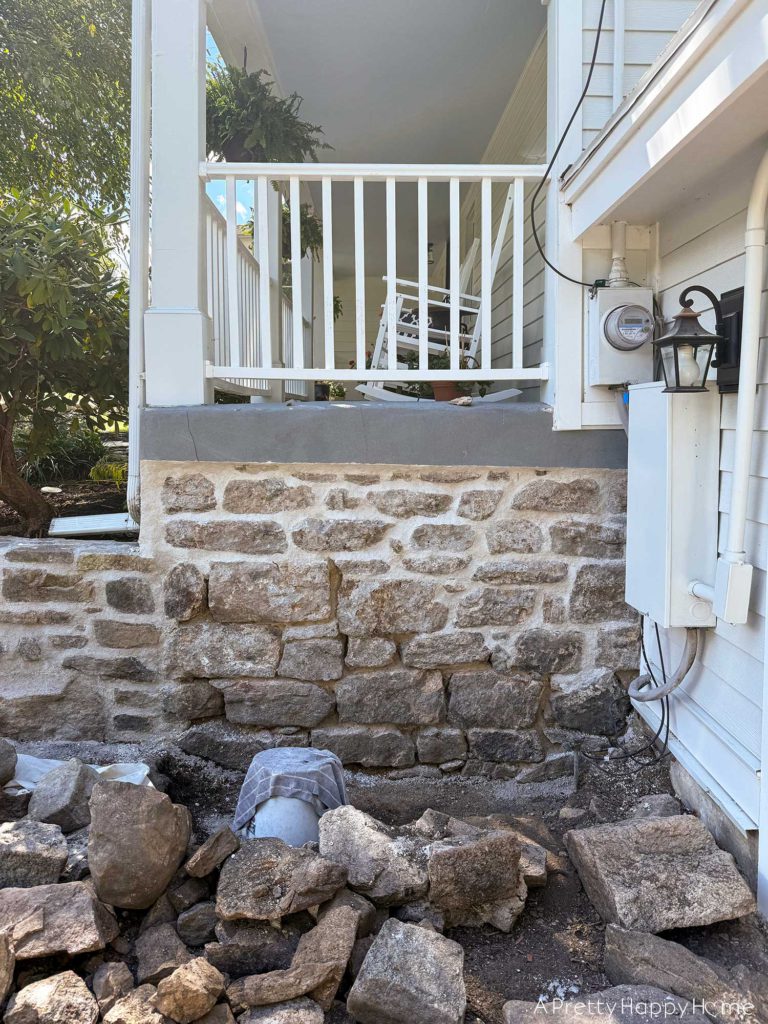
Once the flowerbed area was cleared out, I started repointing the stones on the porch wall.
Lime mortar repointing is such a refreshing change of pace over building an entire fieldstone wall. Dare I call it enjoyable?
The results were definitely enjoyable.
Drumroll, please.
Here’s how the porch wall looks now!
To say this rocks my world, well, that would be a huge understatement.
Do you know how badly I want to expose the rest of the porch foundation now?
It’s only a matter of time, folks.
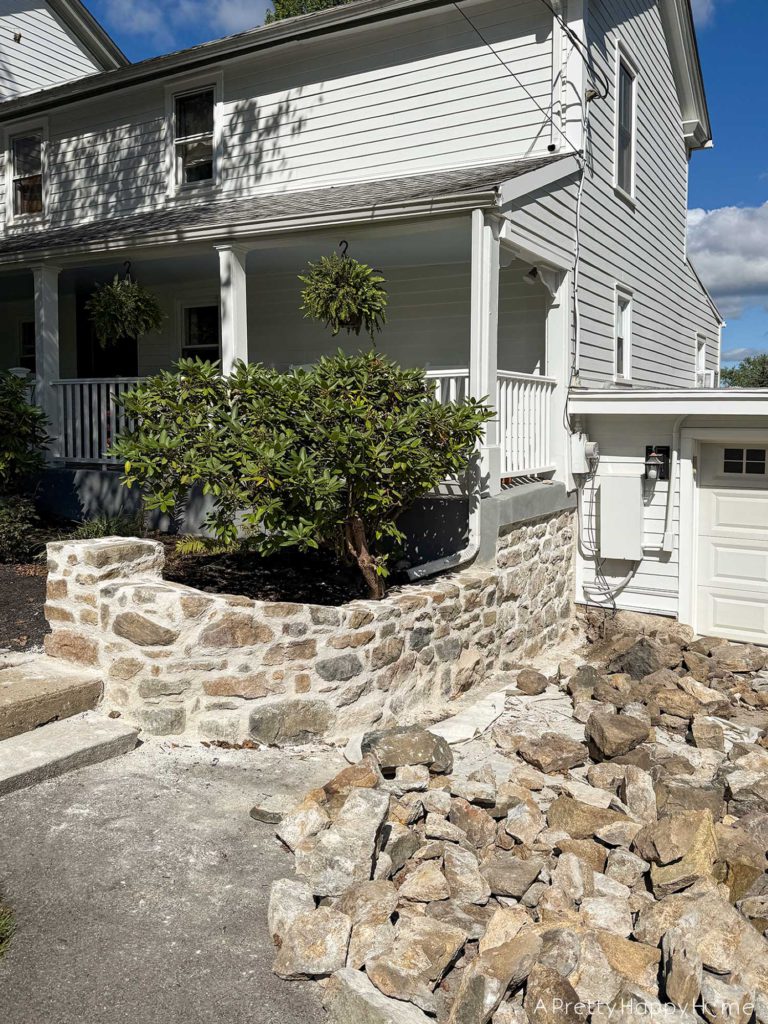
Until that happens, I can live with this.
Even the less-than-ideal transition between the stone and skim coat doesn’t bother me at the moment because I know we are working toward something amazing.
It will be worth the wait.
What do you think of how the porch wall turned out? Do you like how it connects to the wall I built? Do you have a can of worms you don’t want to open, too? You can comment on this blog post, email me here, or reach out via direct message on Instagram or Facebook.
Happy DIYing.
Thank you for following along with our DIY adventures. I appreciate you! If you missed any of the posts in this series, you can catch up here:
Curved Fieldstone Wall: Part 1, The Plan
Curved Fieldstone Wall: Part 2, Demo Section 1
Curved Fieldstone Wall: Part 3: Progress Section 1
Curved Fieldstone Wall: Part 4: Reveal Section 1


4 Comments
Nancy B
Oh just…WOW! It keeps getting better! I’m not sure about the less than ideal description, although what you’re dreaming up has to be wonderful, as usual. Lots of claps to you and HH!
annisa
We will take all of the claps, thank you! What i meant about ‘less than ideal’ is that up close the cap extends quite a bit over the stone. There’s not a super elegant way to make it look intentional or finished, at least, not one I’ve come up with yet.
Teri
You and your husband are extraordinarily talented. Thanks for shring this project with us, it is beautiful!
annisa
You’re welcome! Thank you for following along on this journey as we learn and try new things.