Converting a Door Into a Window In a Stone Building, Part 2
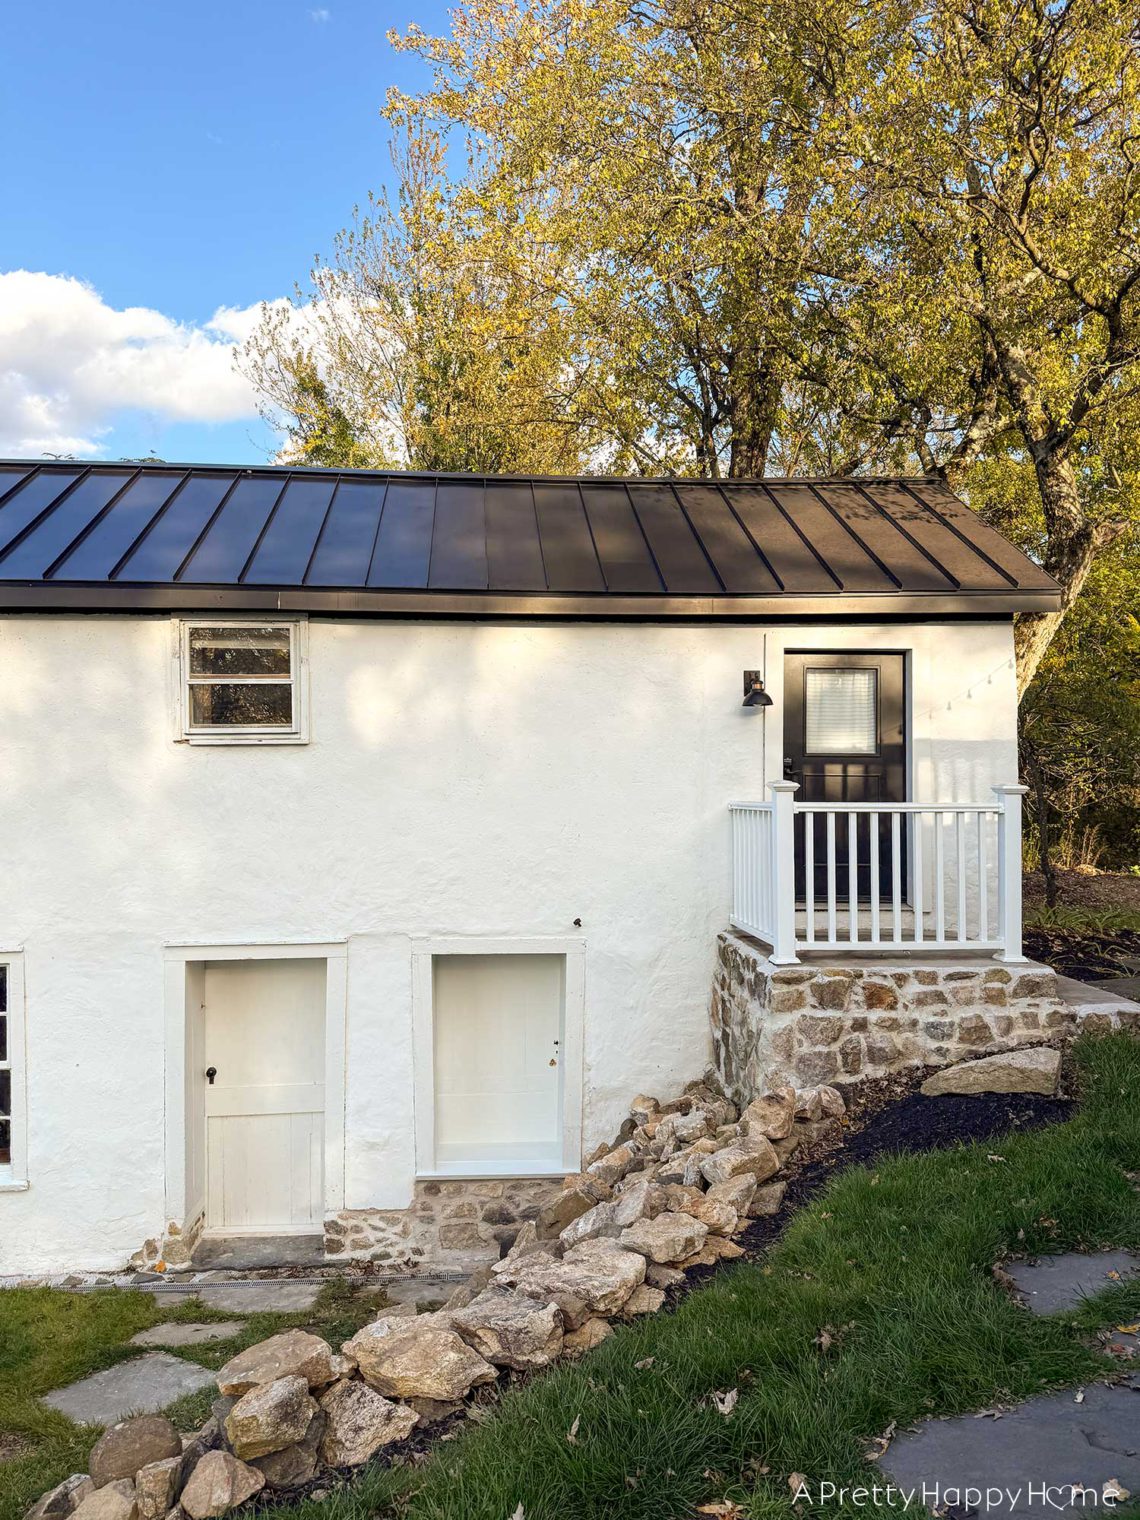
Today, I’m continuing the story of how we’re converting a door into a window in a stone building, our Carriage House. You can catch up on part one, which includes why we are doing this, here.
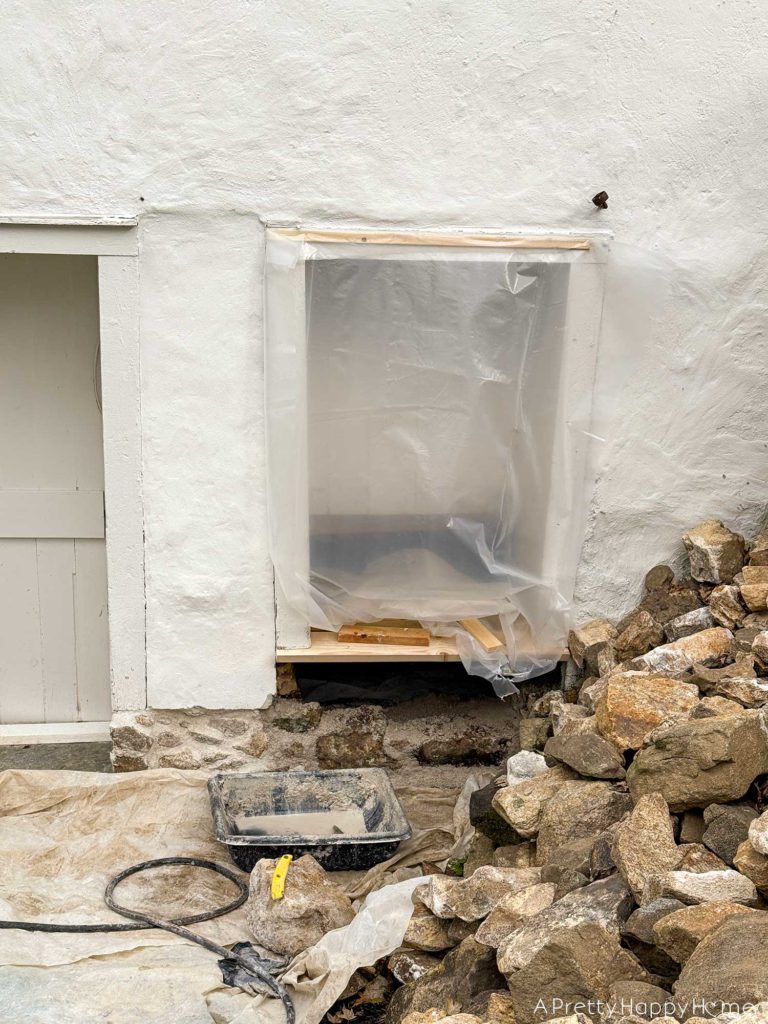
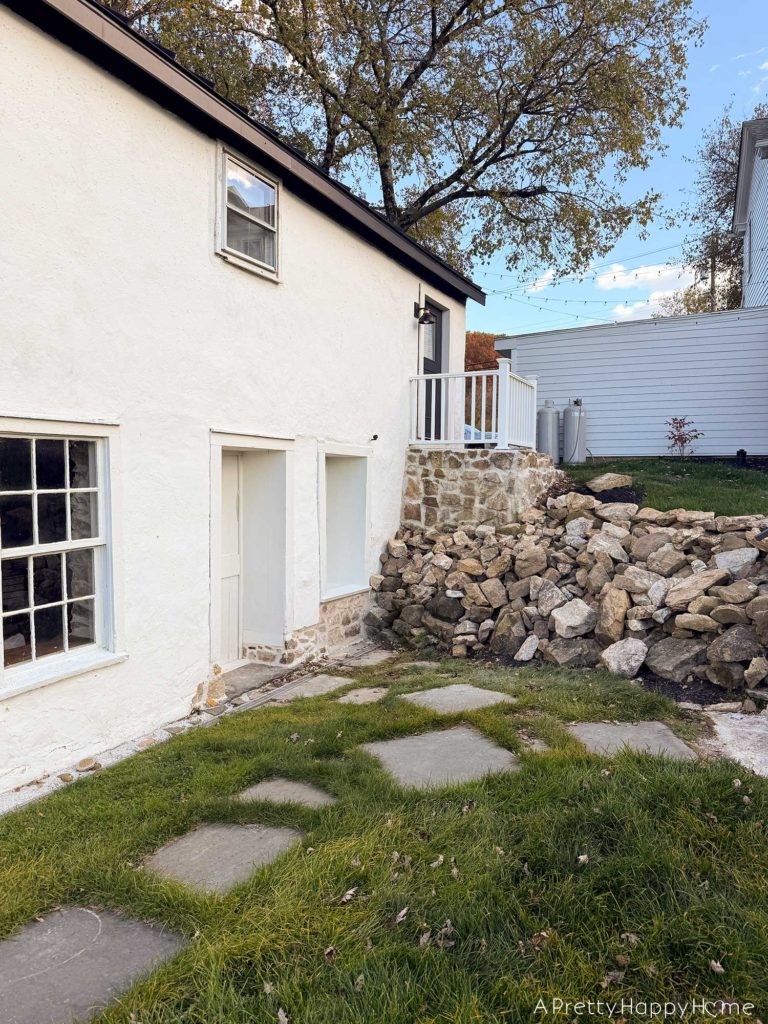
When we last left off, we had removed the lower half of the Dutch door in this space, removed the bottom part of the door jamb, and added a window sill.
It might seem like a backwards way of doing things, adding a window sill before we have window framing or even the window, and it is for sure. However, this order of operations was selected for a reason.
We need to fill in that void under the windowsill with fieldstone, as this is a stone building. Having the windowsill in place means I know exactly where to build the stone level up to, and I can make sure the underside of the windowsill is sealed up tight with lime mortar. It takes the guesswork out.
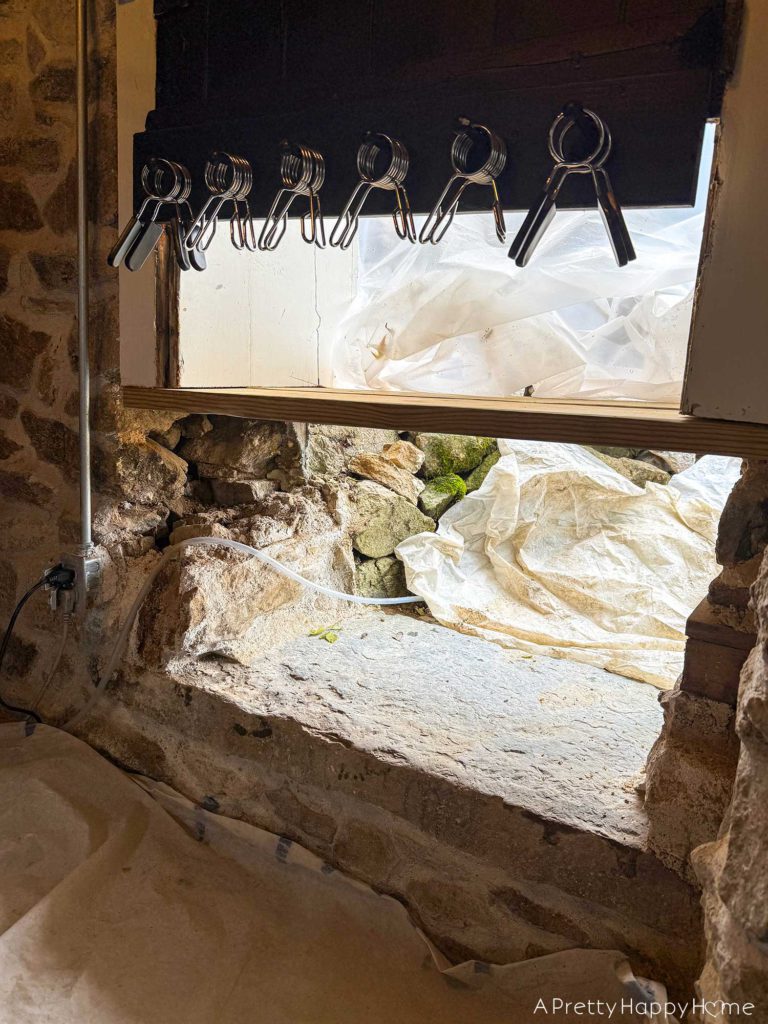
We’ve been covering the outside of this opening with plastic at night, so you’re seeing a bunched-up bit of plastic sheeting above the new windowsill. There’s also plastic sheeting on the ground to contain the masonry mess that’s about to go down.
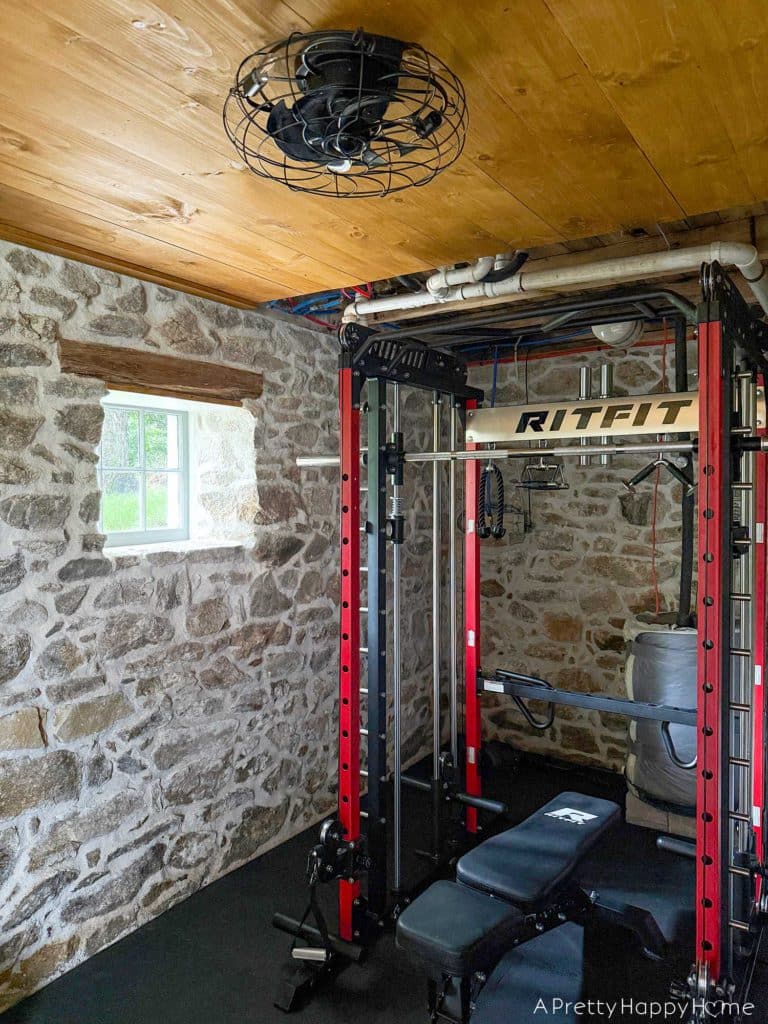
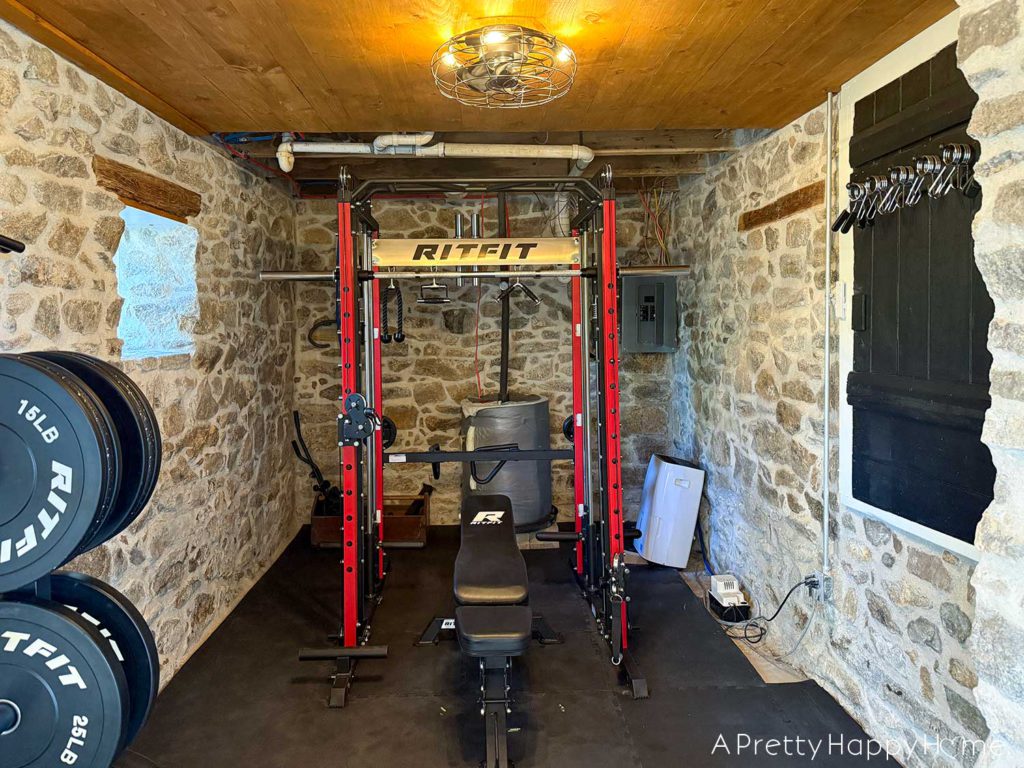
If you’re wondering what those things are hanging on the back of the door, they are clips to hold weights onto a weight bar. This area functions as a home gym when it’s not our DIY playground.
The hose running out of the door is for a dehumidifier, and that will be moved.
As much logical sense as it made to convert this door to a window by starting with the windowsill first, it was not practical from a work perspective.
Sure. Let me access a tight space with my whole middle-aged body, a 50-pound tub of mortar, and rocks. Do you want me to do the limbo, too?
Can you say awkward?
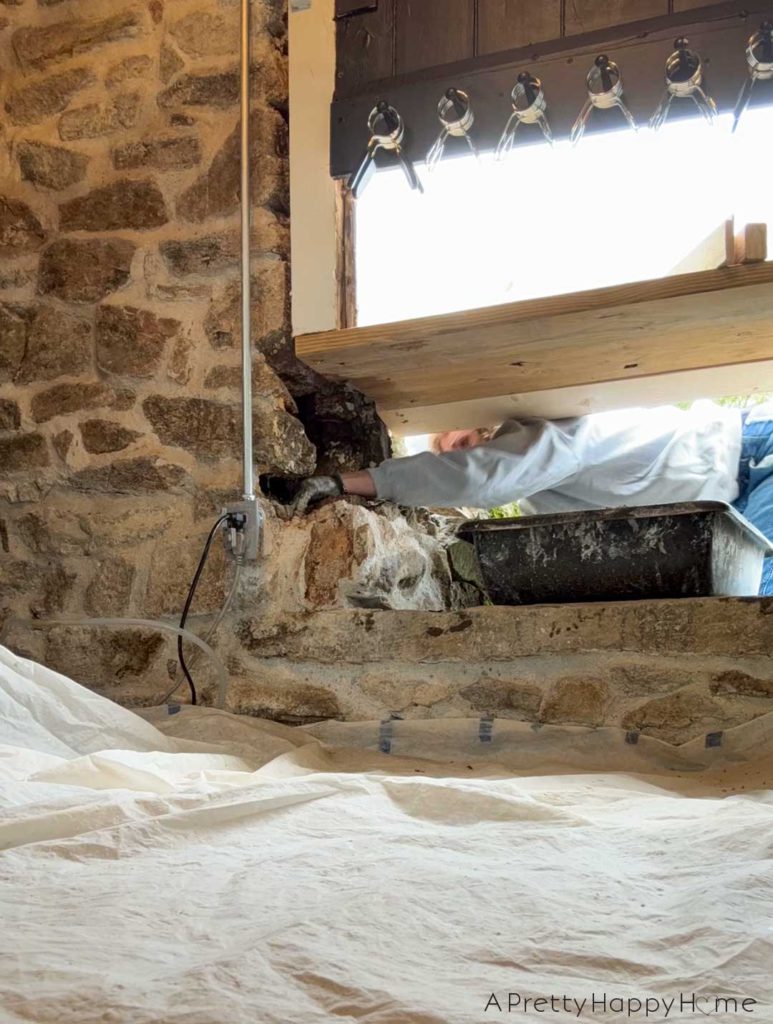
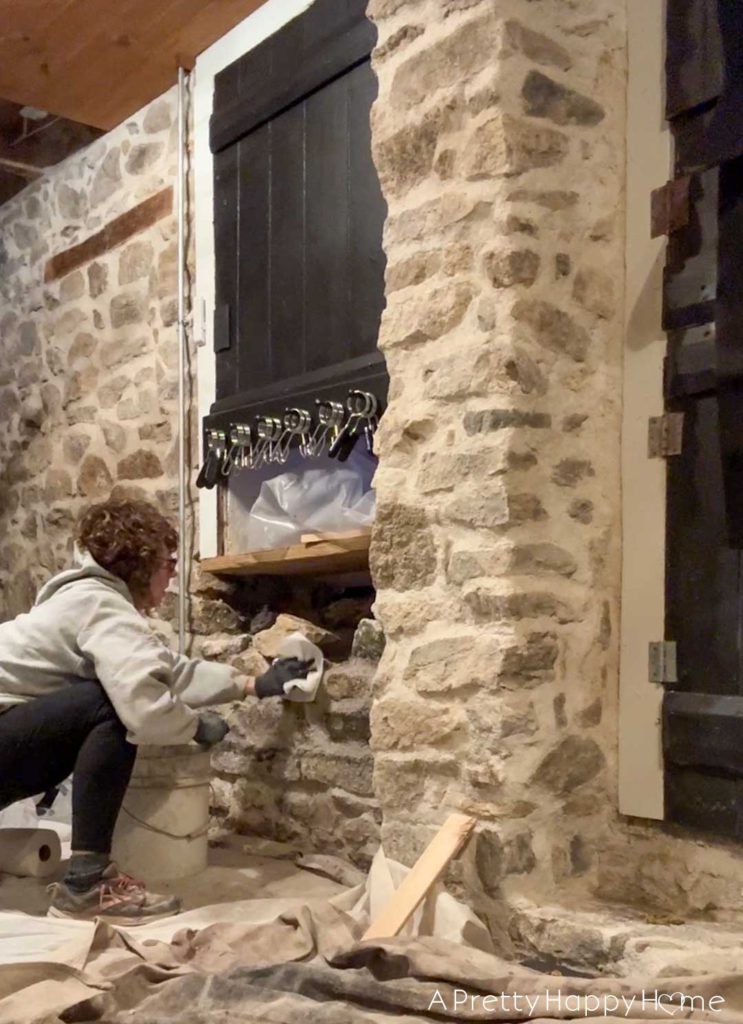
But eventually, I had the area behind the original door jamb resecured with new fieldstone and lime mortar and ready to tie into the rest of the wall I’m about to build.
When I say “new” fieldstone, I just mean fieldstone from our property.
Not only do we have multiple low stone walls on our property, but we also have piles of stone. We can’t seem to run out of it because every year, the ground heaves up more during the freeze and thaw cycle. It’s not the worst problem in the world to have, but I wish Mother Nature would heave up a bag of gold coins instead.
With the area behind the old door jamb secured, I could move on to filling in the area where the bottom of the door used to be. In the photo below, you can see that the first row of fieldstone has been set.
In this scenario, I did have to take turns building this wall from inside and outside of the building. Luckily, I didn’t have to go far. Just through the door and around the corner while carrying rocks, my tub of mortar, and the garden hose.
As much as I tried to contain the mess, dust got EVERYWHERE inside the building.
This is partly because you have to brush off the wall as it dries to remove excess sand. In addition, I had to leave the door open while I was working because I was going in and out a hundred times a day. Trying to open a door with lime mortar on your gloves is like trying to open a door with grease all over your hands. Not only does it not work, but it makes a gigantic mess.
All that to say, the open door meant wind could blow dust around and leaves inside the building.
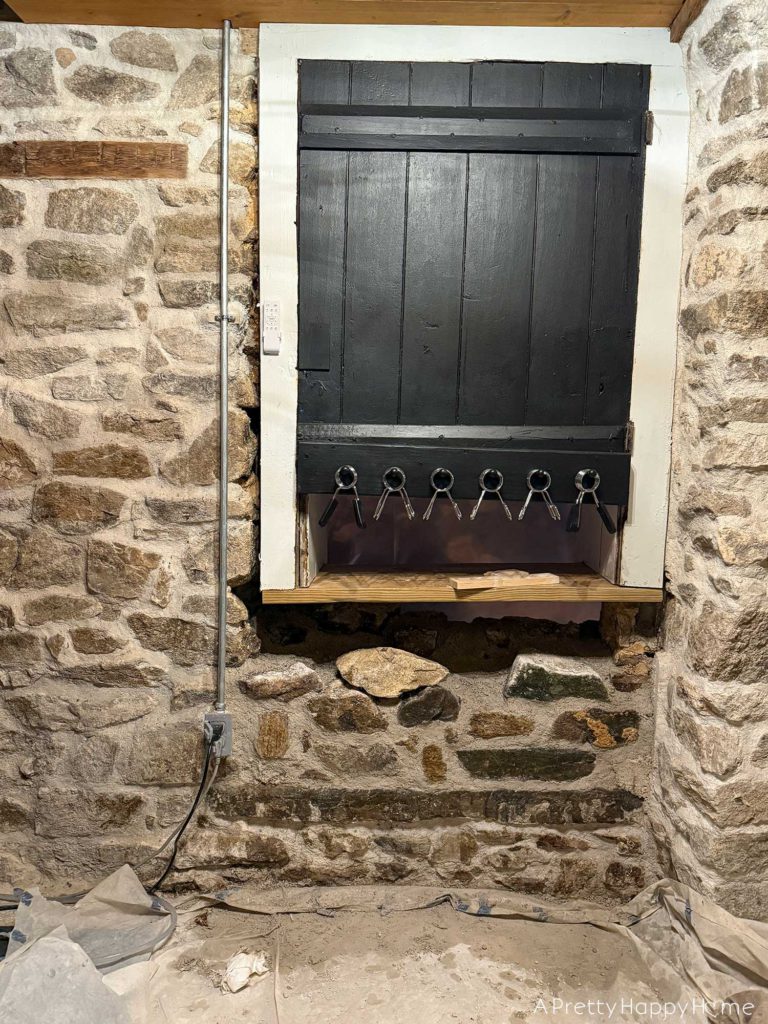
But let me tell you, the little bit of sunlight streaming through the open part of this half window/half door situation was just enough for me to KNOW without a shadow of a doubt that this was the right choice.
The future window we install in this area is going to let so much natural light into the space.
I can’t wait!
That declaration would be more impactful if I then showed you a picture of daylight streaming in, and not a photo of the progress taken after dark. I’m learning that it is easier to build a stone wall than to anticipate what pictures you’ll need to tell the story of building a stone wall.
Now, if you read part one of this story, you’ll know I said we don’t have a window to install yet because Handy Husband wants to try his hand at making one.
So, why are we doing this project now?
Well, it’s mainly because the door itself was not secured well. That meant water could get into the building when there was heavy rain. Filling in the area with stone had to be done no matter what, so we might as well do it now. This way, we won’t have to deal with water intrusion all winter.
It does mean we’re going to be sporting the “weird half door” or “boarded up window” look for the rest of the winter.
But I nicely caulked and painted it, so that helps, right?
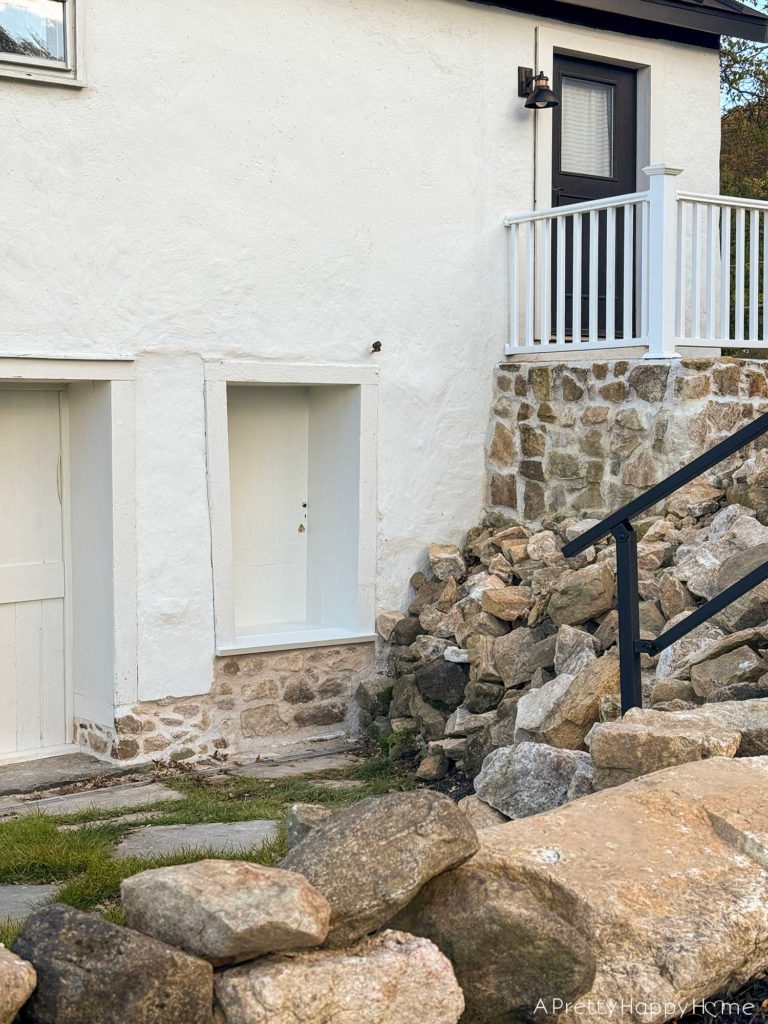
Normally, I get a little down when it rains, but this is the ONE TIME where I’m hoping for the off chance of offensive weather so I can see how dry the building stays now.
There’s always a chance that while we fixed the known problem, an unknown problem remains.
This is an old building. Taking care of it is like playing a never-ending game of problem whack-a-mole. Nothing surprises me.

I do think the stone work will blend in nicely once it has fully cured, and it won’t be obvious that this was a patch job, especially from the inside.
I know some of you are wondering if we are going to make the exposed stone line even along the front of this building. Handy Husband wants to. I’m neutral on that topic, not because I don’t think it would look amazing. It would.
The question is whether or not we’re opening up a can of worms by doing that, and there are other things I’d rather address first, such as the hill of rocks.
We also need to finish the gym ceiling and wall off the mechanical items. The rest of the windows need some attention. It would be nice to plug the chimney so that it’s not drafty. After all that and a lot of saving, maybe we’ll be able to install heating and air-conditioning in here.
Oh, and lest we forget, we still need to finish the actual project we just started. Hahahaha!
So many projects, so little time.
At least have a jump start on converting this door into a window, that feels nice. However, we’ll have to table completing it until spring when warmer weather returns.
Maybe the delayed gratification will make me even more appreciative when we do get some extra natural light in this space?
How are you with delayed gratification? Have you got a jump start on any projects recently? Let me know! I love chatting with you. You can comment on this blog post, email me here, or reach out via direct message on Instagram or Facebook.
Happy DIYing!
We are using NHL5 lime from Limeworks.us. That’s not sponsored. That’s just where we buy our lime. They offer classes on historic masonry, too. We usually do a ratio of 1 part lime to 3 parts all-purpose sand (not play sand). In the U.K., it is called sharp sand. Sometimes, for repointing only, I do a 1:2 ratio for easier smoothing. I can’t tell you exactly how much water I use. Just enough to make the mortar hold together when you make a fist. If it’s too runny, it won’t stay in place.
Thanks for following along on our DIY journey. We’re learning as we go, and sharing the process with you. If you’d like another post to read, I’ve got you covered!
Stone Carriage House Gym: Part 6, How to Remove a Stone Wall


2 Comments
Nancy B
It’s going to be so nice when you’re done! More natural light is always good, I agree. While I can picture that line if stone continuing on, and more stone is also good in my book, I kind of like that step down effect you have going on, too!
annisa
Cross your fingers we finish this one come spring!