DIY Kitchen Cabinet Feet from Scrap Wood
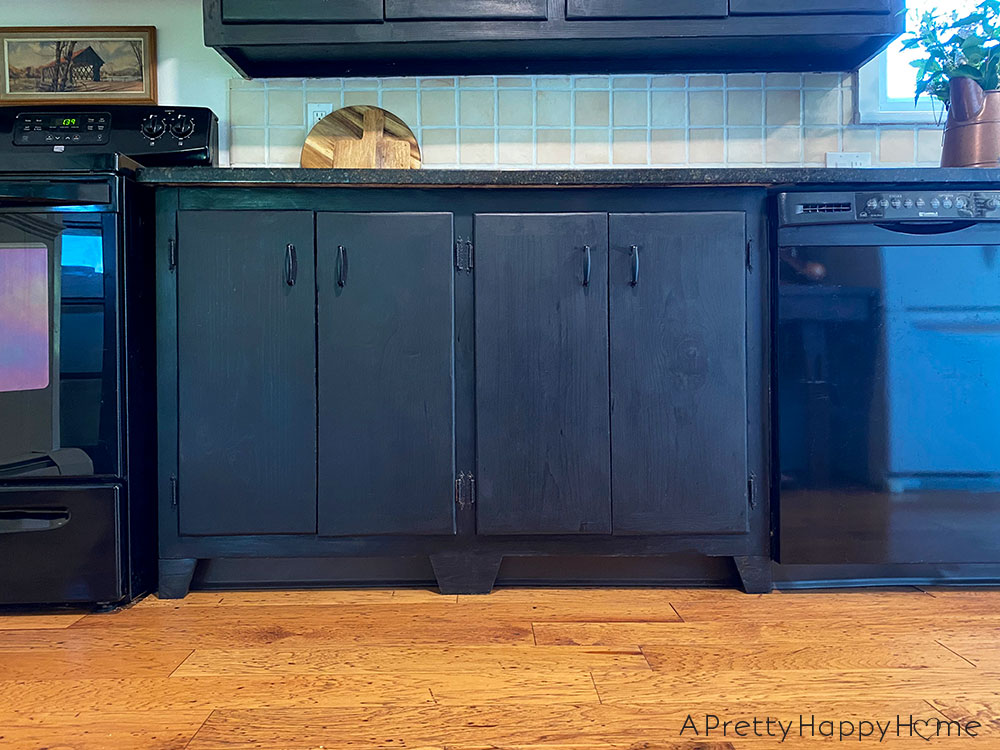
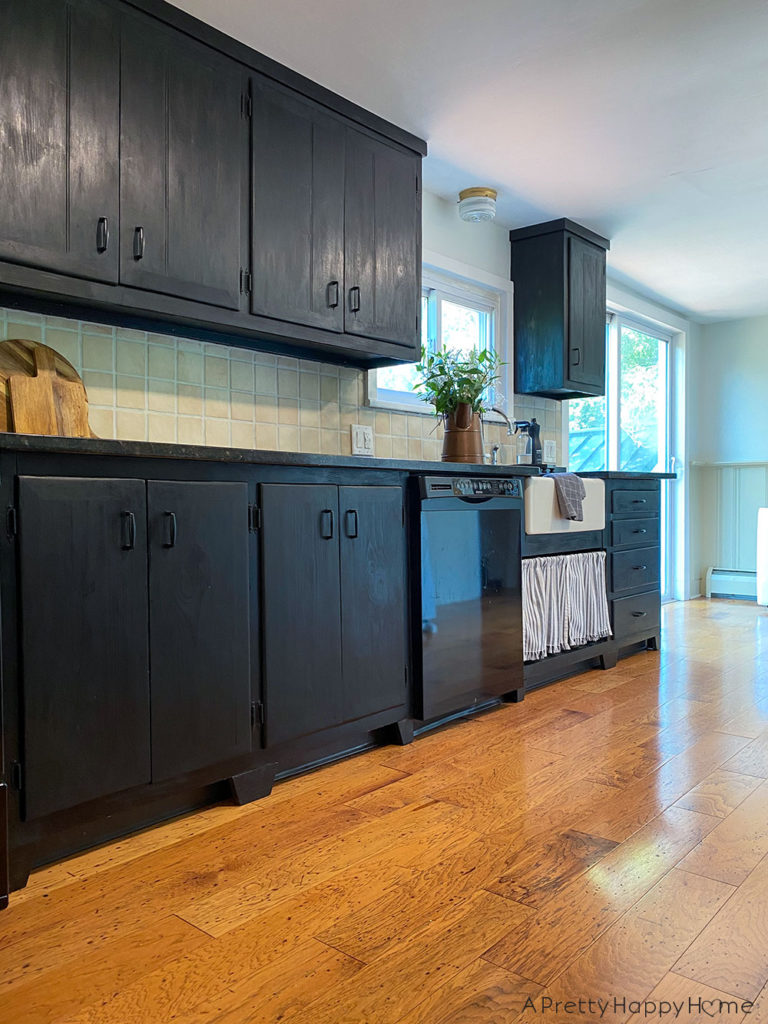
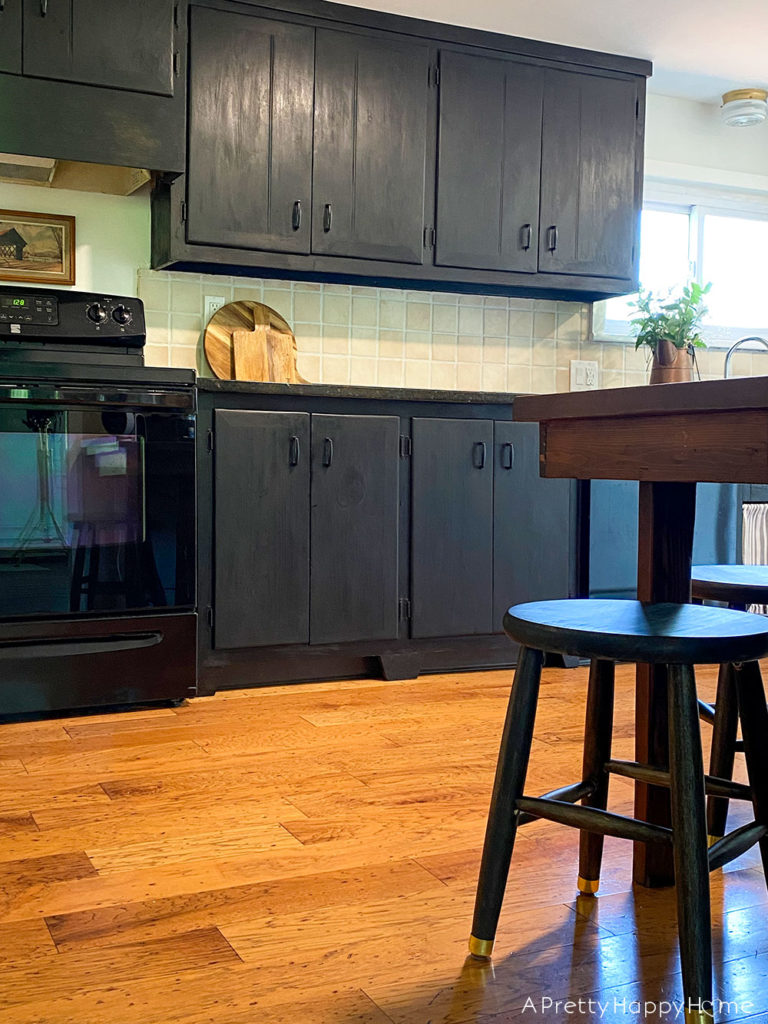
One of the easiest ways to make basic kitchen cabinets look custom is by adding feet to the base cabinets. Here’s how we made DIY Kitchen Cabinet Feet from scrap wood.
This is probably the best use of scrap wood we’ve come up with yet!
Lumber is especially expensive right now, so not only do we not want to waste any of it, but we want to make it count when we do use it.
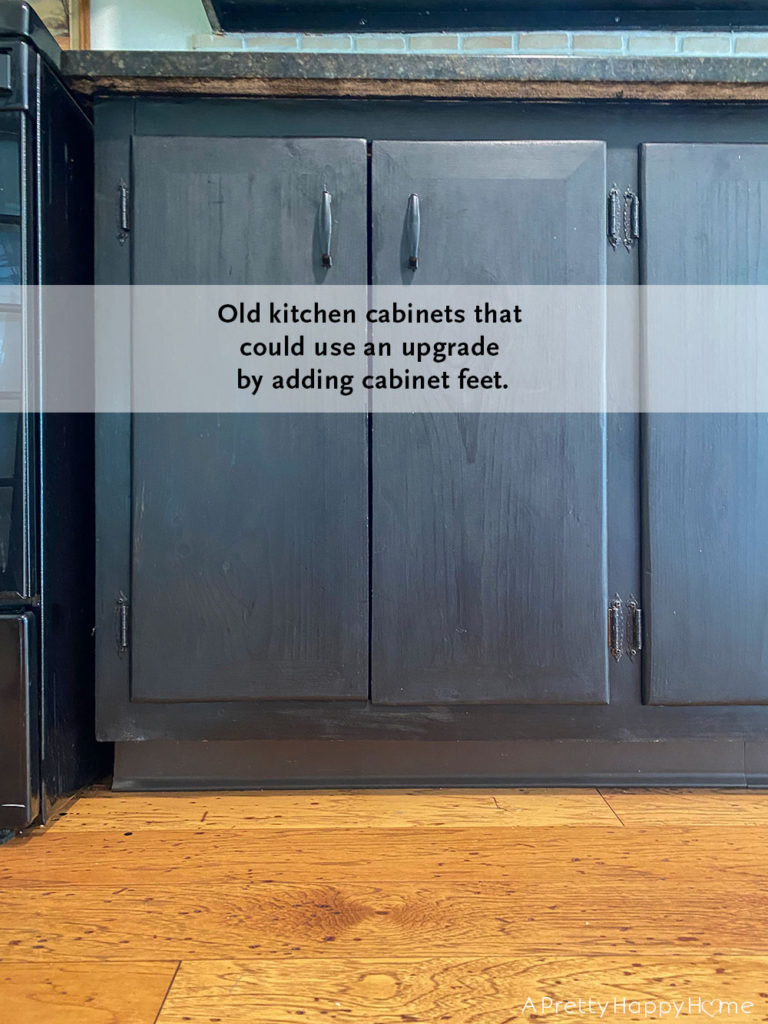
Our old (Seriously, they are really old!) kitchen cabinets were just screaming for the upgrade and added detail that cabinet feet could provide.
There is really no limit on the style of kitchen cabinet feet you can create. You just have to decide on what works for your kitchen’s style.
Here’s how we made our kitchen cabinet feet:
DIY Kitchen Cabinet Feet From Scrap Wood Step 1: Decide on a style.
You can make curvy feet or Shaker-style cabinet feet or something in between.
We decided on a simple, angled kitchen cabinet foot design using some 3/4-inch scrap pine that we had on hand.
The visible part of the foot would graduate from 3 inches across at the top down to 2 inches where the foot touches the floor.
DIY Kitchen Feet From Scrap Wood Step 2: Make a template.
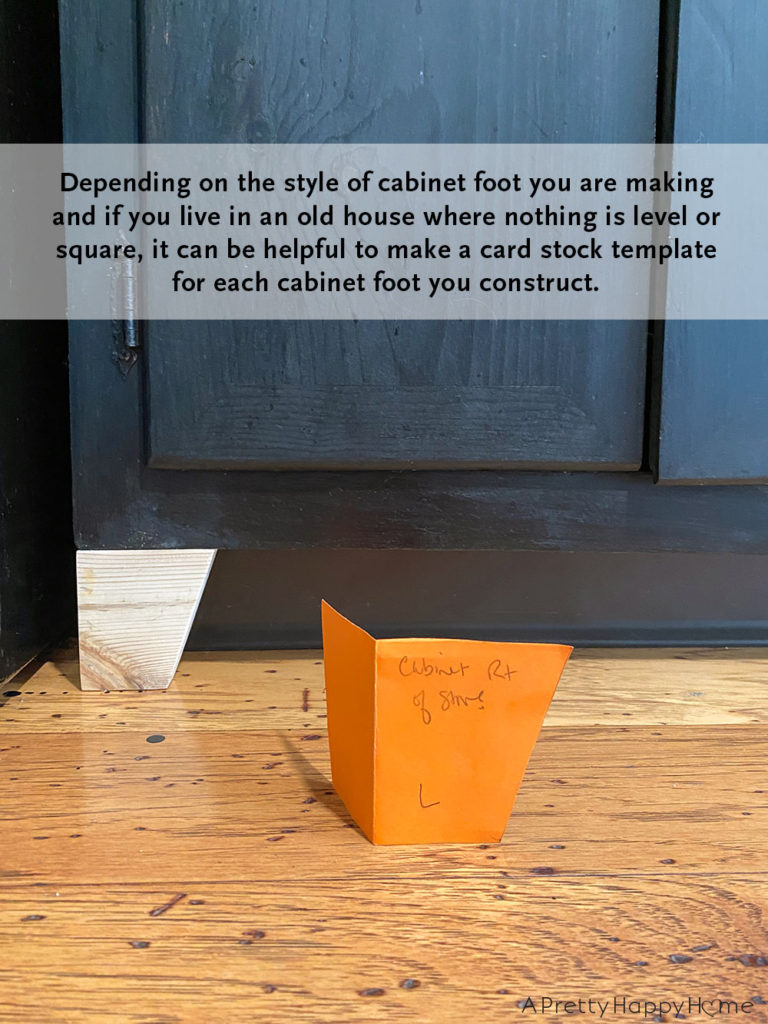
We live in a carnival funhouse an old house and nothing is level or square. It adds some extra spice to this project. Or any project, really.
Some of you may be able to make one template and have that work for every cabinet foot you build. If this is the case, please tell me what it’s like to live in one of these unicorn houses. Is it amazing having everything level? I’ll bet it is.
In our situation, every single one of our DIY kitchen cabinet feet is a little bit different. That means I made a paper template for each cabinet foot out of card stock. It works surprisingly well.
If anything, when making your template, you want to err on the side of the cabinet foot being too tall rather than too short. You want the cabinet feet to fit super snug, so that means the foot needs to be ever-so-slightly taller than the height from the floor to the bottom of the cabinet.
DIY Kitchen Cabinet Feet From Scrap Wood Step 3: Construct the feet.
Use your template to cut your cabinet feet to size then assemble and sand.
We constructed the cabinet feet for any corners or end of a cabinet run to be L-shaped with a 90-degree turn.
Since the cabinet feet are two-sided, we glued and nailed these parts of the cabinet feet together. The nail holes were filled with wood putty and sanded.
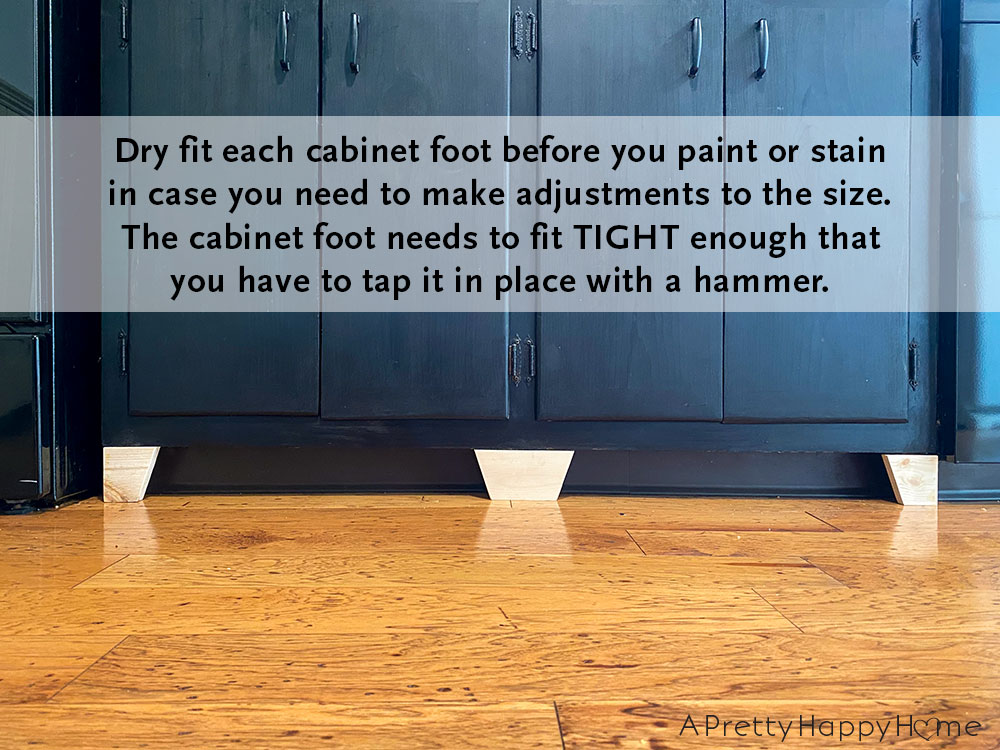
Helpful Tip! It helps to dry-fit the cabinet feet now to make sure they will fit super snug. It’s easier to make adjustments before you’ve stained or painted them.
DIY Kitchen Cabinet Feet From Scrap Wood Step 4: Paint or stain the feet.
Now you need to match your kitchen cabinet feet to your existing cabinets.
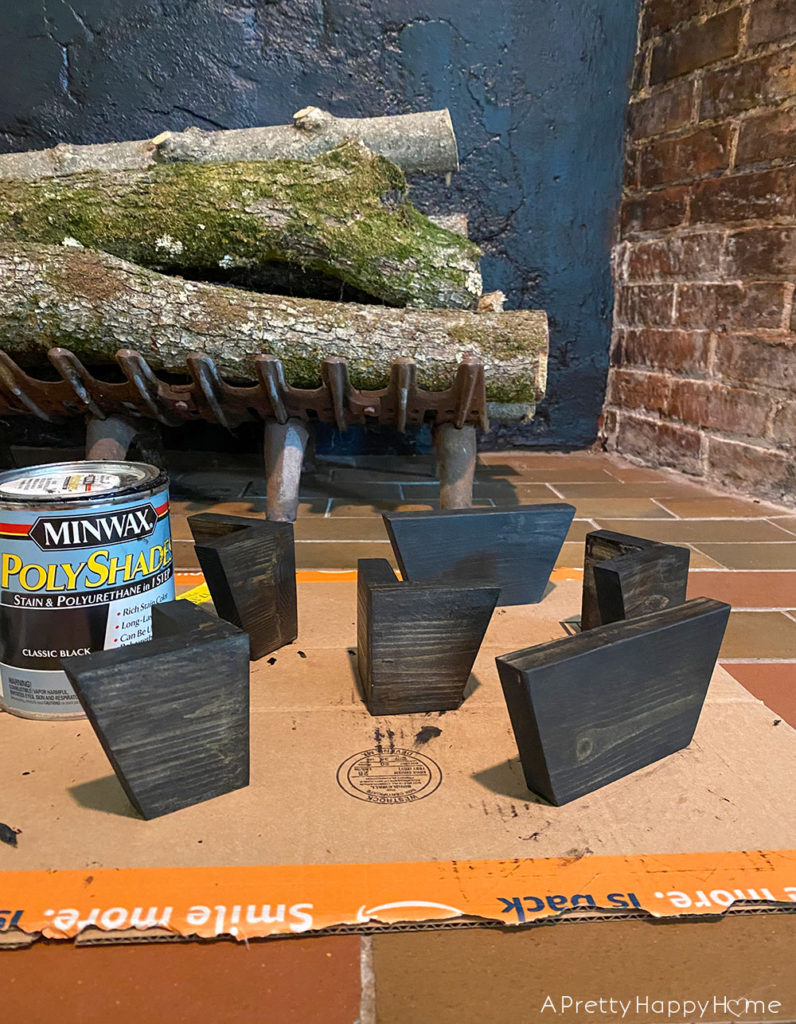
Our cabinets are stained black, so that’s what I used on the cabinet feet.
Helpful Tip! Unless you like puzzles or have an exceptionally good memory, you need to mark the bottom of each cabinet foot so you know which one will be installed where. I used monikers like “left of dishwasher,” but you could also number them.
DIY Kitchen Cabinet Feet From Scrap Wood Step 4: Install the cabinet feet.
Get ready because this part of the project is going to transform your kitchen!
I’ve seen people install cabinet feet a bunch of different ways, which means you may need to go through some trial and error to see what works best for your particular situation.
The key is that your cabinet feet need to FIT TIGHT. If you can push them in with your hands, they aren’t tight enough. You want them tight enough that you have to lightly tap them in with a hammer.
Helpful tip! If you’re using a regular hammer and not a rubber mallet, you may want to cover the hammer with a cloth so you don’t damage the finish on your newly constructed cabinet feet. You may want to do this regardless of what type of hammer you are using. This is the part of the process where you want tears of joy, not tears of dismay, so please take my advice!
Add some wood glue to the top of your cabinet foot before you tap it into place. This will help to further secure the cabinet foot.
Be sure to have a damp rag on hand because no matter how conservative you are with the wood glue, some of it is going to ooze out and you need to be able to wipe it away.
I did not use glue on the bottom of the foot. In case I ever wanted to take them out later, I didn’t want to deal with dried glue on the floor. I have read of folks use caulk under the bottom of the foot, but I didn’t try it or find it necessary.
Troubleshooting tip! If your cabinet foot is not tight enough you can glue a wood shim on the bottom of it to raise it up slightly. You probably have some really thin strips of wood on hand from making these cabinet feet, but popsicle sticks work too.
I glued my wood shims onto the bottom of the feet instead of just wedging them in because I wanted to align them in such a way that they didn’t show at all from any angle. Plus, without glue, they kept moving out of place as I was tapping the foot in.
You’ll know within a week of normal use if this installation method worked or not. This project, like many, is made better when subjected to the stress test of real life. If the cabinet feet can withstand being crashed into by a remote control car or the vacuum, they will probably hang tight for the long haul.
Worst case, you can always put a finish nail or a screw through the foot to secure it to the cabinet frame. It’s just such an awkward spot to use a hammer or a nail gun that we tried to avoid this scenario by going the ‘glue and tight fit’ route first. We did end up having to secure one cabinet foot in this manner because it just would not stay in place.
The bang for the buck out of the project is astronomical! I do not know why we’ve never done this before, but I’m happy we did it now.
In our case, we didn’t spend money on this project because we already had wood scraps, wood glue, and stain on hand.
Even if we bought wood for this project or pre-made feet, it still would have been worth it for the instant upgrade it gave to our very old, very basic kitchen. In fact, it worked so well at distracting my eye I don’t even notice the rubber toe-kicks under the cabinets anymore!
DIY kitchen cabinet feet from scrap wood for THE WIN!
Let me know if you’ve installed kitchen cabinet feet in your kitchen. I love hearing about your projects and tips!
Project Resources:
Wood Glue Dispenser If the cap of your wood glue always sticks, get this dispenser. It is life-changing if you are doing a bunch of DIY projects.
*affiliate links in this blog post*
Thanks for being here today! I hope this post was helpful or inspiring in some way. Here are some other posts you might enjoy.
DIY Wood Stool With Brass Leg Tips


