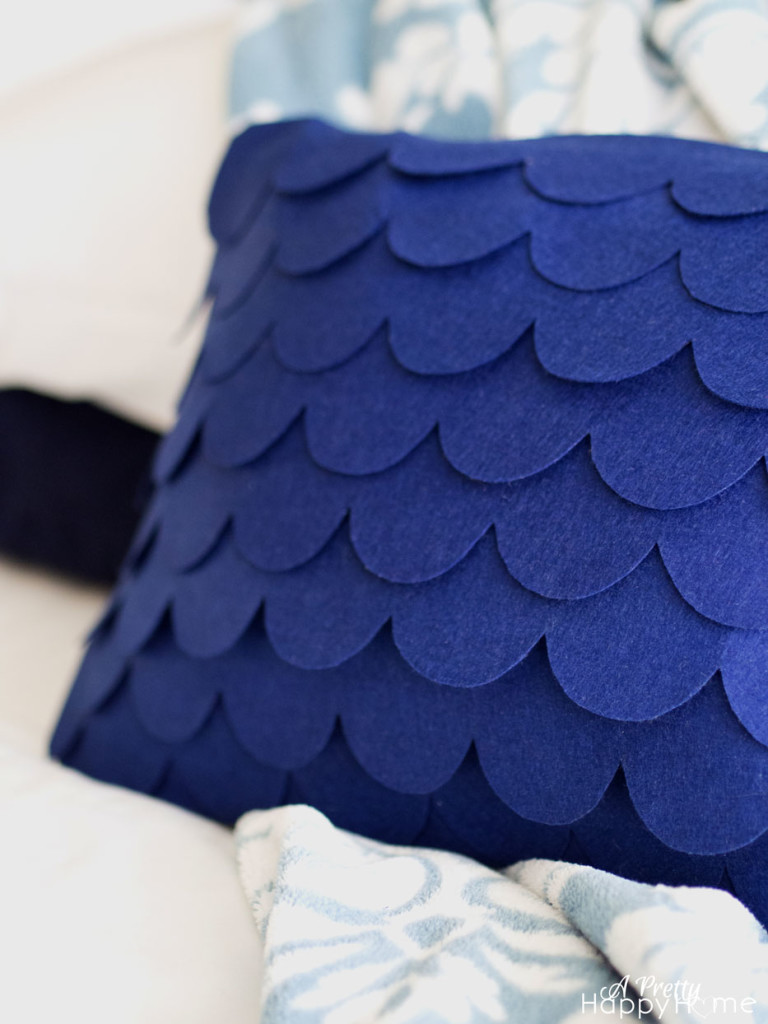
Scalloped and Basket Weave Felt Pillow – No Sew
It’s been awhile since I’ve shared any crafty projects involving felt. Did you hope think I dropped that obsession?
Ha! That’s crazy talk.
Here’s how it all went down…
I’m still having problems with my sewing machine. By “problems” I mean the bobbin thread is a hot mess and I don’t have the patience to deal with it.
By the way, does anyone need a sewing machine?
It really is amazing what I can create when I’m avoiding figuring out how to work my sewing machine.
I needed wanted some new decorative pillows for my bed and thought I’d try my hand at making over two pillow covers that I own. Waste not, want not.
At Hobby Lobby I found large sheets of felt – probably 11×17 inches in size. This discovery made me happier than a kid who found a fruit snack in their car seat. For those of you without kids, that’s like hitting the jackpot.
This felt is stiffer than the felt you typically find in the smaller squares. I’m not sure if that is good or bad – it depends on your project, I suppose.
The real downside is that Hobby Lobby only had a limited number of colors. THE HORROR!
Here’s the deal. I thought I took pictures of the entire pillow cover making process, but I also thought I wasn’t getting any grey hairs. Only one of those things was actually true. Or two of those things, but who’s counting?
For the scalloped pillow:
Step 1: Make a scalloped template out of computer paper, which is basically a bunch of connected circles. You’re also going to need one rectangular strip of felt for the very bottom row if you want your pillow cover completely covered.
Step 2: Figure out how much spacing you want between each layer. Mine are a little more spaced out than I originally intended based on the amount of felt I purchased.
Step 3: Trace your pattern onto your felt with a pencil.
Step 4. Get out those scissors and cut out your pattern! I find this whole process goes by much quicker with Netflix.
Step 5: Affix your scallop strips (and the rectangle piece) to your pillow cover with iron-on adhesive tape.
Step 1: Figure out how thick you want your basketweave strips to be. Mine were a little more than an inch.
Step 2: I used an entire sheet of felt for the “frame” for the basketweave. Using a pencil, I drew a horizontal line at the top and bottom of the felt frame. That’s where the basketweave would end. I connected each of the horizontal lines with equally-spaced vertical lines. I used a craft knife to slice along the vertical lines only.
Step 3: I cut equally sized strips of felt to make the horizontal part of the weave.
Step 4: I wove the strips of felt through my frame with the vertical cuts, making sure to tuck the ends under the “frame.”
Step 5: I used iron-on adhesive tape to secure the strips of felt to the frame and then used additional iron-on adhesive tape
to secure the entire basketweave piece to the pillow cover.
Since I didn’t take step-by-step pictures, hopefully the finished pillow will let you infer the steps. I’m awesomely helpful that way.
Making these pillows was actually less of a pain in the behind than I thought it was going to be. Always a plus when it comes to, well, everything really.
My crafty projects usually go one of two ways: better than expected or a flaming pile of failure. I’m happy I didn’t have to toss this one in the flaming heap!
Update: These pillows lasted a year or so with gentle use (mainly sitting on the bed to look pretty) before some of the hem tape needed to be repaired around the edges.
If you enjoyed this post, you might like one of these too!
*affiliate links in this post*


2 Comments
Pingback:
Pingback: