
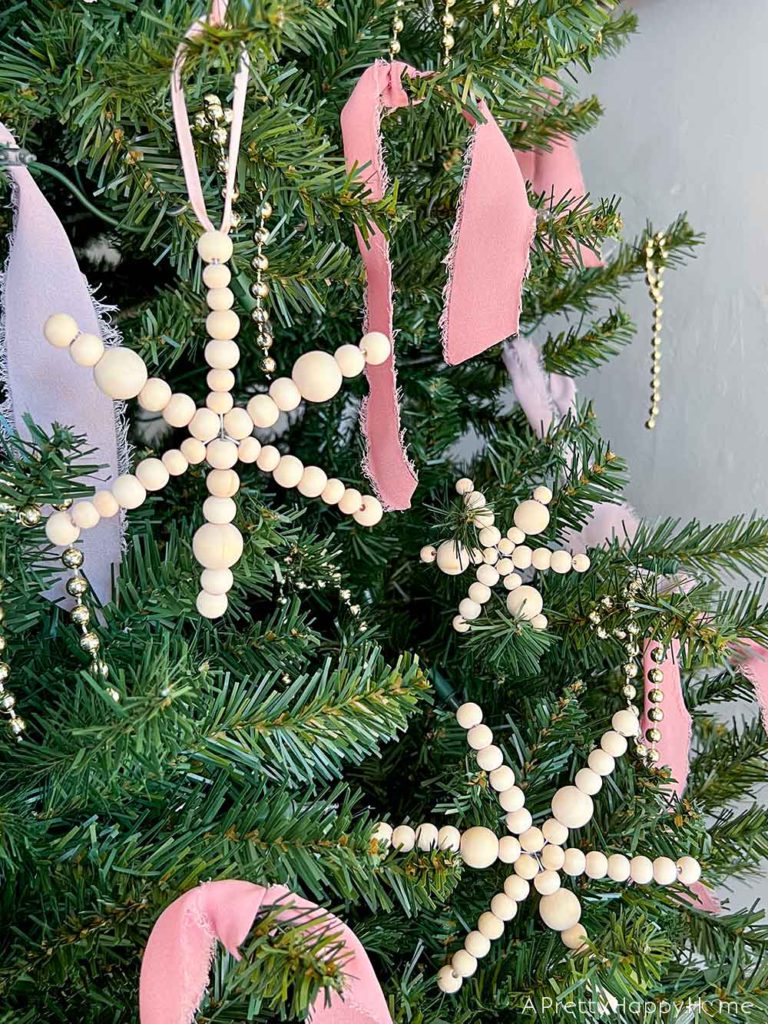
Wood Bead Snowflake Ornaments
I’ve recently become very interested in what I can make out of natural wood beads for my home decor. My infatuation will probably last until I’ve used up all of the beads I purchased. Ha! So far, I’ve experimented with making a garland, napkin rings, and Christmas ornaments. Today, I’m going to show you how to make Wood Bead Snowflake Ornaments.
It’s the season, after all!
Here’s how to make Wood Bead Snowflake Ornaments.
Step 1: Gather your materials.
wood beads in varying sizes (I used this pack of 510 beads)
wire snowflake forms (I used this pack of varied-sized forms)
ribbon or string to hang your ornament
The item that makes these Wood Bead Snowflake Ornaments so easy to make is a wire snowflake form. If I would have known wire snowflake forms were a thing, I might have tried beading earlier.
Step 2: Start beading.
The hardest part of this entire craft is deciding what sizes of beads to use and what pattern you want to make with your snowflake.
For lack of a better word, the wire snowflake forms have 6 prongs. Start by adding beads to every other prong. That will get the first 3 beads as snug as possible to the center of the form. Then you can add beads to the remaining prongs.

Heads up – these wood beads are not designed to go on these wire forms. There has to be a little hitch in this project, right? But don’t worry. I have a solution.
The wire forms are designed to be used with teeny tiny beads. This means that the wood beads can slide off the wire prongs easily. If you bend the end of the prongs up slightly while you are beading, this will prevent you from losing your beads off the end.
Normally, you’d finish off the end of each snowflake by bending the wire over on itself making a sort of loop. That won’t work with the wood beads because, again, they are too big. Instead, you’ll fold or press the wire over the top of the last bead to seal it in place.

This will give you a definite front and back to your ornament. If this bothers you, you could alternatively try sealing the last wood bead on each snowflake prong with a dab of hot glue.
Step 3: Add a ribbon to hang.
Now that you’ve finished beading your snowflake, it’s time to add a ribbon to hang it. You could also use a metal ornament hook.
I secured my ribbon loop under one of the wires that were folded over. It worked like a charm!

There are definitely more complicated ways to make gorgeous Wood Bead Snowflake Ornaments and Wood Bead Star Ornaments than what I showed you today. I just wasn’t up for complicated this year…or probably ever.
By the way, because this craft is pretty easy it would be a great activity to do with kids. They could even paint the beads if they wanted to. There’s no right or wrong here!
If you make one of these ornaments or something similar, I’d love to hear about it. You can always comment on this blog post, email me here, or reach out via Instagram or Facebook.
Happy Christmas crafting!
Thanks for being here today! I hope you leave with an idea or two. Here are some other blog posts you might enjoy too.
A Touch of Christmas On Our Barn (Here’s hoping we have a white Christmas again this year!)
12 Handmade Holiday Gift Ideas (These are the type of gifts I cherish the most.)
DIY Mini Copper Christmas Tree From a Safety Cone (The humble safety cone gets a glow-up!)
*affiliate links in this blog post*


You May Also Like

Wood Dining Chair Makeover With Fabric Tape

Using Contact Paper to Make a Deer Silhouette
