
Watercolor Wood Easter Eggs
Did you like dyeing Easter Eggs as a kid? I sure did! I’ve come up with the adult version of this in the form of Watercolor Wood Easter Eggs and the best part is they won’t turn rotten will last for years to come.
Get ready to channel your inner artistic kid because this Easter craft is so satisfying!
Best of all, there’s no right or wrong for making Watercolor Wood Easter Eggs.
You want to mix colors? Do it.
You want to super saturate the colors? Do it.
You want to make a huge mess while coloring eggs? Do it…BUT! You’re going to have to clean that up yourself because your mama isn’t going to do it. So maybe dial back your inner kid just a little.
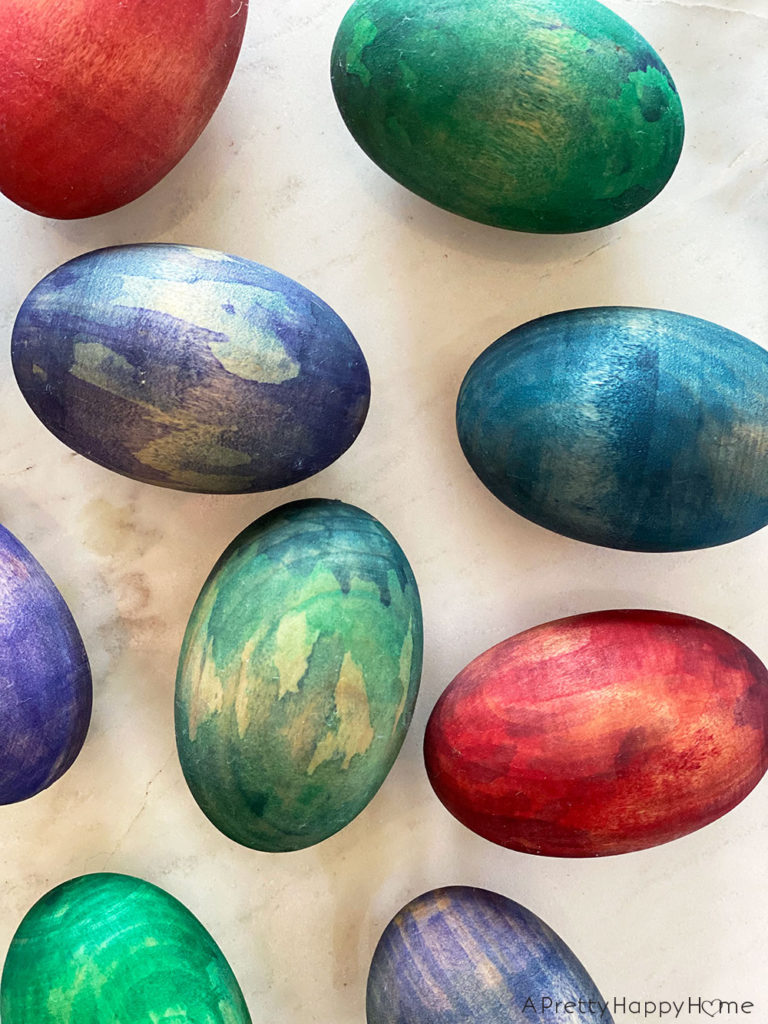
The items needed for this craft are wood eggs, watercolor paint, and a small paint brush.
I ordered my wood eggs off of Amazon. They come in a variety of sizes, but I chose the 2.5-inch size because it is a close approximation to the size of a real chicken egg. Some eggs sold online have a flat bottom so you can stand them up. I did not want this, so I ordered the eggs that are rounded on both ends.
The wood eggs will have marks from the wood lathe. If this bothers you, you can try to sand those marks off, but I just embraced those quirks.

To make your masterpiece Watercolor Wood Easter Eggs all you are going to do is get out your watercolor paints and start painting your wood eggs.
I used watercolor paints that come in a tube and then diluted the paint with water until it was the desired saturation. If the paint is too saturated on the wood egg, you can wet your brush with water and further dilute and move the paint around.
I’m pretty sure this craft would also work with the watercolor paint sets that come in a pan. There are just differences in saturation levels between watercolor paint in a tube vs. in a pan. You could also use watered-down craft paint in a pinch.

All painting techniques are fair game! Remember? No rules other than cleaning up your own mess.
I experimented with using one color on the eggs.
I dripped a second color on the eggs and let gravity pull the paint down the egg.
If I had the artistic talent, I might have tried painting an actual scene, but that’s beyond my scope at the moment.
The paint is going to look different, usually lighter, after it dries on the wood egg. You may want to wait until the egg dries before adding a second color or an additional layer of the same color.
There were a couple of wood eggs that I accidentally turned brown with my paint mixing. It as if I forgot all my childhood painting mishaps! If this happens to you, it is fixable. You can try two things: wiping the egg with a damp cloth or using a piece of sandpaper to sand away the undesirable color.
The sandpaper does come in handy as the watercolor paint will raise the texture on the wood eggs. If this wood grain texture bothers you, a very light sanding with a fine grit sandpaper (220 grit or higher) will knock off that texture without messing up your paint.
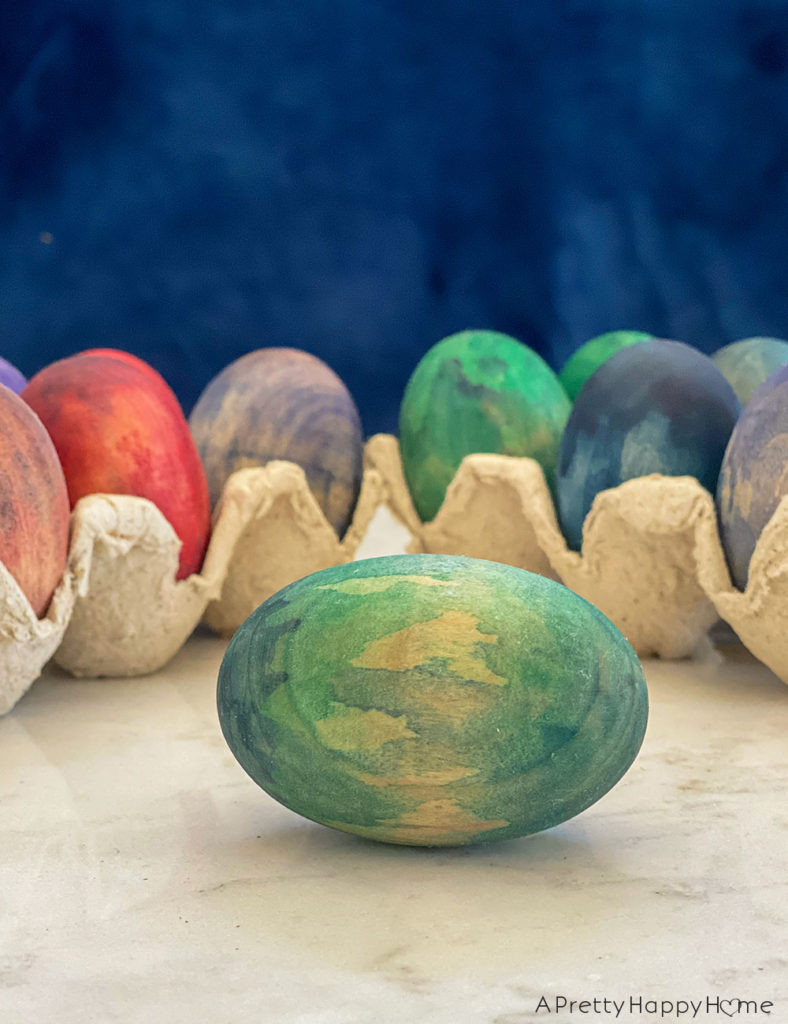
How do you know when you are done with your Watercolor Wood Easter Eggs? When the colors and patterns make you happy!
The eggs are fine as is with just the watercolor paint. You could seal them with a clear spray paint or other topcoat if you want them to be shiny. I chose to “season” the wood eggs by rubbing some olive oil onto them. It gave the eggs a slight sheen and ever-so-slightly deepened the colors.
I love that I can enjoy these Watercolor Wood Easter Eggs for an entire season!
If you make Watercolor Wood Easter Eggs or any other crafty Easter Eggs, I’d love to see your creations!
Here are the products I used to make these Watercolor Wood Easter Eggs:
Watercolor paints in a tube. I had an old set, so here is something similar. Watercolor paint in a tube will probably be more saturated than the watercolor paint sets in a pan, so keep that in mind as you are playing with your color.
Thanks for being here today! Here are some other Easter Egg projects you might enjoy:
*affiliate links in this blog post*


You May Also Like

How To Make A Wood Heart Bracelet

Leather Wrapped Rock Paperweight
