
A Snarky, but Helpful Wallpaper Removal Guide
Here’s a Snarky, but Helpful Wallpaper Removal Guide for when you are already over it and you haven’t even started. Don’t worry. This feeling is totally normal when it comes to wallpaper removal.
For every beautifully wallpapered room I see online I know there is a poor schmuck that will someday have to remove that no longer beautiful wallpaper.
Guess how often that poor schmuck has been me?
Eight times in our current house alone.
Our house really isn’t that big, but almost every vertical surface, including the stair risers, was covered in decades old wallpaper. Why did I want this house again?
Removing wallpaper is like unwrapping a present from a new boyfriend. You hope this boyfriend is good at giving thoughtful gifts that demonstrate how much he cares about you, but you aren’t sure if gift giving is his love language because this is the first time you’ve received a gift from this boyfriend.
Sometimes when you remove wallpaper you find a perfectly solid wall, free from any major damage. DIY dreams do come true, my friends.
Sometimes when you remove wallpaper you will find more wallpaper. You’re not even sure how this is possible. Yet, there it is.
Sometimes that wallpaper is hiding a damaged wall or 1,001 thumbtack holes.
Sometimes removing the wallpaper creates wall damage because that wallpaper wanted to stay. Forever.
Sometimes that wallpaper removal reveals questionable paint choices. It happens to the best of us.
If you are really unfortunate that wallpaper is hiding mold. Or are you fortunate that you found the mold before it spread even farther? Ah, perspective.
But let’s not get ahead of ourselves with doomsday scenarios before you’ve even started this project. I know, I know. You’re already over this project, but the only cure for that feeling is to power through. You’ve got this!
Wallpaper Removal Guide Step #1: Gather Your Tools and Prep the Area
I’ve removed wallpaper using many different techniques: steamer, wallpaper remover spray, water only, homemade remover solutions, picking at it with my fingernails. You do you and decide whichever technique you feel most comfortable with.
I’m typically removing really old wallpaper from either drywall or plaster. Many folks swear by the homemade wallpaper remover solutions, but I have had the most consistent results using a store-bought wallpaper remover spray along with a scoring tool and a scraper. You can also buy a remover concentrate that you can mix with water in an old spray bottle. That’s what you’ll see me using in the below pictures.
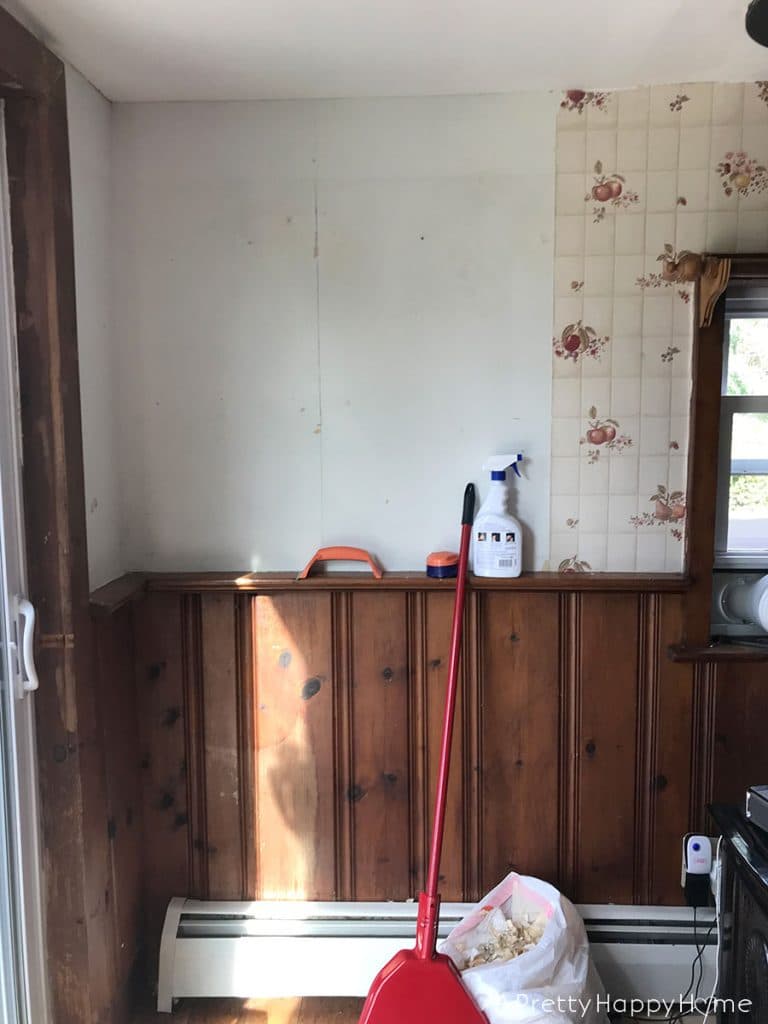
Wallpaper scraps are going to rain down like wet confetti on your floor when you are removing it. If you want to cover your floors, do so before you start. You’re also going to need to remove the outlet covers and you might want to protect the outlets and light switches with painter’s tape because you will be spraying water on the wall. Last, have a big trash bag on standby.
Wallpaper Removal Guide Step #2: Distract Your Mind
Removing wallpaper is not the time to be alone with your thoughts. Instead, turn on your favorite distraction. Friends reruns, all those podcasts you want to catch up on, audiobook for book club, your favorite playlist from high school. No one’s judging your boy band preferences. Fine. We are, but that doesn’t matter. What matters is that you have a happy place for your mind to go.
As a side note, if you are REALLY desperate for alone time, this is the perfect time to get it because your family doesn’t want to help with wallpaper removal.
However, if you have a friend who is willing to combine friend time with wallpaper removal time you have hit the jackpot and this project will go faster. If you have a friend like this, never let them go. Also, you are going to owe them big time.
Wallpaper Removal Guide Step #3: Remove the Top Layer of Wallpaper First
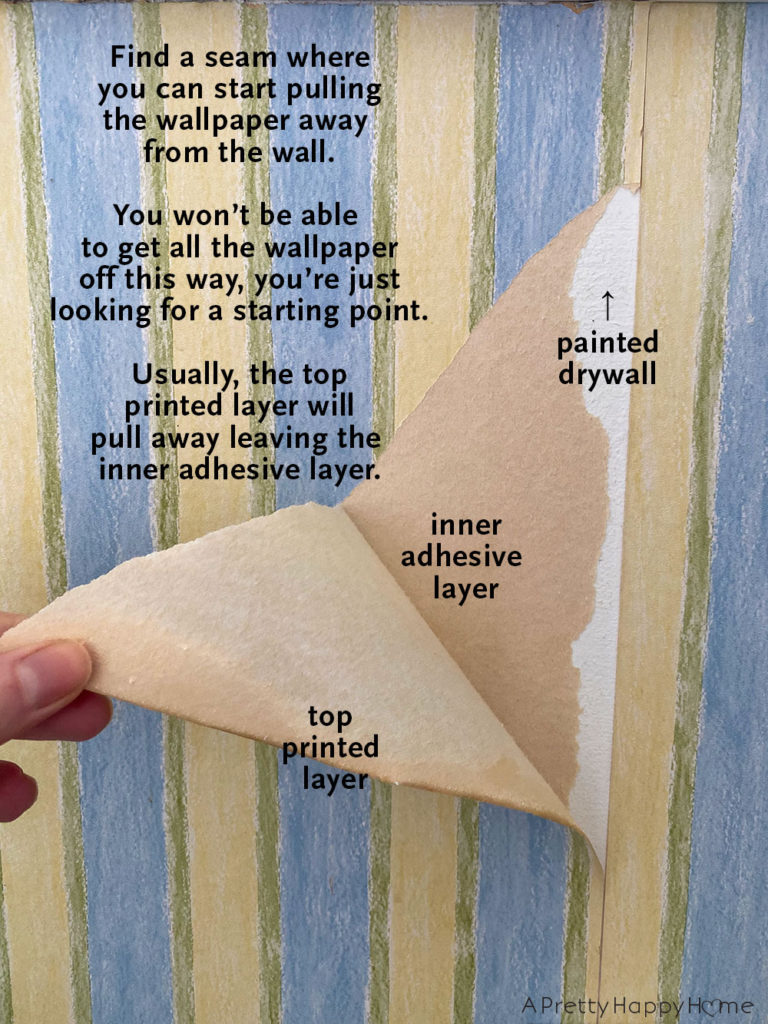
Now that you are all prepped, it’s time to get that wallpaper off the wall! Start by removing as much of the top, printed layer as you can. Most wallpapers have a top printed layer and an inner adhesive layer.
You can almost always find a loose seam to start peeling the top layer off with your fingers or a scraper tool. Don’t expect it to all come off with one pull. You’re just aiming to expose some of the inner layer underneath the printed paper.
If you can’t find a loose seam because your wallpaper is affixed tighter than Spanx after a holiday dinner, then you most likely can find a starting point under the trim or an outlet cover.
You don’t need to remove the top layer all at once, but as much as you can get off is helpful and will save you scraping time later.
Only one glorious time have I pulled at the top layer of wallpaper and did whole sections (inner layer and all) slide off the wall like butter. I think that was because the wallpaper wasn’t glued on well or because the glue lost all of its stick. If this happens to you, go buy a lottery ticket because it is your lucky day.
Wallpaper Removal Guide Step #4: Lightly Score the Remaining Wallpaper and Spray With Wallpaper Remover
This step is optional, but I find it can be helpful, especially if the top layer is proving to be stubborn.
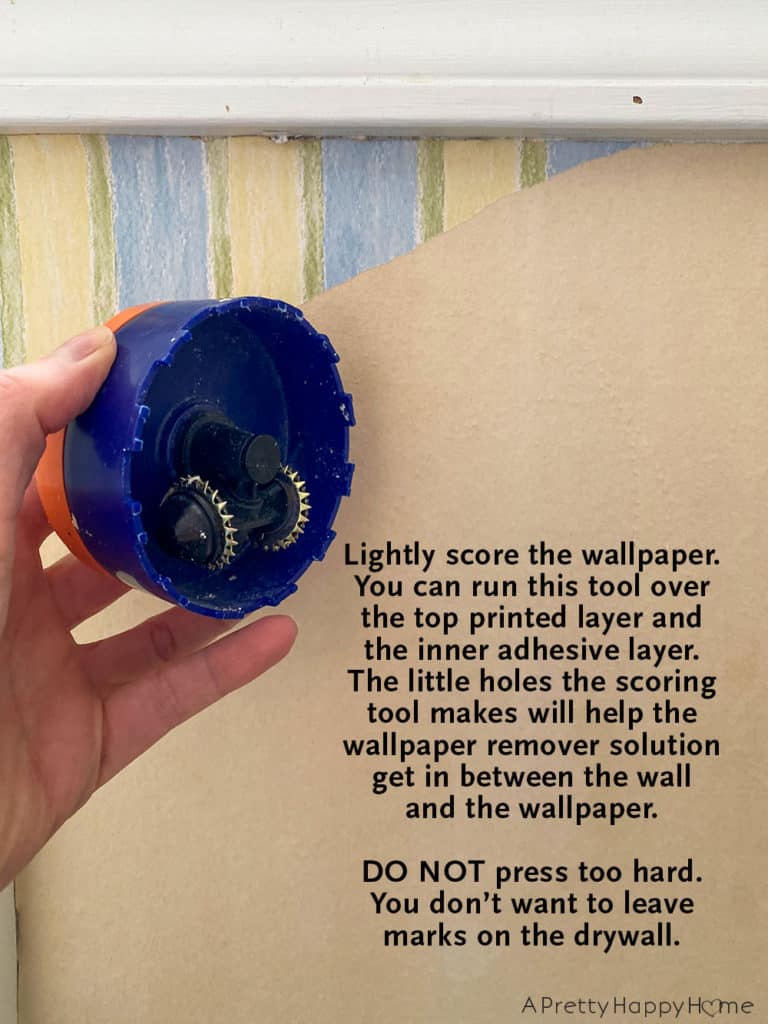
Lightly roll a scoring tool over the section of wallpaper you are working to remove. Light is key. You are trying to poke holes in the paper so that the wallpaper remover can seep through. You don’t want to press so hard that it makes a mark on your wall.
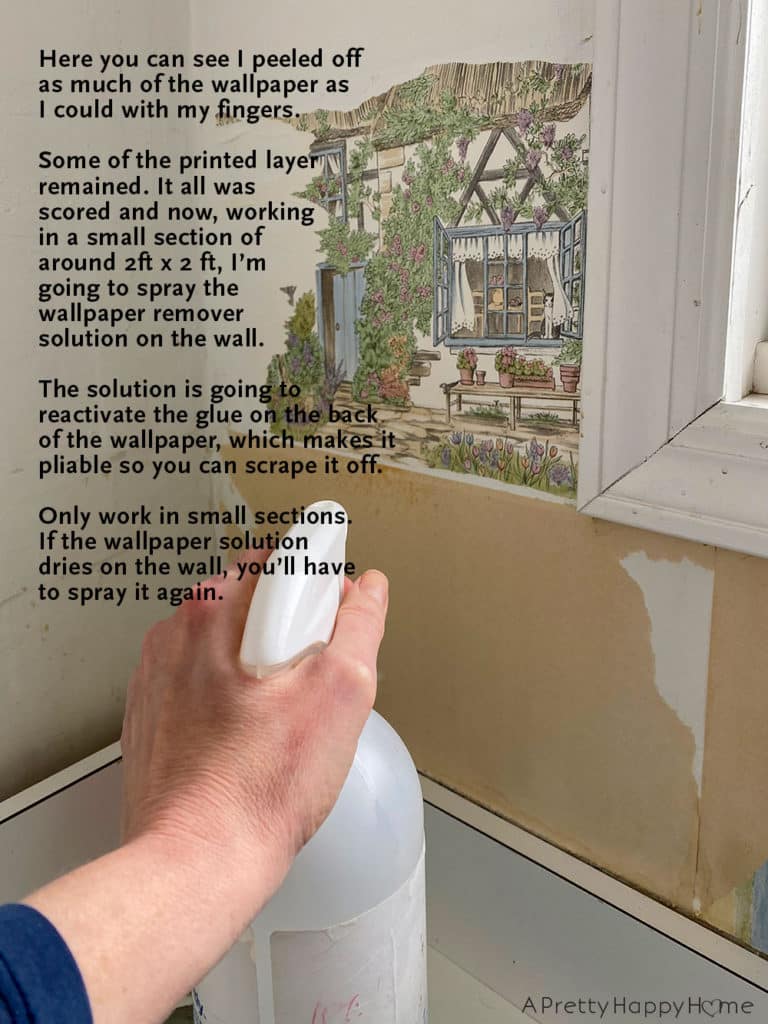
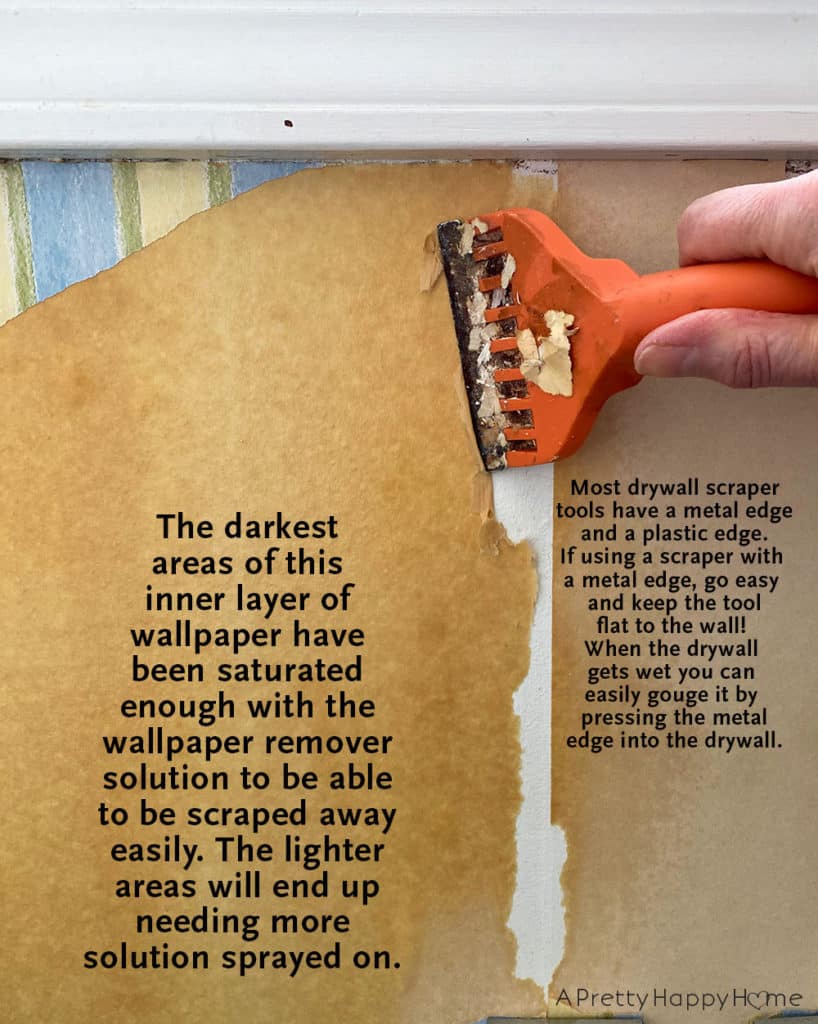
Next, spray the wallpaper remover on a small section of scored wallpaper. If you are just spraying it on the liner, you’ll see when the brown liner paper becomes saturated. You aren’t trying to flood your wall, but you do want the wallpaper to be wet all the way through so that it releases its hold.
I typically work on a 2’x2′ section of wall at a time. When you spray wallpaper remover on wallpaper, it is reactivating the adhesive so you can remove it. If the wallpaper dries out, the adhesive has reset itself and the wallpaper isn’t going to come off as easily. That means there’s no need to spray too much of the wall with wallpaper remover all at once. Small sections at a time.
Wallpaper Removal Guide Step #5: Scrape, Scrape, Scrape
After your wallpaper has been sprayed with the wallpaper remover, you are going to scrape it off using your scraper tool. The scraper tool is usually two-sided. One side has a metal edge. The other has a plastic edge. I usually prefer to use the side with the metal edge because it is thinner, but you have to be careful not to gouge your wall.
Sometimes, you can use the scraper to lift up a section of the wallpaper and then use your fingers to pull it off the wall in one big strip. That’s SO satisfying. You’ve got to find your joy wherever you can during this project, folks.
If there are sections of the wall where you couldn’t get the top layer of paper off before you started scoring and using the wallpaper remover, please keep in mind that you might have to do this section in two parts. Once to remove the top layer. Then re-spray and scrape to remove the inner layer.
If the wallpaper does not come off easily with the scraper, apply more wallpaper remover and wait a minute for it to activate.
If there are areas that are difficult to reach (e.g. behind the toilet), you can always try using something with a longer handle like a flexible, plastic kitchen spatula. I won’t tell anyone the next time you are flipping pancakes with that spatula that you used it to scrape wallpaper.
Wallpaper Removal Guide Step #5: Clean Up, Patch, and Paint
This is the last step in the wallpaper removal process. Granted, I lumped about three things into this last step so we have a nice, tidy list, but you’re over it already, so you don’t care!
There may still be tiny bits of wallpaper or glue residue on your walls when you are done removing the wallpaper. If this is the case, I usually just wipe the wall down with a damp sponge. You could use a little dish soap on the sponge too if needed.
If there is any damage to the wall, you’ll need to patch that before you paint. Assuming you have minimal damage or just small holes to patch, I like this all-in-one repair product from 3M.
If you are going to re-wallpaper these walls right away, I guess you weren’t too scarred by this process. That’s good news! My wallpaper scars run deep, so you are made of tougher stuff than I am.
Make sure you follow the instructions from the wallpaper manufacturer on how to prep the walls before wallpapering. This is how you are going to pay it forward to the next person who will have to remove the beautiful wallpaper you installed. We only want to send good karma out into the DIY universe.
When you are done with this project, it is time to celebrate! I firmly believe in celebrating your DIY wins, big and small.
Good luck! You’ve got this!
I’m sure you’ll be happy you tackled this project or at least happy when it is finished. If you attempt wallpaper removal for the first time, let me know in the comments so I can give you a virtual high five.
Products I Find Helpful With Wallpaper Removal
WP Chomp Wallpaper Removal Kit (These are the tools that I have and the set came with a spray bottle of remover.)
Wallpaper Removal Concentrate I ran out of the wallpaper remover that came with the above kit and switched to the concentrate so that I could mix my own as needed. Remember, I had a whole house of wallpaper to remove.
*affiliate links in this blog post*
Thank you for sharing part of your day with me! Here are some other posts you might enjoy.


You May Also Like

How to Fix a Sagging Wood Bench

Scrapmaster Project #4: Dove
