
Curved Fieldstone Wall: Part 7, The Stairs
Welcome back to our Curved Fieldstone Wall Series, where we attempt to rebuild the fieldstone walls in our front yard using historical masonry techniques. Today we are talking about the stairs between the two wall sections. The first wall section is already complete.
The stairs were not a part of the original plan. We intended to leave them alone because we were going to exercise restraint, like the reasonable DIYers that we are.
Hahahahahaha.
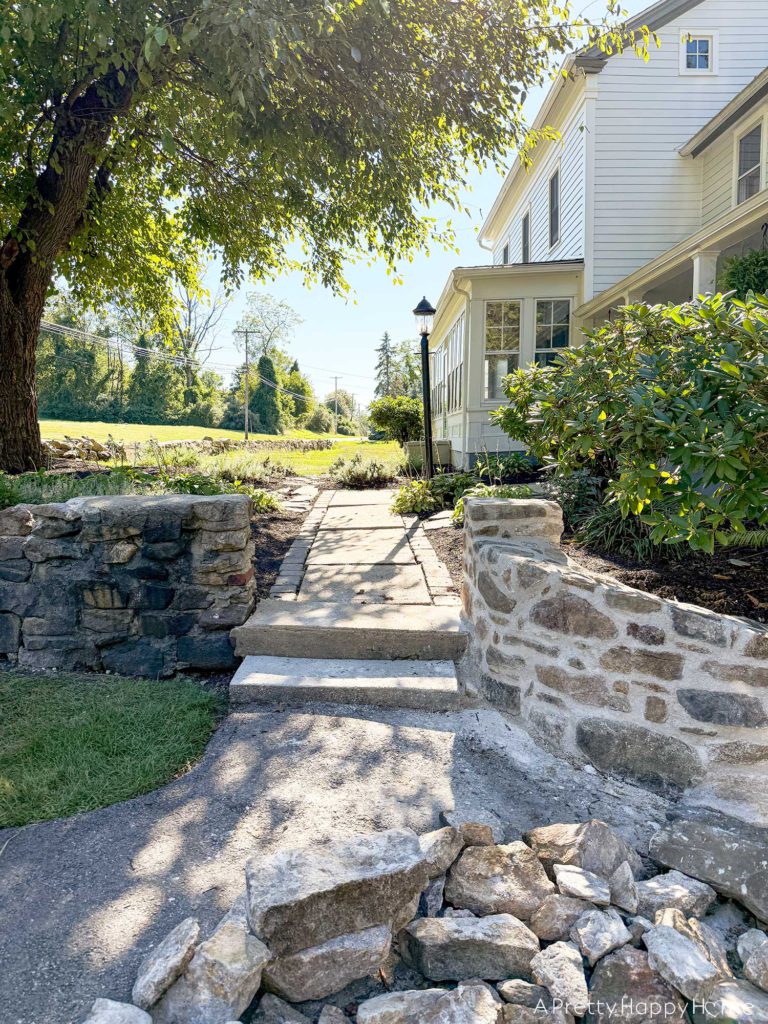
The original stairs connecting the driveway to our sidewalk were concrete, which makes sense. The sidewalk and the stairs match. The stairs were a little wonky in size, and one looked newer than the other, but we hadn’t spent too much time dwelling on that fact.
At some point during the 25 hours (no joke!) Handy Husband spent dismantling the second wall, he suggested we take out the stairs, too.
My immediate reaction was a hard pass. That wasn’t part of the plan. We were already as overloaded as a power strip with every outlet in use. Someone needed to trip the breaker on this idea.
But then I thought about it, and remembered a humorous observation by Terry Johnson. He said, “Have you ever noticed how ‘What the hell’ is always the right decision to make?”
Indeed, Terry.
With that in mind, I got on board with Handy Husband’s idea, and before you know it, it was hammer time.
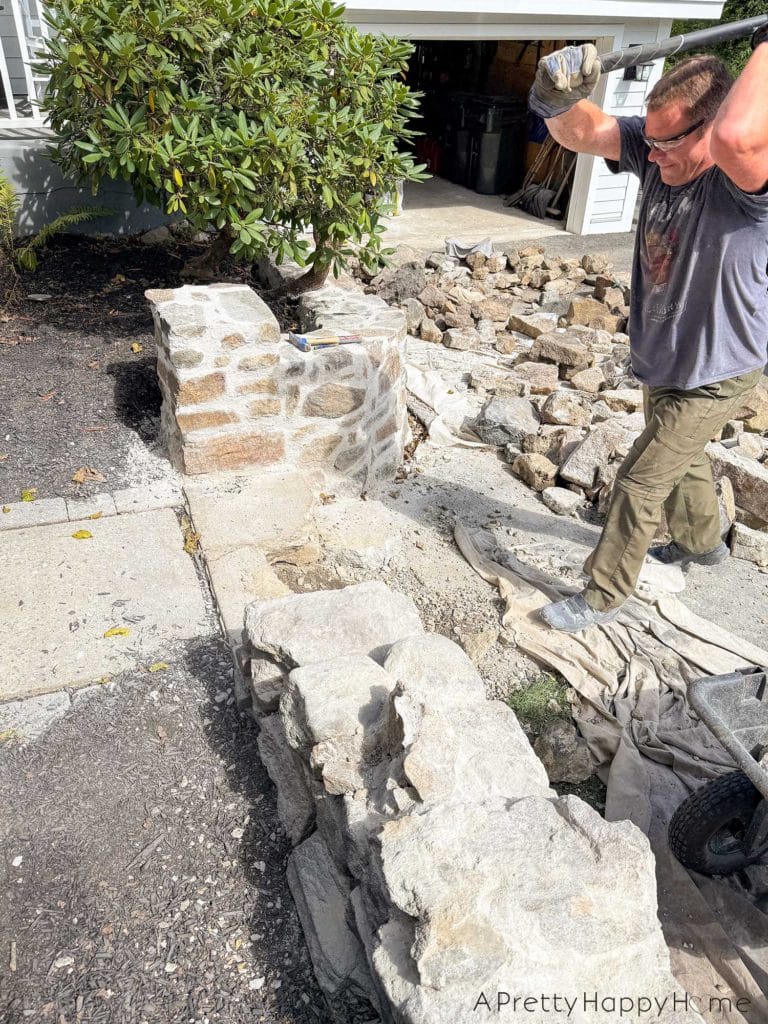
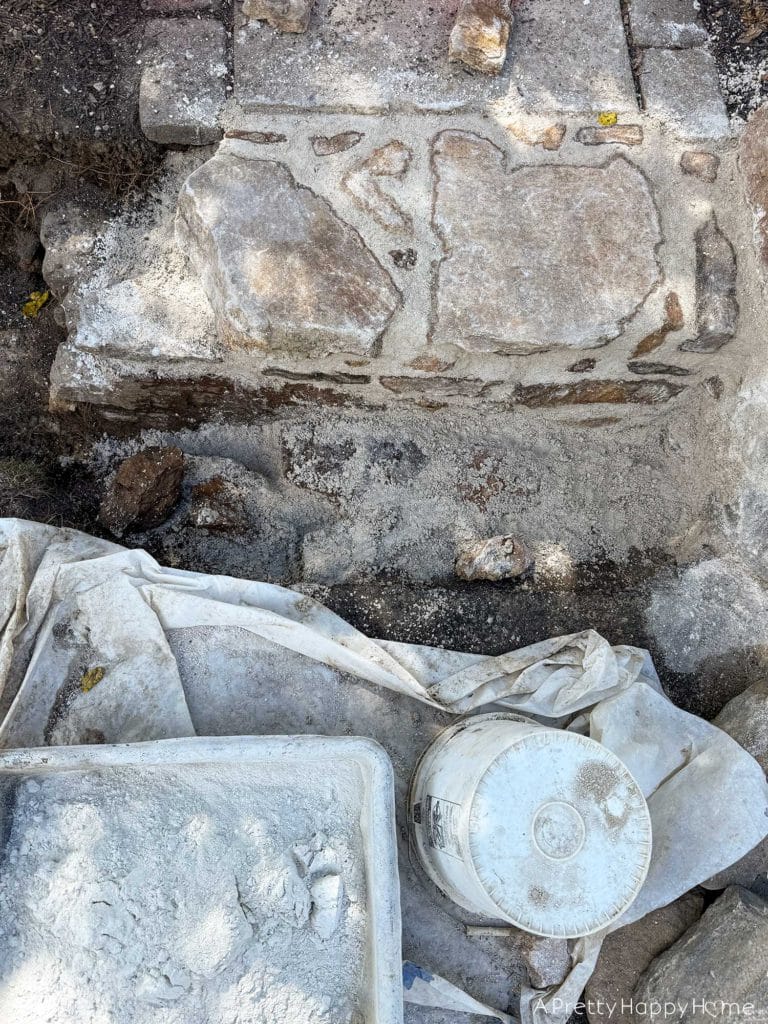
It didn’t take long to break the concrete stairs up with a sledgehammer, which meant the consequences of our actions were swiftly delivered.
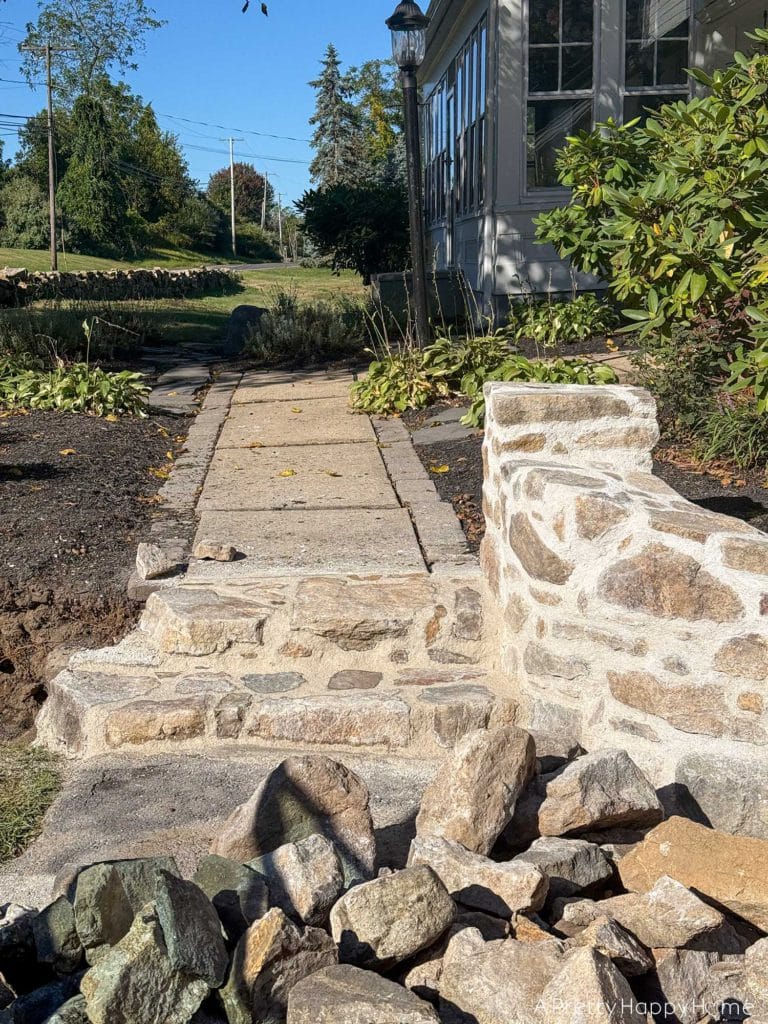
What we found underneath the stairs was one mammoth-sized rock. It was approximately 5 feet long and 16 inches deep.
It was not coming out of the ground, not on our watch, which meant we had to build the stairs around it.
We couldn’t use the giant rock as a step because it would have been too big a step down from the sidewalk. Plus, there would not have been a great way of finishing off the exposed concrete edge, which was not intended to ever be seen.

That meant we had to use the big rock as a foundation for one of the steps, and then build a second step below it.
Basically, we were recreating what was already there, but in fieldstone. There’s always a reason people build things the way they build them, and it might be because there’s a giant rock in the way.
We did contemplate making the stair treads out of a solid piece of flagstone. Ultimately, we decided to make them out of fieldstone, similar to how we built the stairs in our backyard.
This would allow us to structurally and aesthetically tie the stairs to the two fieldstone walls we are building.
Worst case, if they don’t hold up, we can always redo them in flagstone. That’s relatively easy to do compared to what we’ve already demoed and built. Perspective is everything!
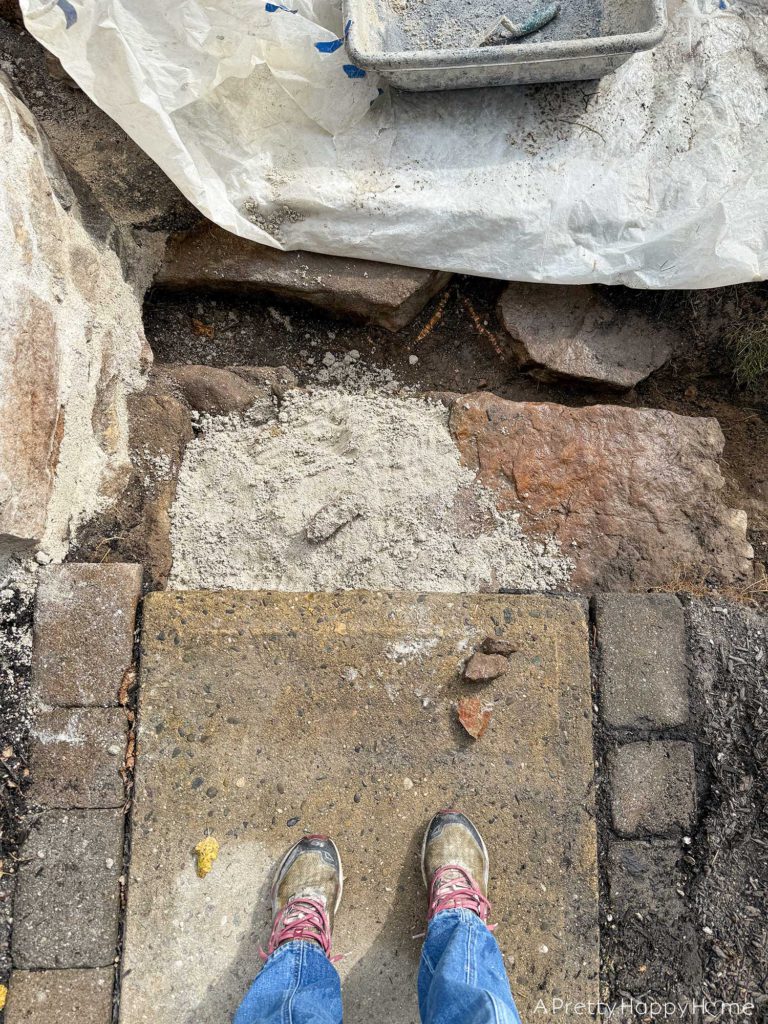
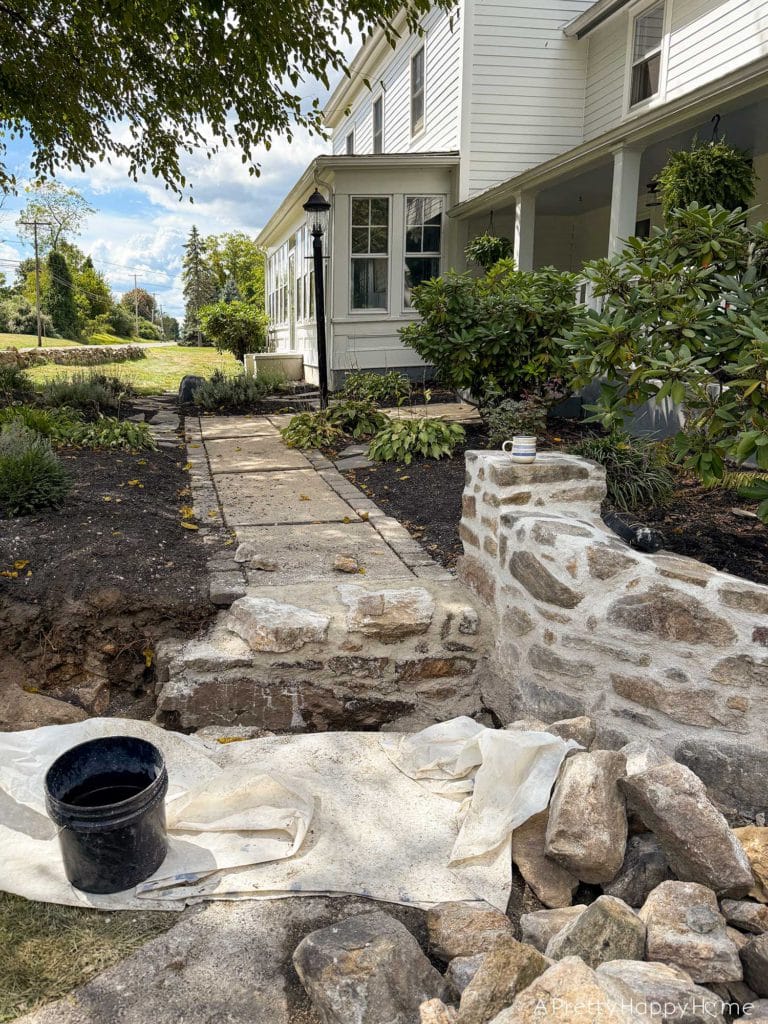
I built the section that will be level with the sidewalk first.
It had to come out 16 inches from the sidewalk because that’s the width of that gigantic rock that we’re working around.
It looks a little jagged and unfinished on the left side because that’s where it will connect to the second fieldstone wall.
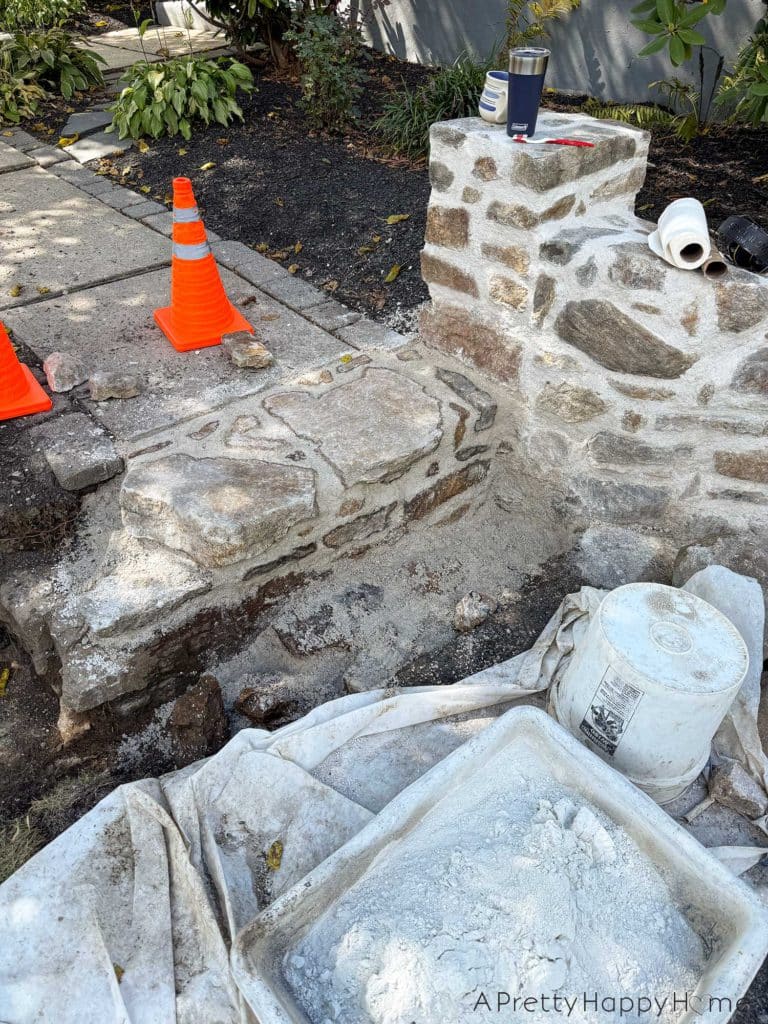
I love the view below because you can see how solid these steps are going to be when complete.
The gigantic rock is so long and well placed that it is going to anchor the stairs and the second wall section together. I couldn’t have planned it better if I tried.
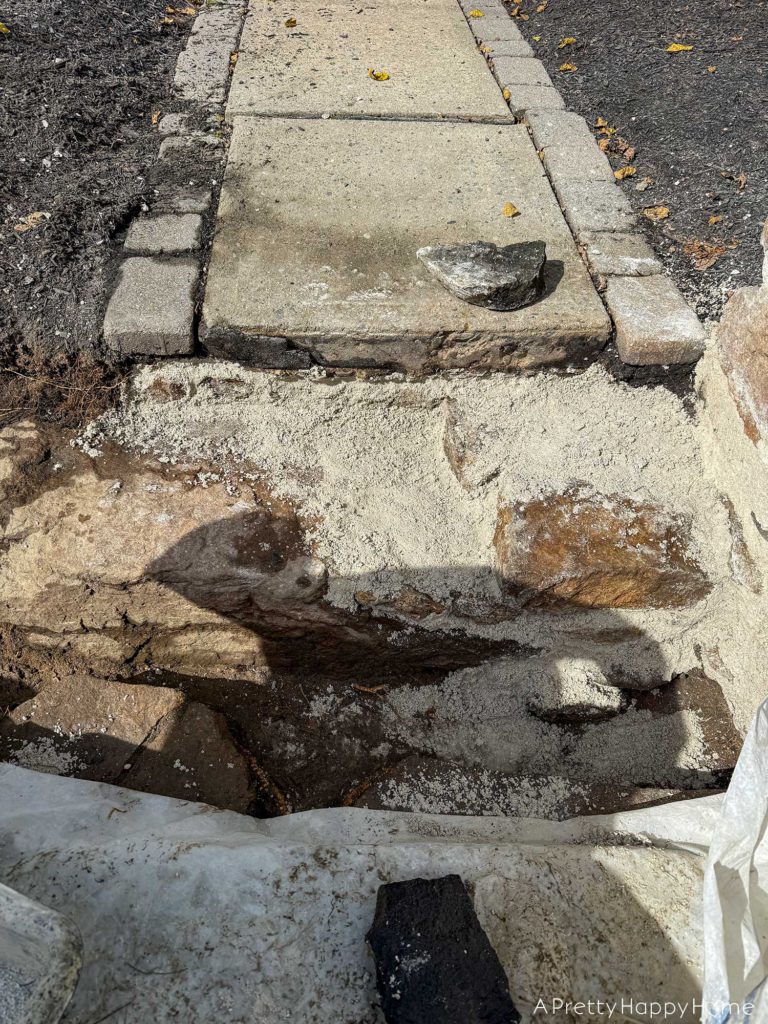
After we had laid fieldstone to the edge of the gigantic rock, it was time to build the one true step.
I first had to bring the first step up to the asphalt level. This was the foundation of sorts for the step.
Then we split the difference between the sidewalk and the driveway to obtain our riser height, which is roughly 7 inches.
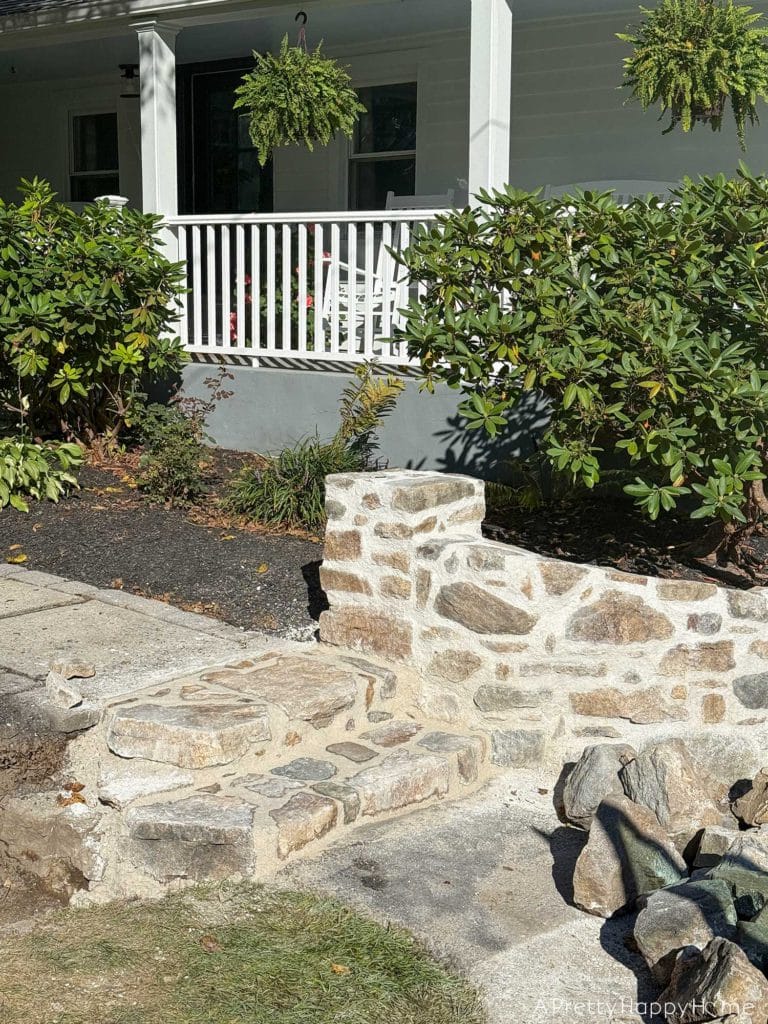
We’re getting faster because it only took us one solid day of work to build these stairs.
Also, keep in mind the mortar is still drying, so it’s a darker color than the finished wall on the right.
Without further ado, here are the new fieldstone stairs! TADA!
MAN OH MAN.
Are you hyperventilating yet?
Because I am.
On this blog, we believe in tooting our own horns.
Kudos to Handy Husband for having this idea and doing all of the demo.
Kudos to me for being able to turn his idea into actual stairs.
Kudos to the people who originally built these walls. I wish I had known you.
Teamwork makes the dream work.
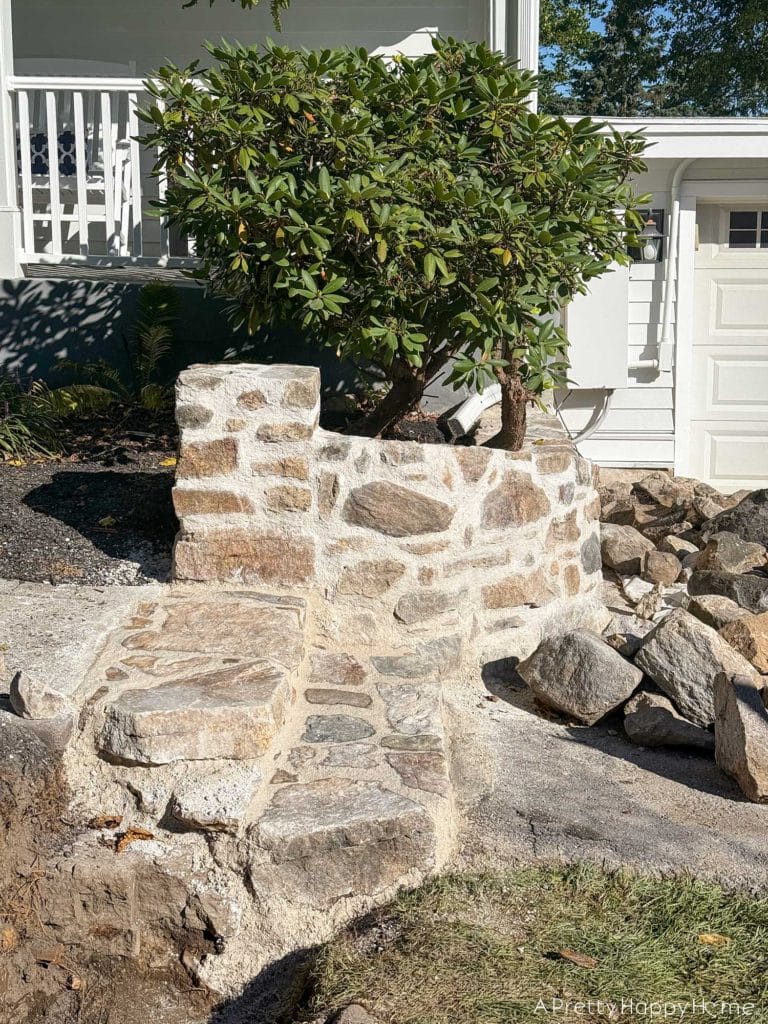
I’m pretty good at visualizing how things will look, but I didn’t realize how much of an impact these new stairs would have in tying the two wall sections together until I saw them with my own two eyes.
The fieldstone stairs elevate the entire project another notch, and it is giving me the motivational boost I need to keep going.
What do you think of the new stairs? Can you see this entire wall project coming together now? Are you as excited as I am? Let me know. Don’t hold back.
Comments really do make my day. You can comment on this blog post, email me here, or reach out via direct message on Instagram or Facebook.
Happy DIYing.
P.S. Sometimes in the evenings, Handy Husband and I sit on the front porch and chat. On the evening after the stairs came out, he said, “In 20 years, we’ll probably regret not building a ramp instead of stairs.” I’m sure he’s right. We tucked that idea away for later because the reason we couldn’t build a ramp now (we checked) is that the slope was too great. To do it right, we’d need to rip out the sidewalk, too. That’s not happening now. I swear, it’s not.
Thank you for following along with our DIY adventures. I appreciate you! If you missed any of the posts in this series, you can catch up here:
Curved Fieldstone Wall: Part 1, The Plan
Curved Fieldstone Wall: Part 2, Demo Section 1
Curved Fieldstone Wall: Part 3: Progress Section 1
Curved Fieldstone Wall: Part 4: Reveal Section 1


6 Comments
Laura L
Wow! That is really great! Better than I thought it would be by far! Who knew? Great job!
annisa
Certainly not me! And I was there for the whole thing. Thank you so much!!
Nancy B
What the hell, indeed!, absolutely amazing. You two just keep reaching for the stars, or stairs in this case. I knew they’d be lovely but had no idea what a difference in actuality.
I’ll quit gushing now, well, after one more wow. Wow!
annisa
Your reaction has given me a permanent grin!! Thank you! I, too, did not realize what a difference the new stairs would make. It’s nice to be surprised.
Teri
Wish I could “like” NancyB’s comment! WTH, FTW!
annisa
I need to see if we can add that feature! WTH, FTW, FOR SURE! Thank you, Teri.