
DIY Mission-Style Table Legs from 4x4s
We recently upgraded the legs on our kitchen table with DIY Mission-style table legs that we made from 4×4 posts of all things.
It’s amazing what you can do with a humble 4×4.
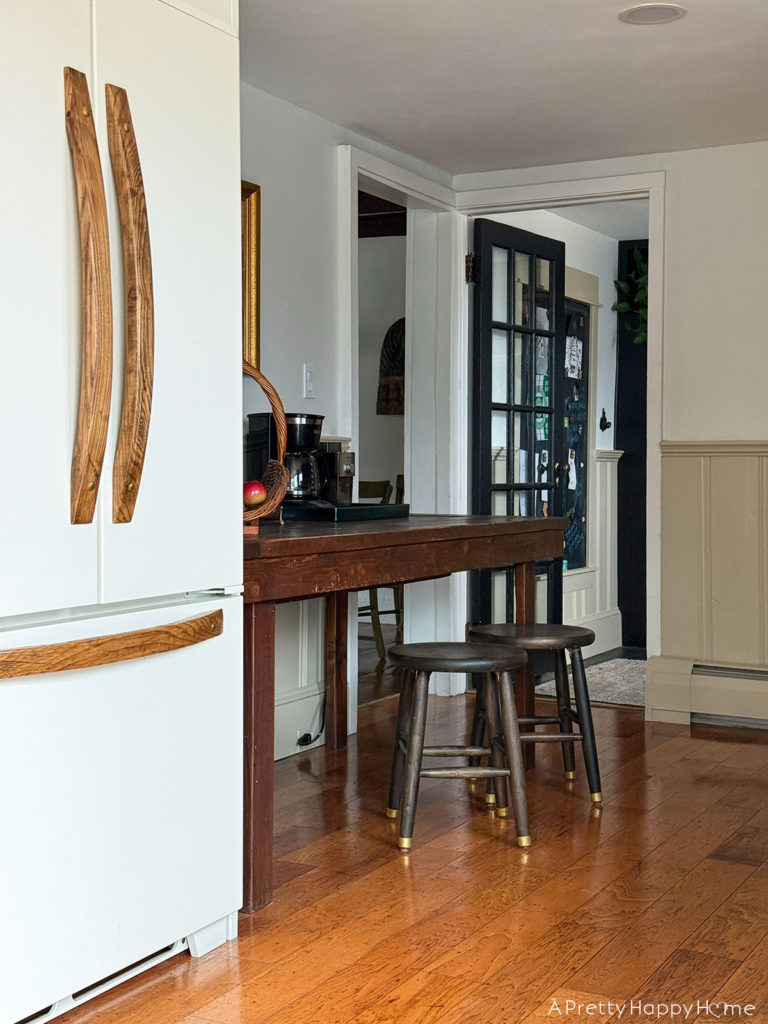
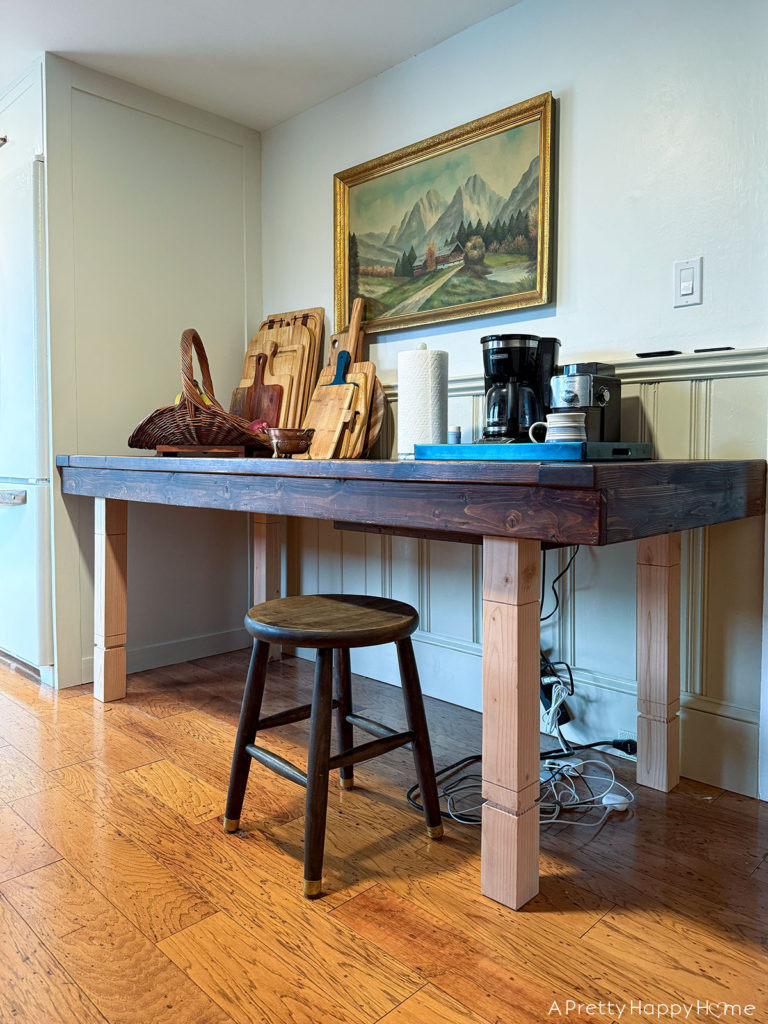
Here’s how our table started. It’s a rustic farmhouse table that we built ten years ago. The rustic part occurred naturally because it was our outdoor dining table for a few years.
The legs were made from basic 2x4s. They were perfectly fine and sturdy enough that you could dance on that table.
I assume.
However, the table legs lacked pizazz. Plus, I’d thought for years that they were a little small in relation to the rest of the table. We could do better.
Our kitchen has some elements of Shaker style, farmhouse style, and 1990s ‘try to make it fancy’ style, so why not add Mission style into the mix too?
The more the merrier. Everyone’s welcome here.
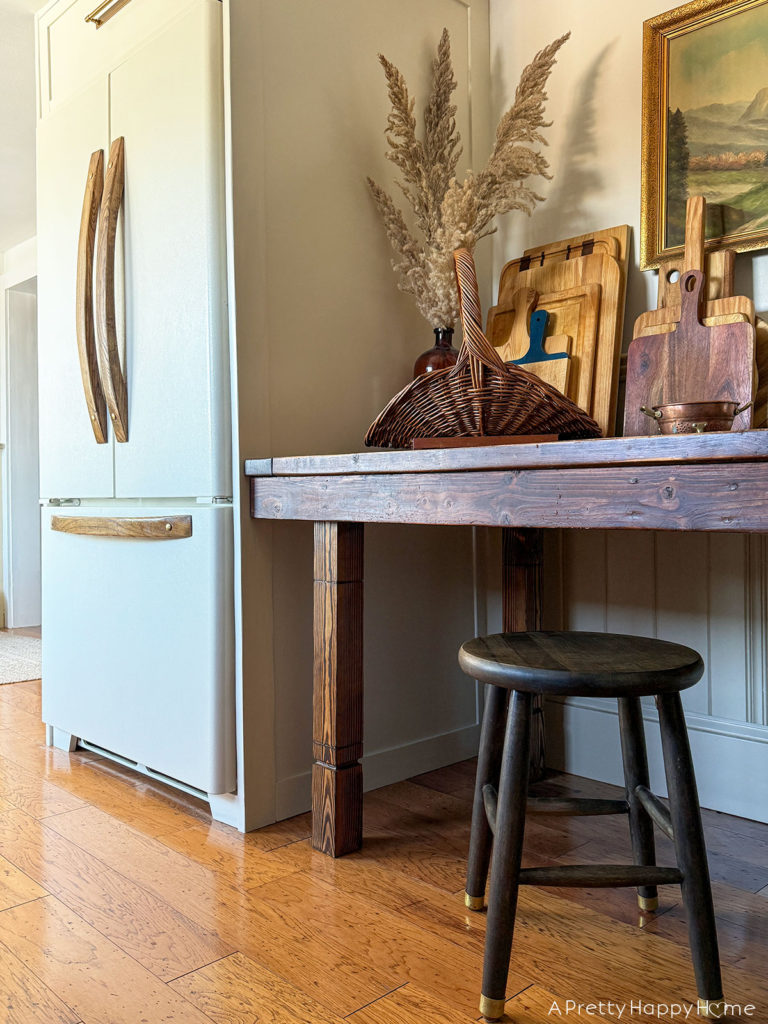
Mission-style furniture is characterized by straight horizontal or vertical lines. You might think of words like chunky or sturdy when thinking of Mission-style furniture, but Vermont Wood Studios describes it best.
“Mission-style furniture represents the ideals of simplicity of design, integrity of construction, and truth to the materials. Joints are often exposed and the natural characteristics of the wood are emphasized with flat paneling and finishes that accentuate the grain.”
So, that’s what we set out to create.
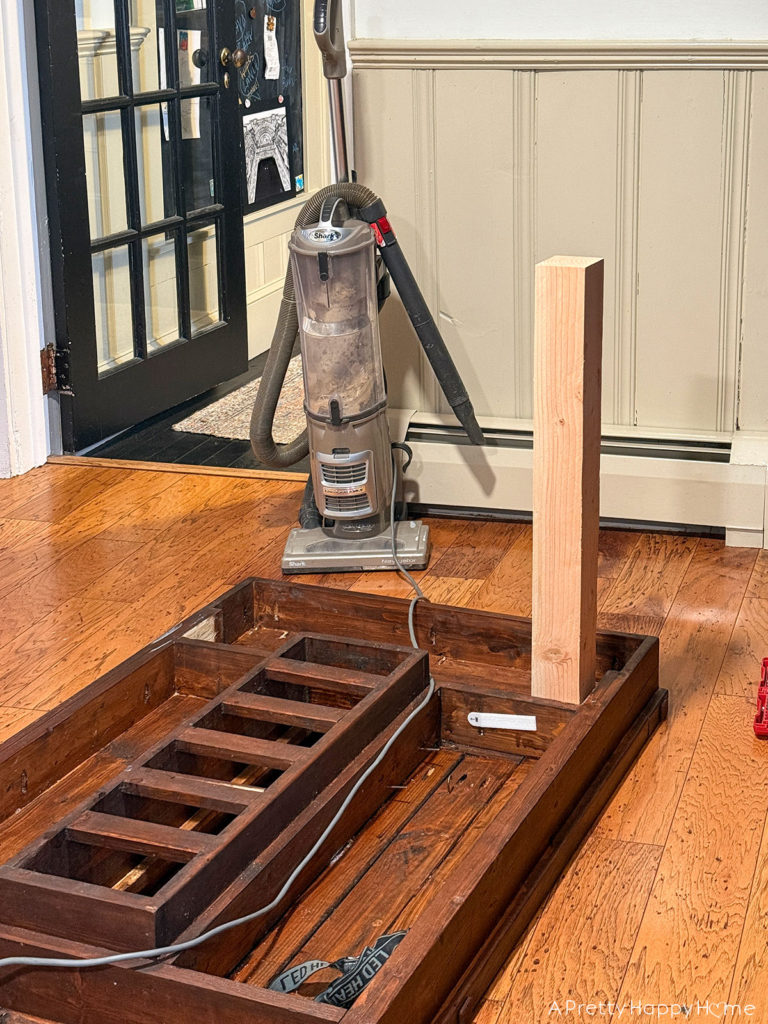
We cut the 4×4 posts down to 29 1/4 inches tall.
Then we shaved a little off the sides so that they were 3 inches square.
We did this for two reasons. First, the proportions felt better at 3 inches all the way around. Second, these were rough 4x4s, so we could cut the worst imperfections off the posts.
Then it was time to make the magic happen!
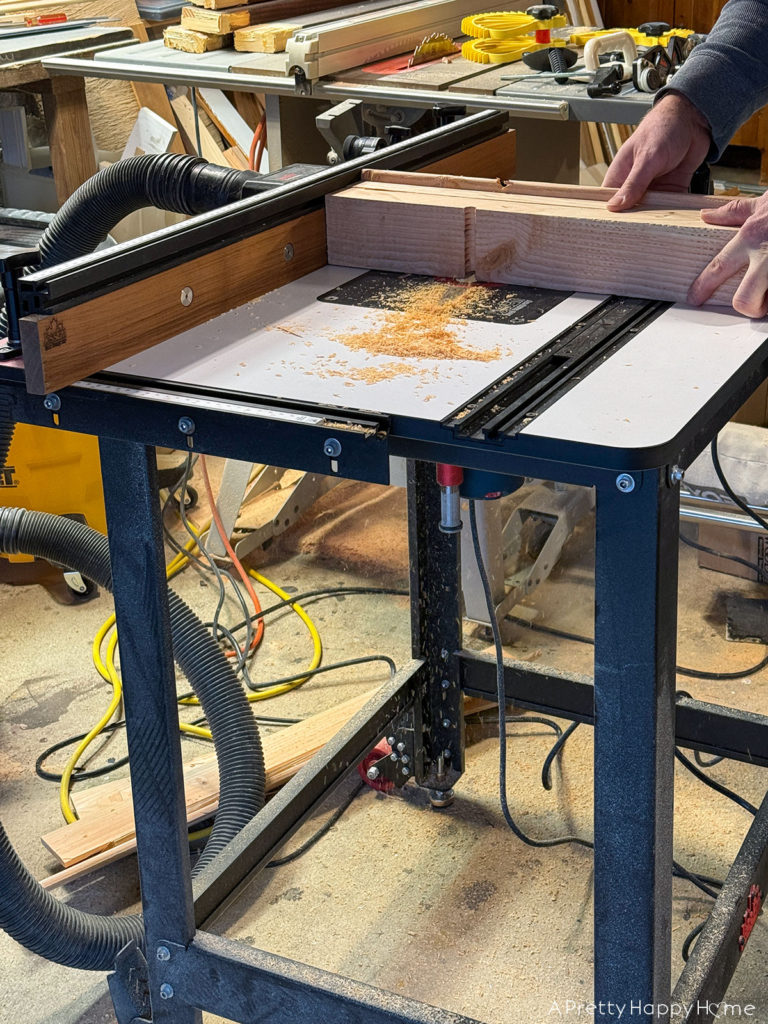
We used a round-over bit on our router to make a groove approximately 7 1/4 inches from the bottom of the leg.
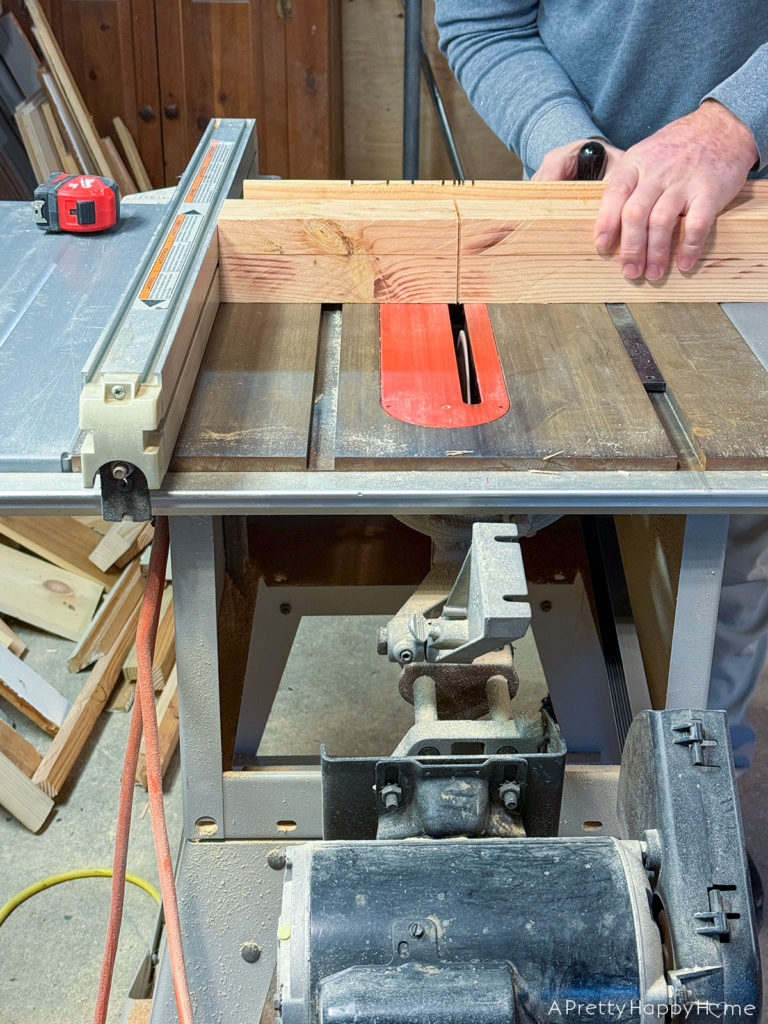
Then we used our table saw to just barely cut into the table leg at the 8 1/2-inch mark on both ends.
Each of these cuts was made on each side of the table leg.
Once we had the router and table saw set up, it only took a few minutes to add these detailed cuts to each table leg.
The longest part of the entire process was sanding the table legs.
This is a rustic table and I didn’t want it to be obvious that the legs were brand new, so we didn’t need to sand all of the character out…just enough to make it fairly smooth to the touch.
“Just enough” still took well over an hour though!
I applied two coats of Rustoleum’s honey-colored stain to the table legs.
I sealed the legs with two coats of Waterlox. Waterlox is a tung oil product and my favorite way to seal stained wood. It’s so easy to apply with a rag – much easier than polyurethane. You can build it up over time without needing to strip the finish. The only downsides are it stinks and you’re supposed to wait 24 hours in between coats.
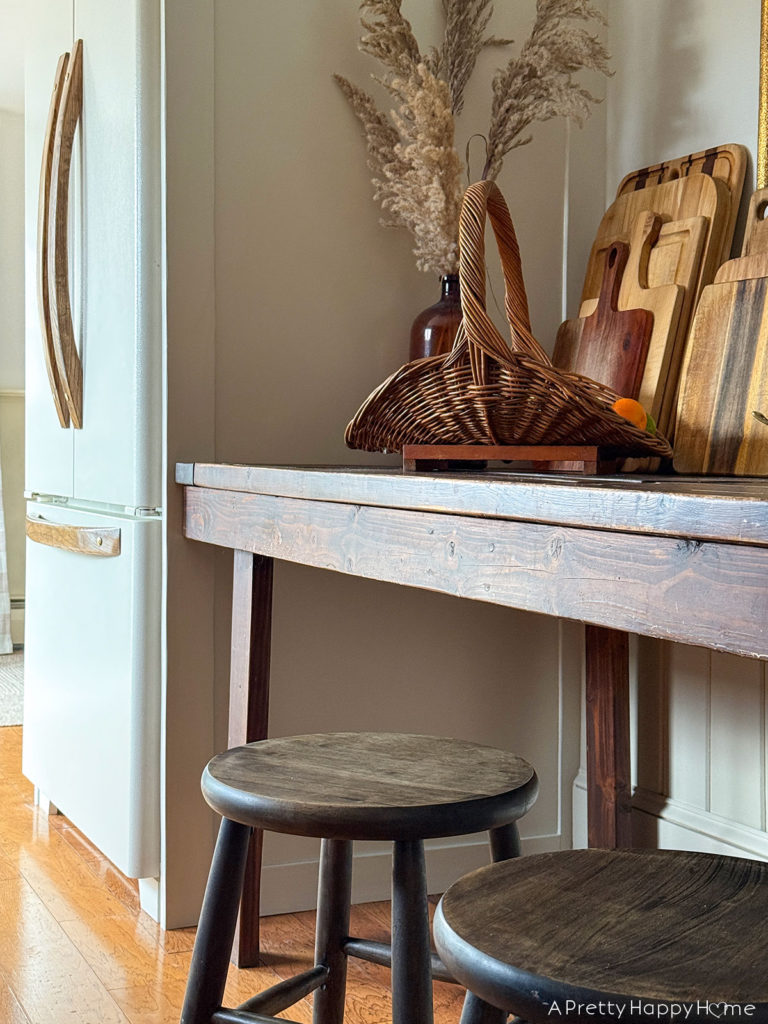
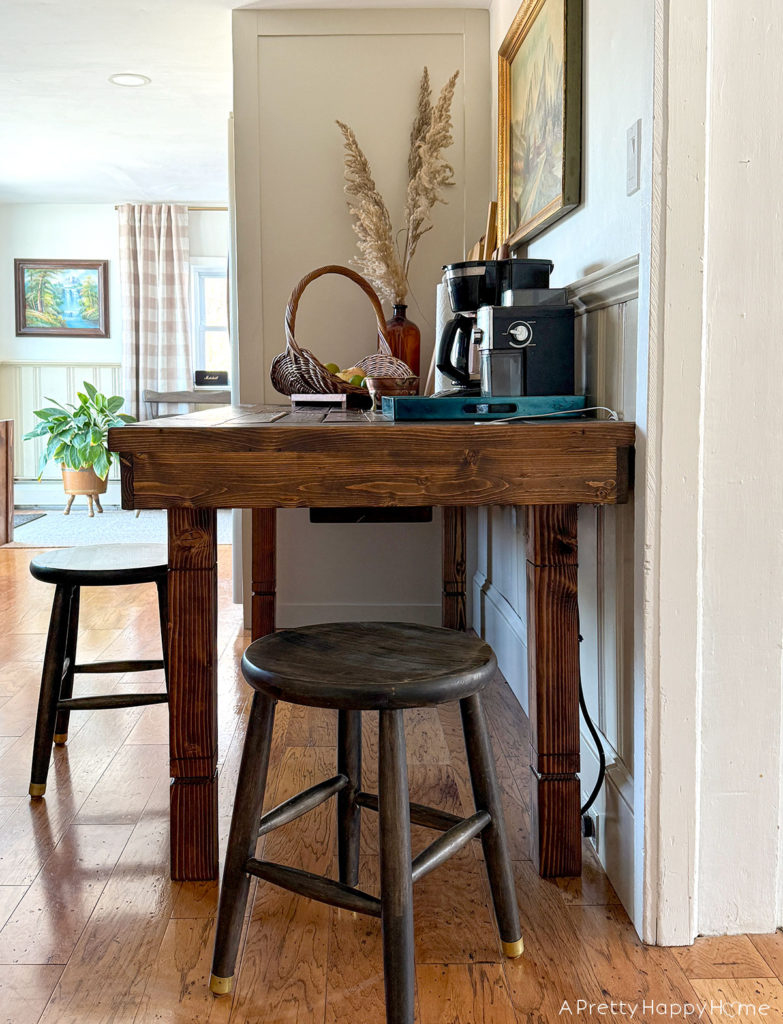
Anyway, enough about my crush on Waterlox, here’s how the table looks now!
As a reminder, here is the table with the 2×4 legs.
The 2x4s are half an inch wider on the front, but half the size on the sides compared to the new legs.
Someday we might have a lathe so that we can experiment with making curvy table legs, but I’m pretty pleased with what we created using the tools we had on hand.
Those straight cuts with the table saw made all the difference.

This ended up being a budget project too!
We bought two eight-foot 4×4 posts for this project, which cost approximately $25.
Of course, we already owned the tools and stain to make the legs, but if you factor that out, we saved ourselves hundreds of dollars by making these Mission-style table legs ourselves.
It’s rare that we can make anything new for 25 bucks these days.
What do you think of our new Mission-style table legs? Do you think it was worth the effort? Do you have questions about how we made the legs?
Let me know. You can always comment on this blog post, email me here, or reach out via Instagram or Facebook.
Happy DIYing!
Did You Know?
The start of Mission-style furniture in the U.S. is credited to New England furniture craftsman Joseph McHugh. He was inspired by a chair he saw in a church in San Francisco in the 1890s. Missionaries from Spain had settled in Northern California, so the name comes from that but doesn’t have much to do with their culture or religion. Learn more about McHugh and the origins of Mission-style furniture here.
Room Sources:
Wall Color: Behr Arcade White in satin
Trim Color: Behr Bit of Sugar in semi-gloss
Wainscoting Color: Behr Khaki Shade in semi-gloss
Cabinet Color: Behr Confident White in semi-gloss (cabinet enamel paint)
Brass Cabinet Pull: Amazon
Braided Rug: NuLoom
Wood Stools: Amazon (unfinished)
Table: Handmade by Handy Husband
Fridge: Oldie but a goodie and tricked out by us
Curtains: Amazon
Gold Curtain Rod: Amazon
Art: Thrifted
Cutting Boards and Table Decor: Thrifted
Thank you for reading today’s blog post! I love sharing ideas with you. Here are some other blog posts you might enjoy.
The Inexpensive Way I Added Brass Feet To The Stools In Our Kitchen
Wood Deacon’s Bench Makeover and a Tip For Disassembling a Bench
DIY Charging Bench For Electronic Devices
*affiliate links in this blog post*


2 Comments
Pamela
Lovely upgrade!
annisa
Thank you, Pamela!!