How To Leaf Stamp On Wood
Get ready because I’m going to show you how to leaf stamp on wood. It’s an easy craft that looks like a million bucks when you’re done. Plus, it’s a lot of fun!
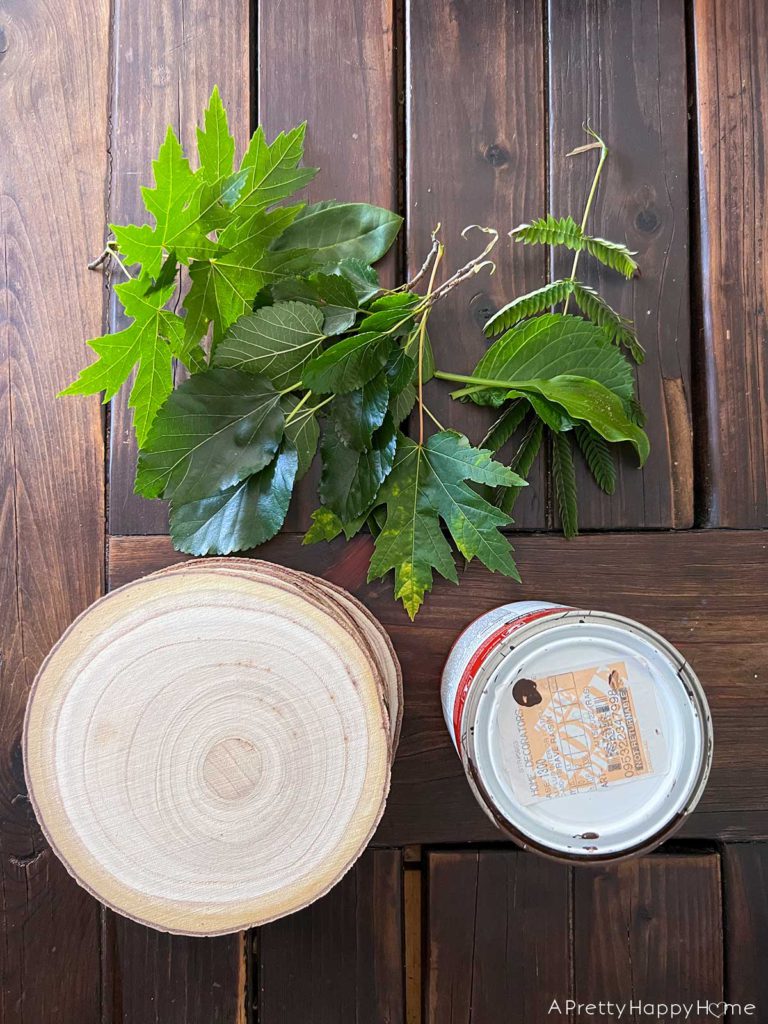
You really only need 3 basic things to leaf stamp on wood: paint, leaves, and a flat piece of wood. Two of those things you probably already have: leaves and paint.
Let’s get started!
Supplies Needed:
Leaves (You’ll need freshly picked leaves that lie flat.)
Wood rounds (Mine are 7-8 inches in diameter and come in an 8-pack.)
Paint (I used house paint, but almost any type of paint like craft paint will work.)
Ribbon
Staple gun or thumbtacks
Something flat to press your leaf down (Small cutting board, cardboard, etc.)
Optional: 220-grit sandpaper
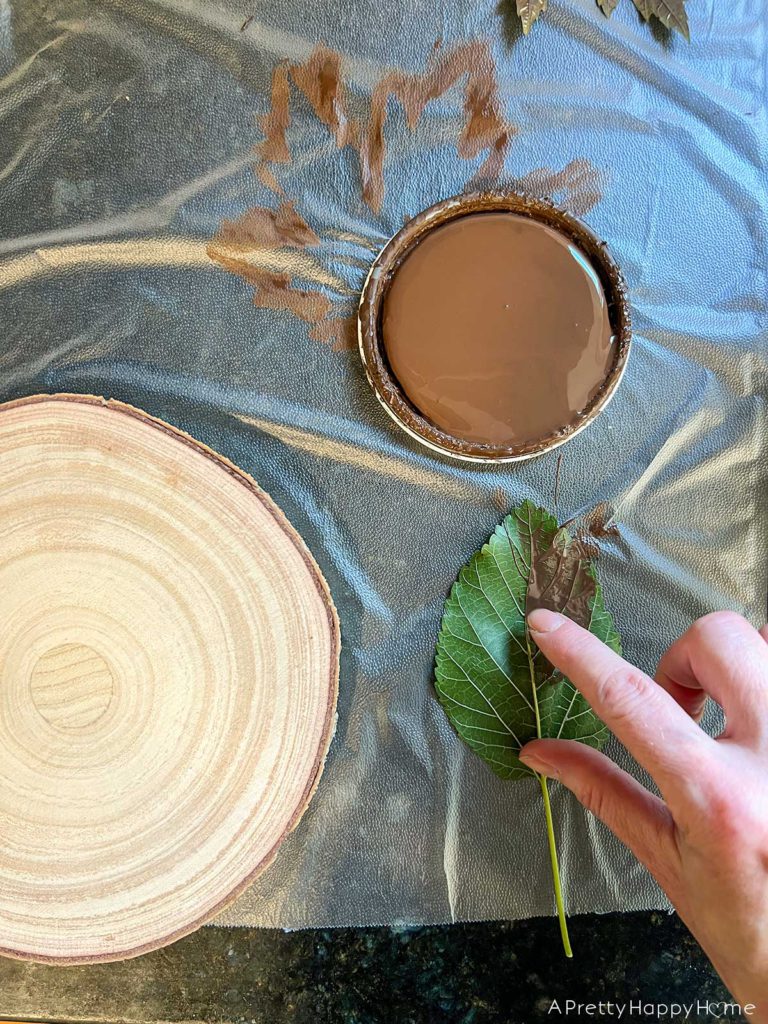
Optional: Something to protect your work surface. I used Press’n Seal wrap because it grips my counter but a drop cloth, newspaper, or parchment paper would work too.
How To Leaf Stamp On Wood Step 1: Prep The Wood Rounds
If you run your hand over your wood round and it feels a tiny bit rough or like it has a little texture to it, then I recommend that you sand it smooth.
20-30 seconds of sanding with your sander and 220-grit sandpaper will make those wood rounds butter smooth and should help you achieve a better leaf stamp.
You could also hand sand it. If you’re using the same wood rounds I did, I’d guess it would only take a minute or two to sand them smooth by hand with 220-grit sandpaper.
How To Leaf Stamp On Wood Step 2: Select Your Leaves
You’ll need freshly picked leaves for this craft. When you forage your yard or houseplants for leaves to stamp on wood, look for leaves that will be the right size and scale to fit on your wood rounds.
You can also combine multiple smaller leaves on the wood round. Just stamp them one at a time.
Additionally, it is easiest to work with leaves that lie flat and don’t have a ton of tiny detail. Ferns and geraniums did not work well for me.
How To Leaf Stamp On Wood Step 3: Paint Your Leaf
Now it’s time to paint your first leaf. You’ll be painting the underside of the leaf because that’s where all the detail is.
You can use a paintbrush, but I had better results (Yes, I tested it) if I smoothed the paint on the leaf with my finger. It allowed me to control how much paint I was putting on the leaf and how evenly it was applied.
Just let your inner child come out and do a little fingerpainting.
Don’t forget to paint the stem.
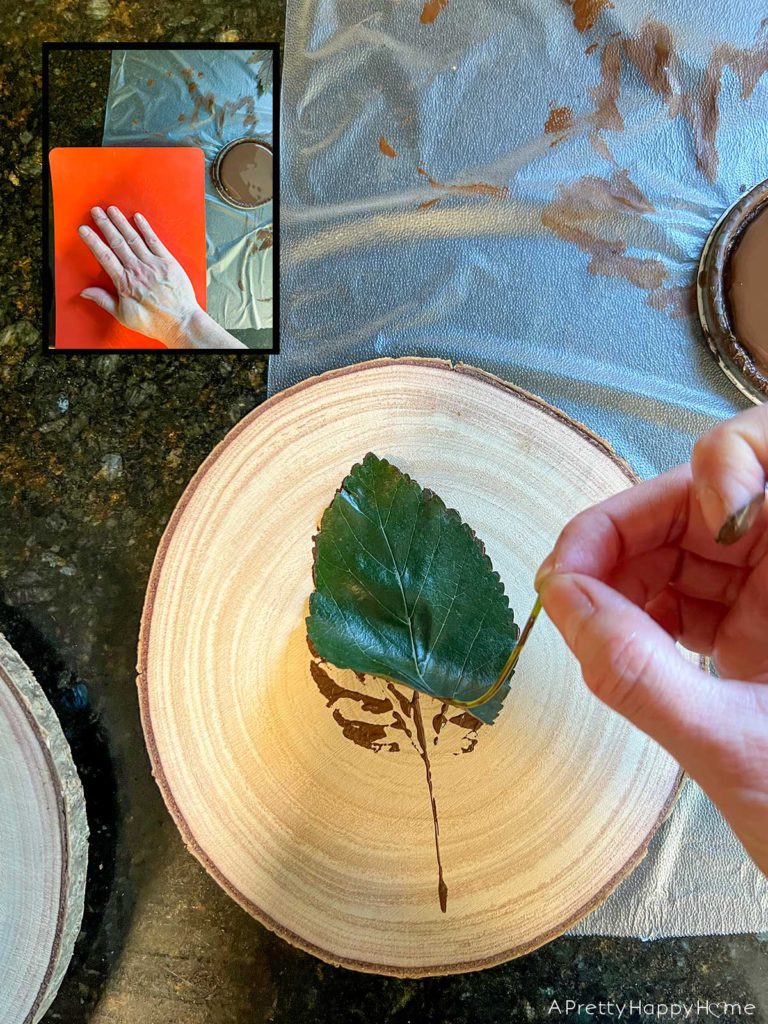
How To Leaf Stamp On Wood Step 4: Press The Leaf
Once your leaf is painted, carefully pick it up and place it, paint side down, on your wood round.
You only get one shot at this. No pressure. Ha!
(Actually, if you mess up, the worst thing that happens is you flip the wood round over and use the other side. Consider this first one a practice round. You can also do a practice on a piece of paper or a scrap piece of wood to get the hang of it.)
Immediately put whatever you are using to press the leaf (cutting board, cardboard, etc.) directly on top of the leaf. Hold it securely in place with one hand and use your other hand to press over where the leaf is sitting.
You don’t need to go overboard. You’re just trying to make sure all the parts of the leaf have come in even contact with the wood round.
Carefully peel the leaf off the wood round and pat yourself on the back.
You just successfully made a leaf stamp on wood. Go you!
I chose to NOT seal my wood rounds, but you could always add polyurethane or a clear coat of some sort over the top if you wanted to seal them up.
You could also “age” the look of the wood rounds by applying a very light stain or finishing oil. I’d test this first though to make sure whatever you use doesn’t obscure the stamp.
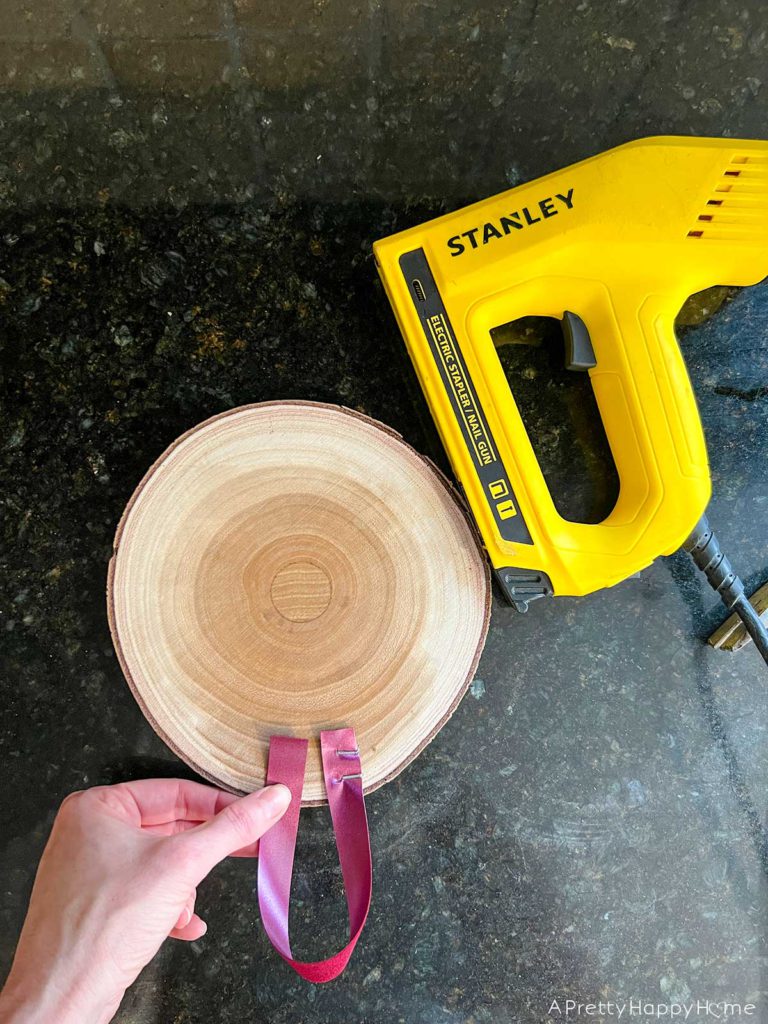
How To Leaf Stamp On Wood Step 5: Add A Ribbon
If you want to hang your leaf rounds, you’ll need to add a hanger of some sort. I chose to add a ribbon by stapling it to the back of the leaf round with my staple gun.
If you don’t have a staple gun, you could secure a ribbon with a couple of thumbtacks. You may need to lightly tap the thumbtack with a hammer to get it fully in the wood round though.
If ribbons aren’t your thing you could add a sawtooth picture hanger on the back. Keep in mind this will move your wood round out from the wall a little when you hang it.
Just make sure the paint is dry before you tackle this step!
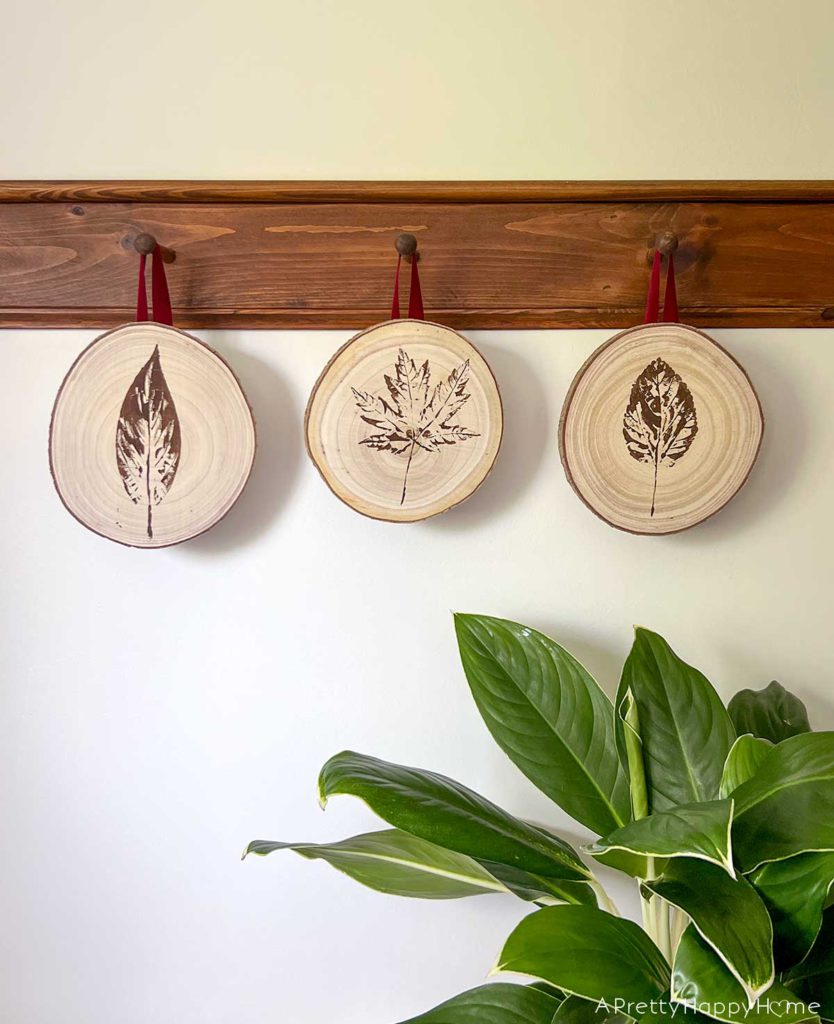
The only thing left to do is decide where you want to hang your leaf-stamped wood rounds!
You could group them together on a wall or hang them above your fireplace mantel.
If you use small wood rounds that are 3-4 inches in diameter you could turn them into coasters. Wouldn’t that be cute?
What do you think of my wood rounds? Is this a fall craft that you’d try?
I’d love to know. You can always comment on this blog post, email us here, or reach out via Instagram or Facebook.
Happy crafting!
Thanks for being here today! I love sharing ideas with you. Here are some other blog posts you might enjoy.
Leather-Wrapped Rock Paperweight
Halloween Cauldron Centerpiece Using a Real Cauldron
*affiliate links in this blog post*