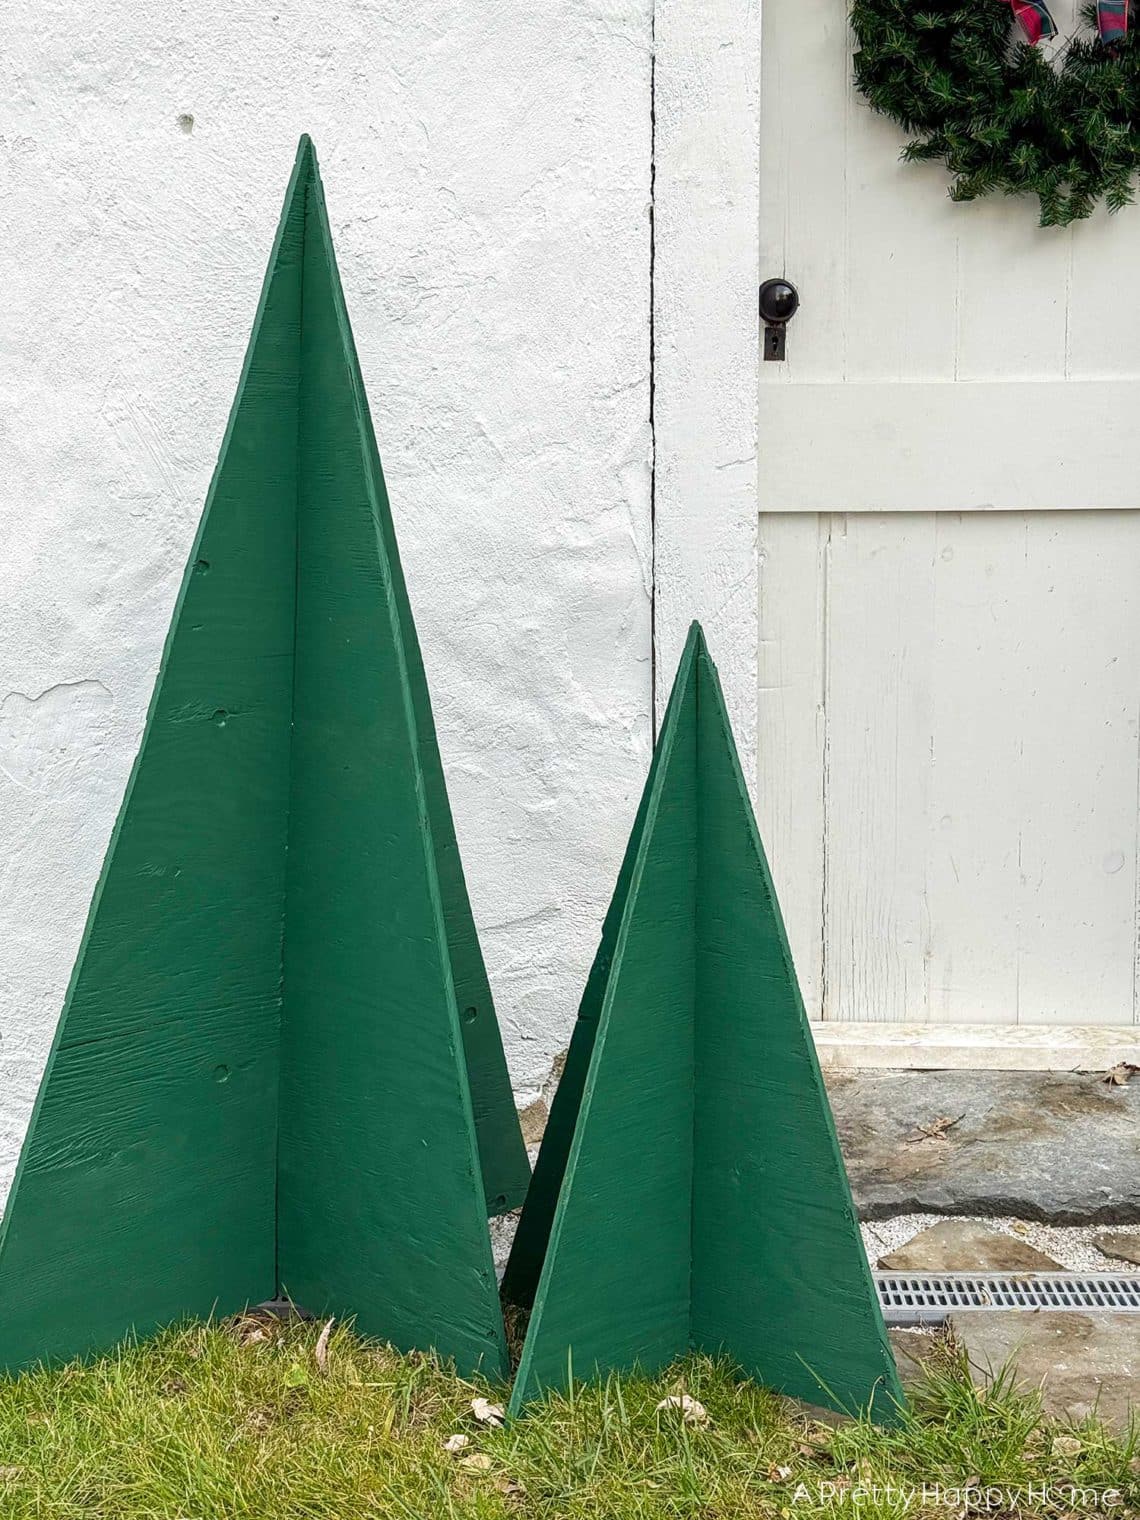
DIY Giant Plywood Christmas Trees
Decorating for the holidays? The thing your front porch is missing is giant plywood Christmas trees. They can be painted any color, made in most any size, and can fold flat for storage. That’s it. That’s my pitch. Blog post complete. Kidding! You know I’m chattier than that. To make giant plywood Christmas trees, you need to cut two isosceles triangles out of plywood. I might have had to Google how to spell isosceles, but I do know from high school that it’s a triangle with two equal sides and two equal angles. We used rough plywood, not finish-grade plywood, because no one is examining these trees up close. I…
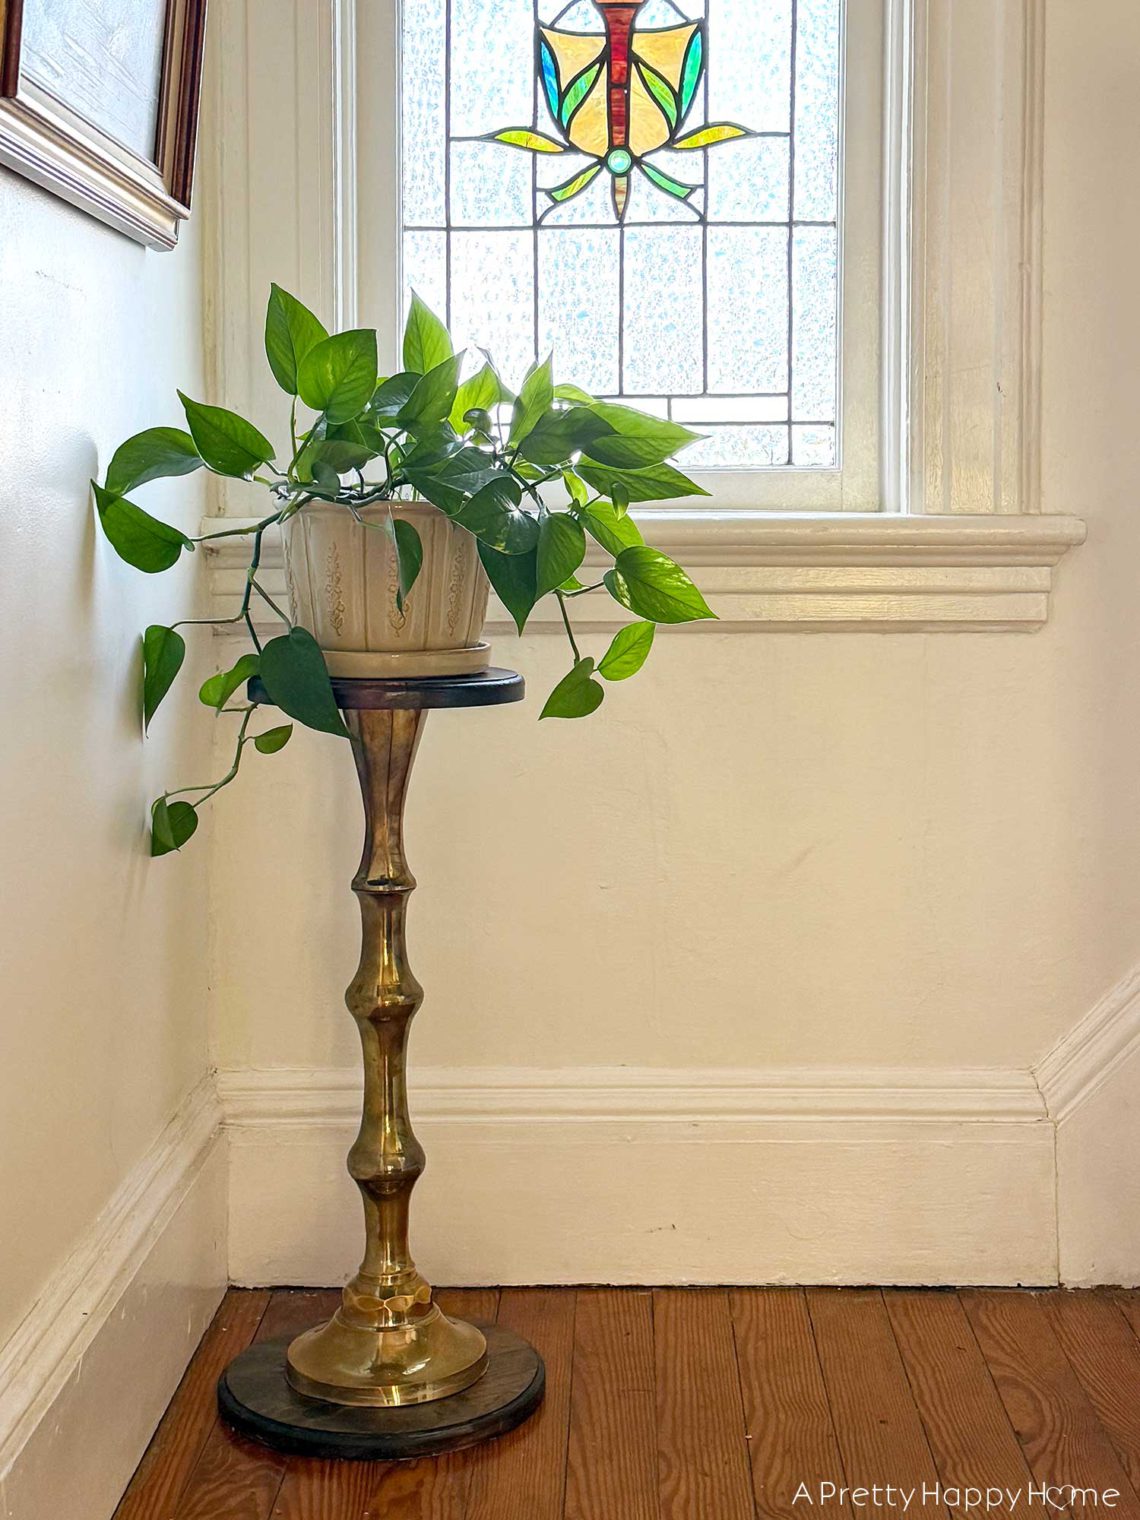
Upcycled Plant Stand From a Lamp Base
The thrift store gods smiled down on me favorably the day I spotted a $9 brass thingy-ma-bob on an overpacked, dusty thrift store shelf. It looked a bit like a giant brass candlestick. Maybe a lamp base. Probably was a lamp base. Although it could have been part of a table, for all I know. What I did know was that I was not going to waste this precious gift. Without a moment’s hesitation, I grabbed that brass thingy-ma-bob off the shelf and walked nonchalantly away. We all know you have to act quickly before someone else notices what you’ve noticed and swipes it out from under you. All’s fair…
Mini Kitchen Makeover After 5 Years – How Has It Held Up?
Home makeovers are fun, but what I really want to know is how your makeover has held up over the years. That’s why I’m sharing how our mini kitchen makeover is holding up after 5 years of extreme use. It’s five and a half years, technically speaking, but that’s not as catchy. When I say extreme use, I mean this kitchen is put through the wringer. We rarely eat out. We work from home. We were holed up in this house during a pandemic. We’re still holed up in this house because we like it here. We do a lot of DIY projects, so we’re always tracking dirt in and…
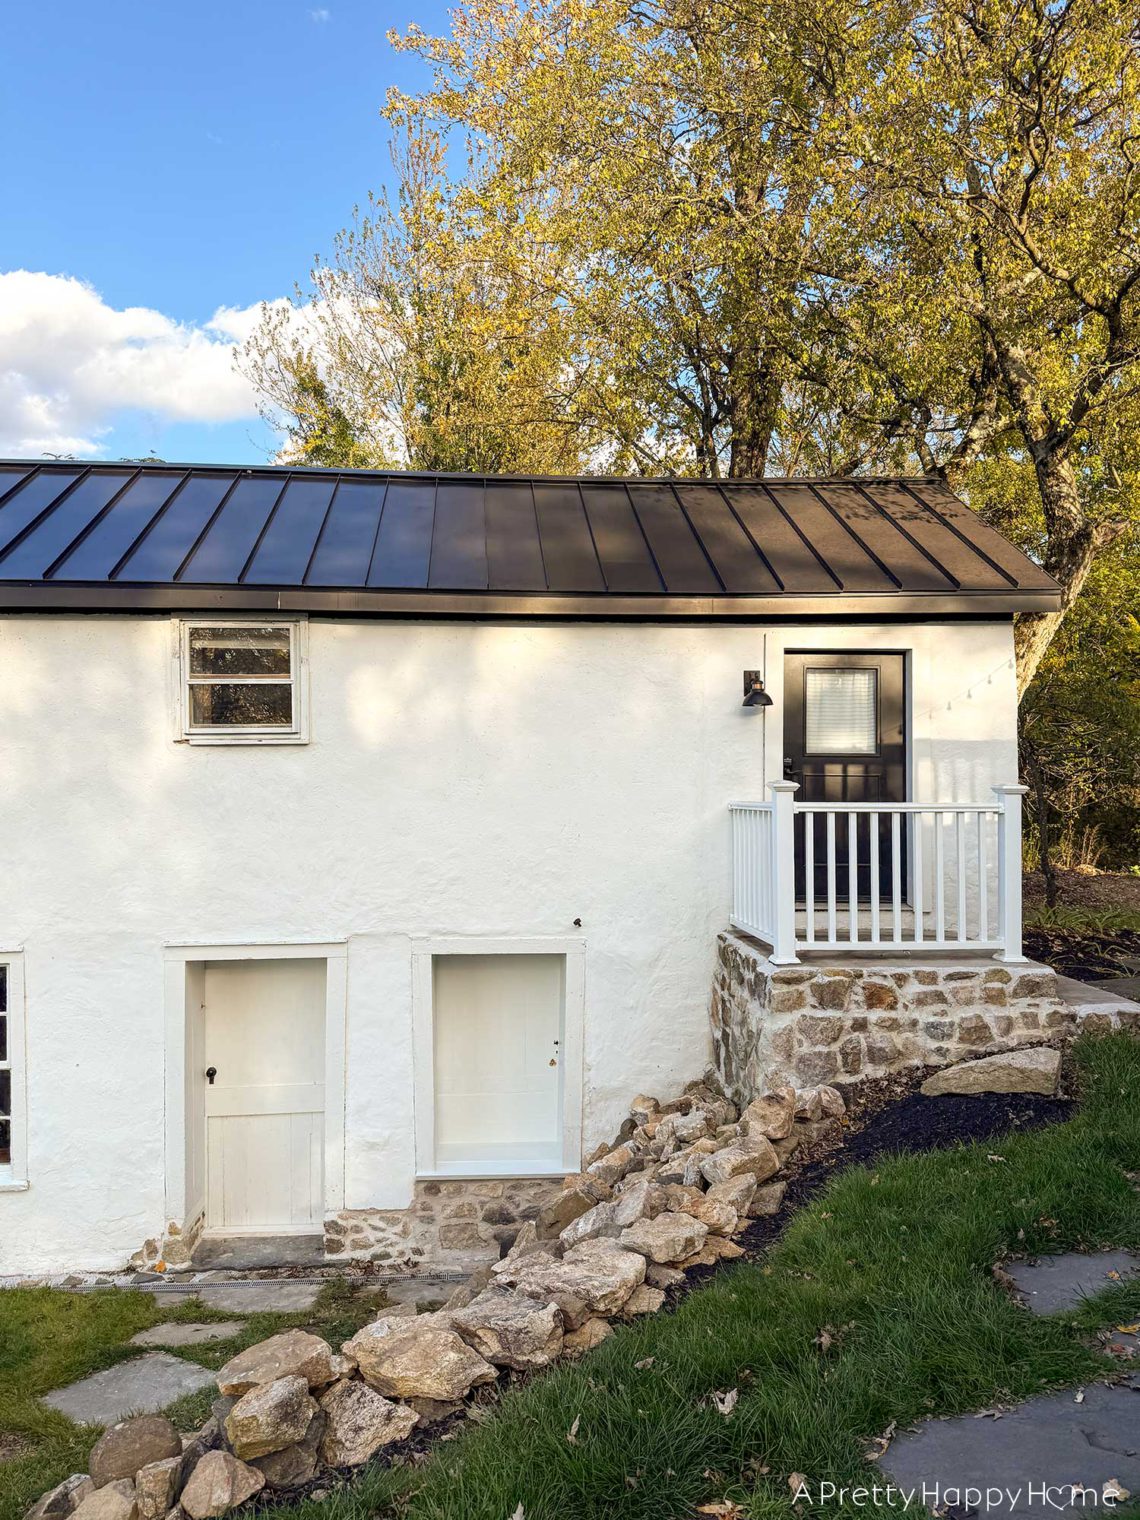
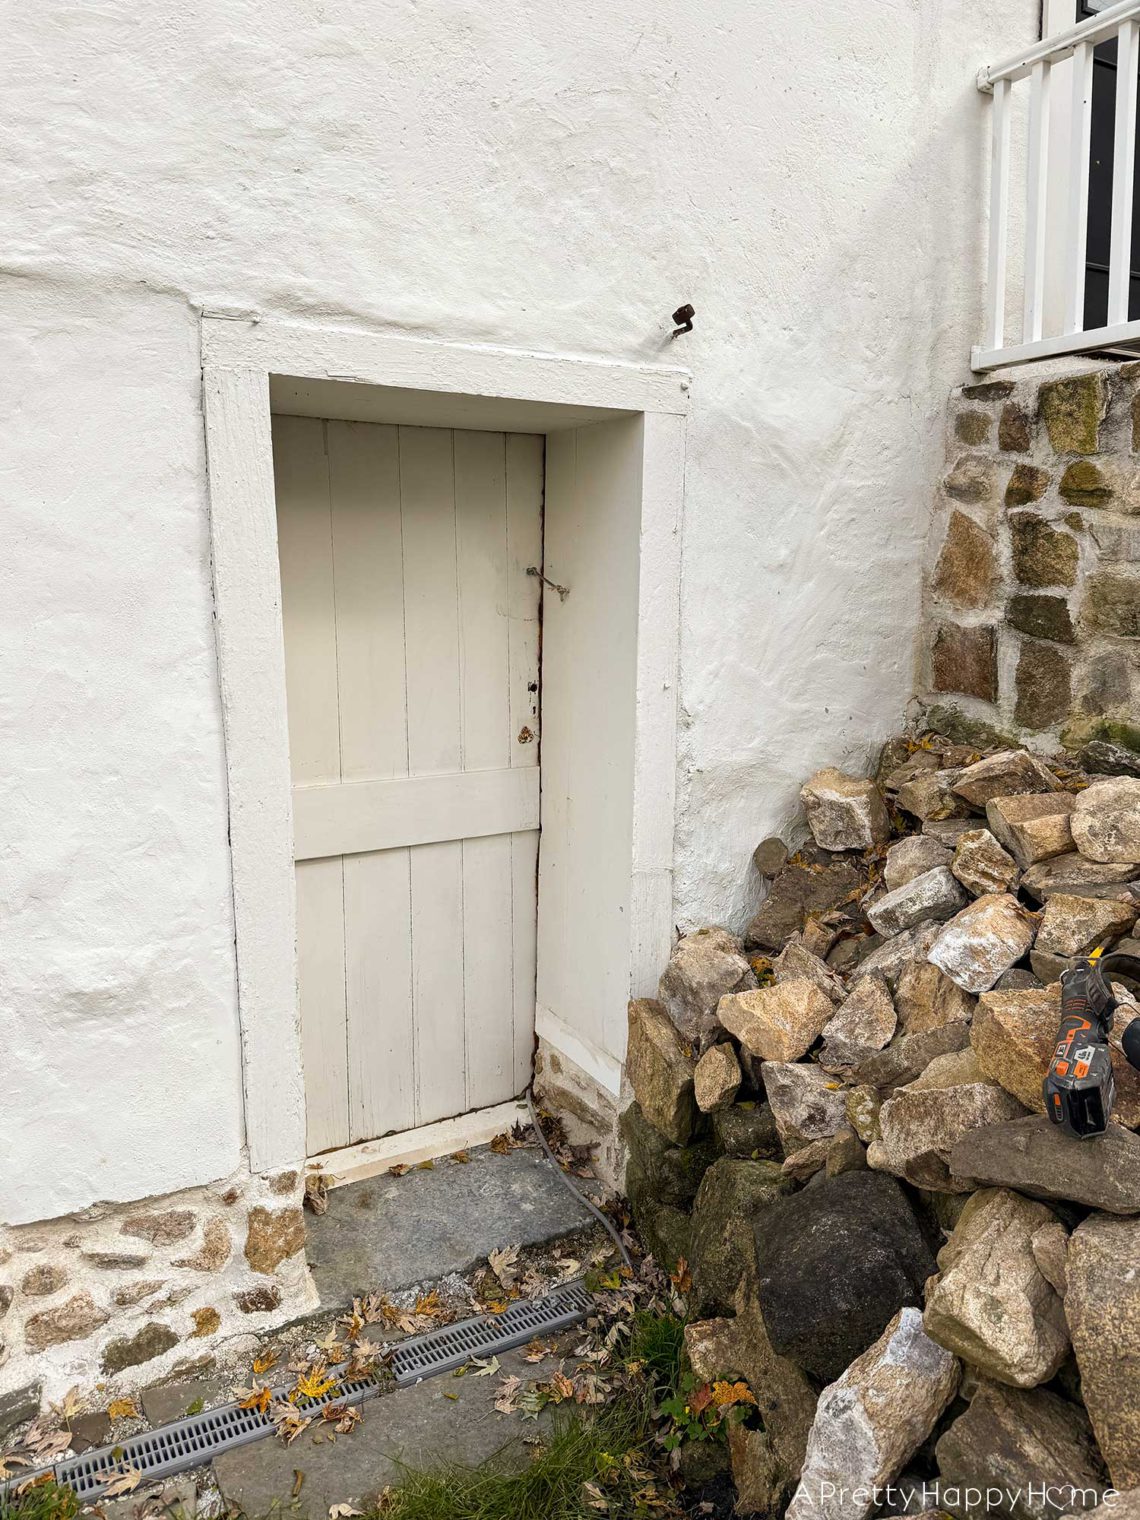
Converting a Door Into a Window In a Stone Building, Part 2
Today, I’m continuing the story of how we’re converting a door into a window in a stone building, our Carriage House. You can catch up on part one, which includes why we are doing this, here. When we last left off, we had removed the lower half of the Dutch door in this space, removed the bottom part of the door jamb, and added a window sill. It might seem like a backwards way of doing things, adding a window sill before we have window framing or even the window, and it is for sure. However, this order of operations was selected for a reason. We need to fill in…
Converting a Door Into a Window In a Stone Building, Part 1
We are converting a door into a window in a stone building, our Carriage House. Want to see how that’s going to work? If so, you came to the right place. If you want to know why we’re doing this conversion, you also came to the right place. All signs are pointing to you being exactly where you need to be at this moment. Lucky you! Multiple entrances to a building are usually a good thing. Multiple entrances to a building are unnecessary if they are 18 inches apart and open into the same room. It would be like having two front doors, and that’s exactly what is happening with…
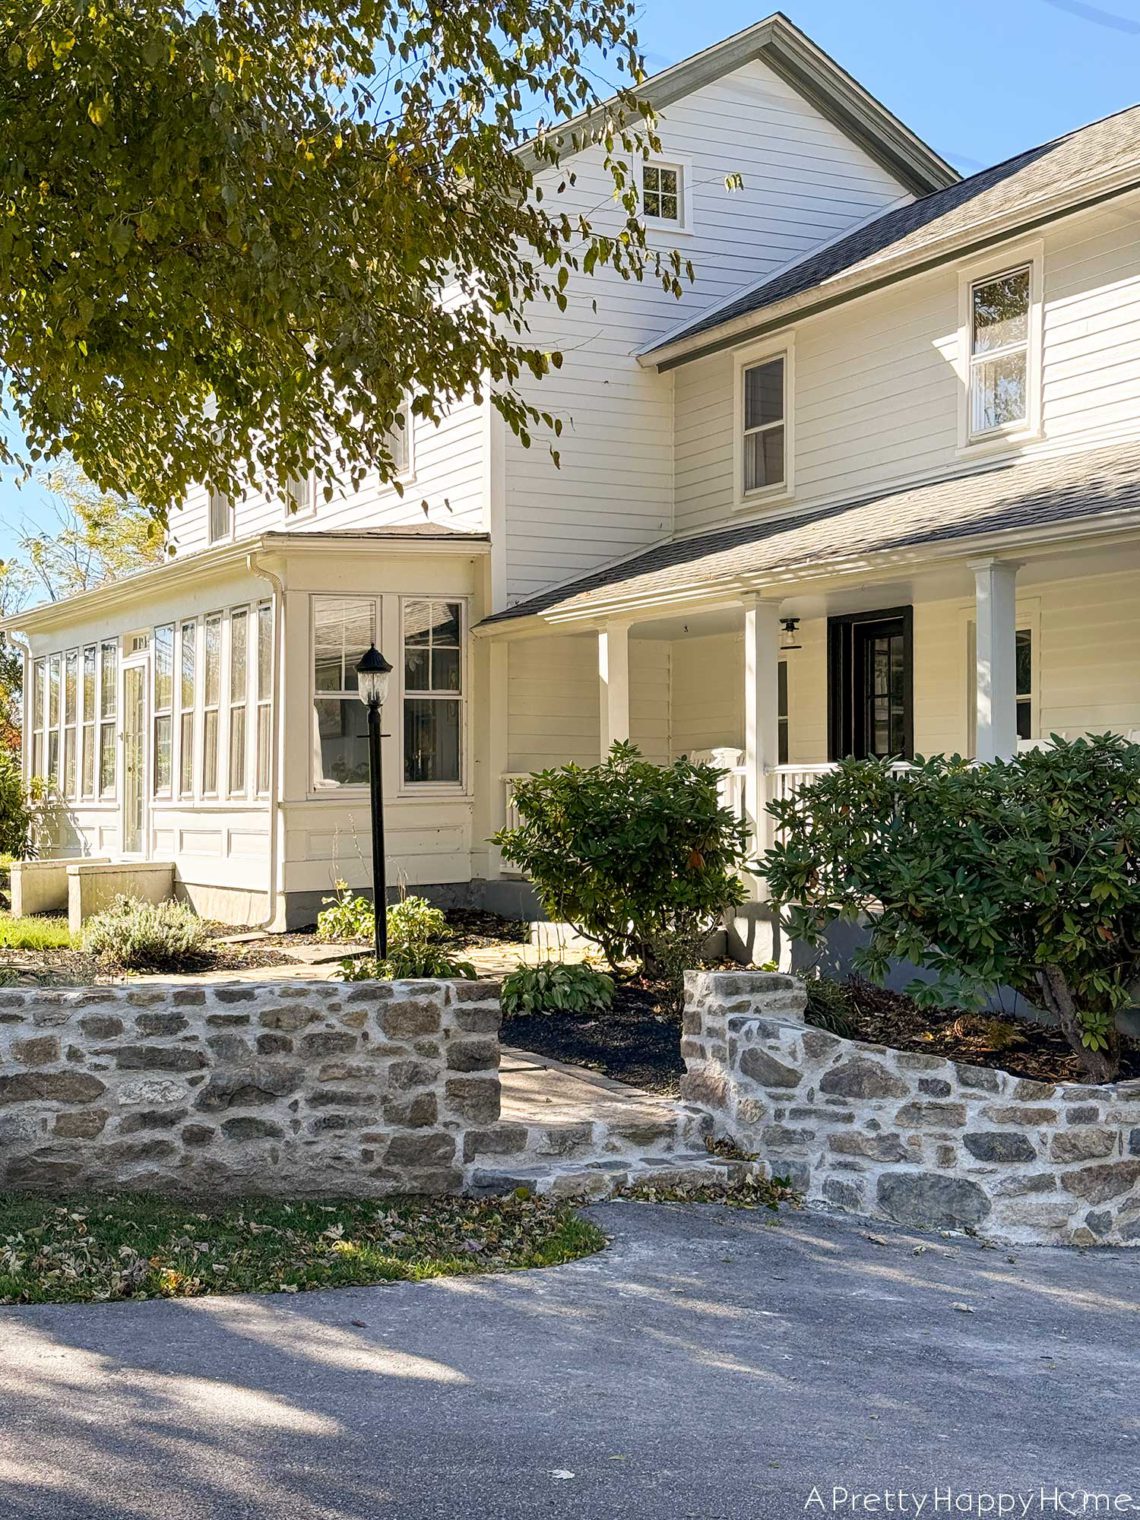
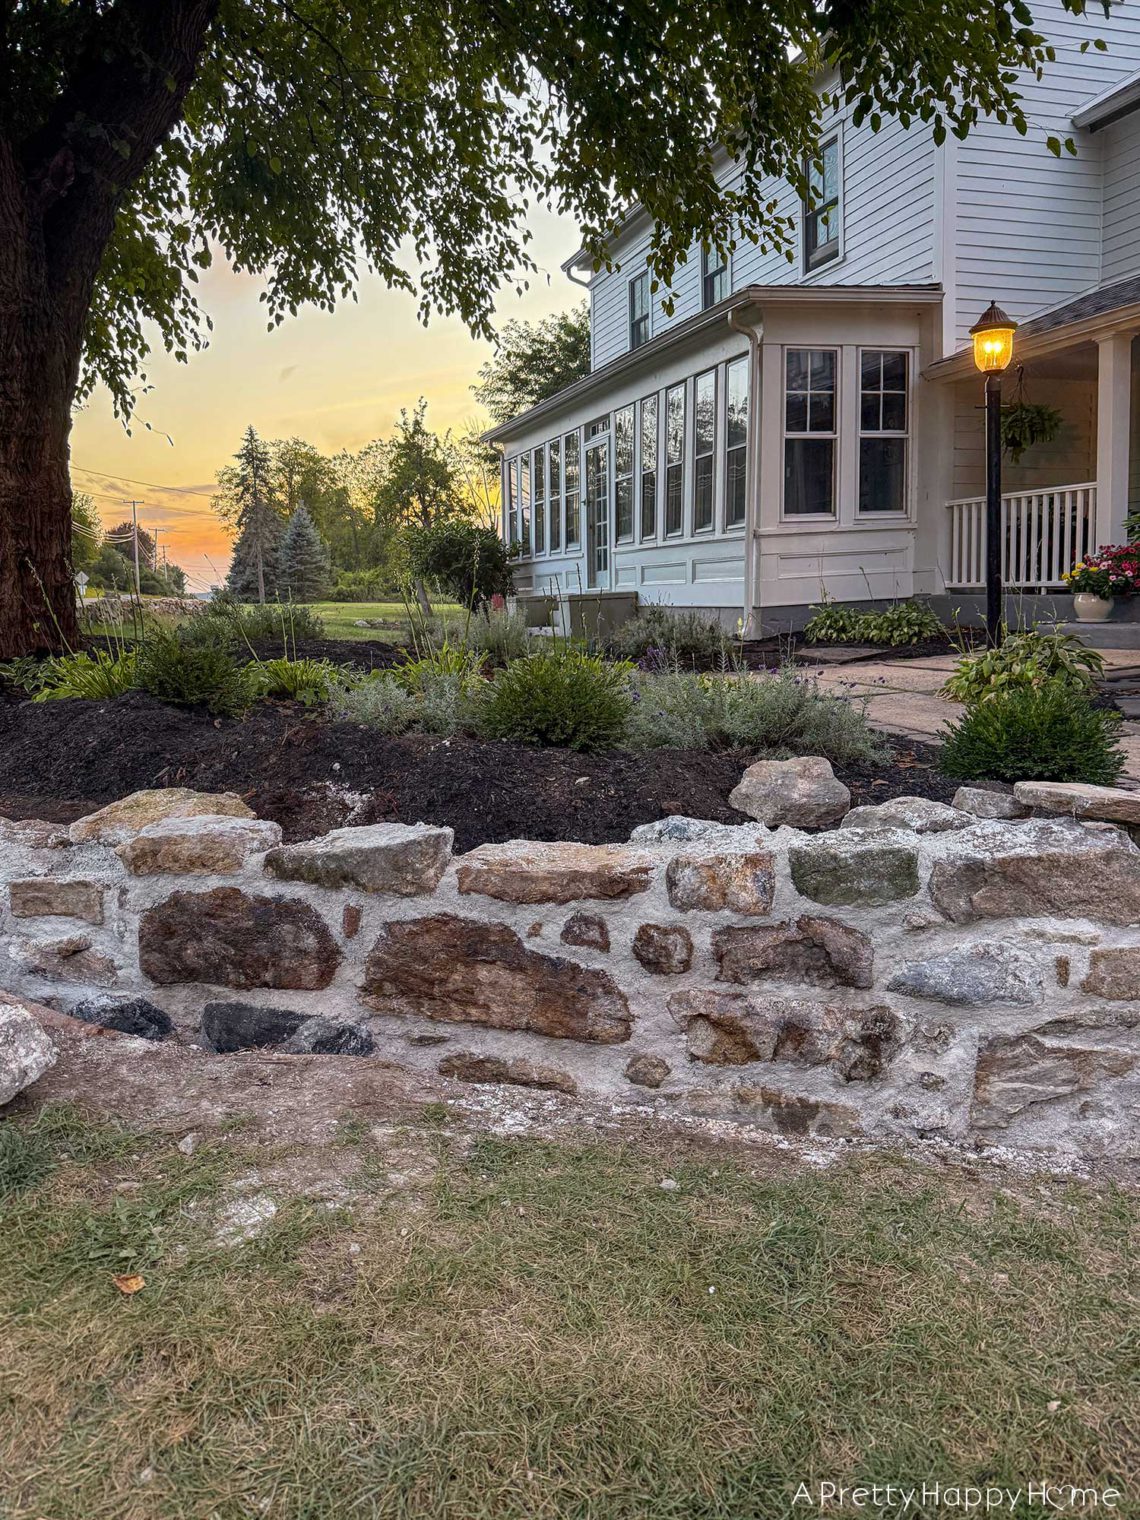
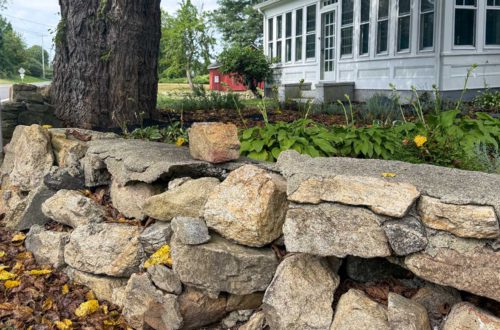
Curved Fieldstone Wall: Part 12, Reveal 2nd Wall Section
It’s Reveal Day! Welcome back to our Curved Fieldstone Wall series. I’m so glad you’re here. In August, we decided to reconstruct the crumbling fieldstone walls in front of our house. We reused the original stone to build the new wall. We used lime mortar to keep it historically accurate. We added a little flair to the wall design to call it our own. After 75 days of solid work, we can finally call this fieldstone wall complete. Thank. Goodness. Here’s how it started. The wall definitely exuded a certain old house charm if you didn’t look too closely to see that it was barely hanging on. This wall was…
Curved Fieldstone Wall: Part 11, 2nd Section Swoop
Welcome back to our Curved Fieldstone Wall Series, where we attempt to rebuild the curved fieldstone walls in our front yard using historic masonry techniques. This is part eleven of a twelve-part series, which is your not-so-subtle hint that we are almost done with this project! I don’t know whether to cheer with joy or weep with relief. Maybe both? If you’ve been following along for this entire series, thank you! If you haven’t and want to catch up, I’ve linked the entire series at the end of this post. Today, we are discussing the swoop. If that wasn’t a technical term, it is now. The original curved fieldstone wall…
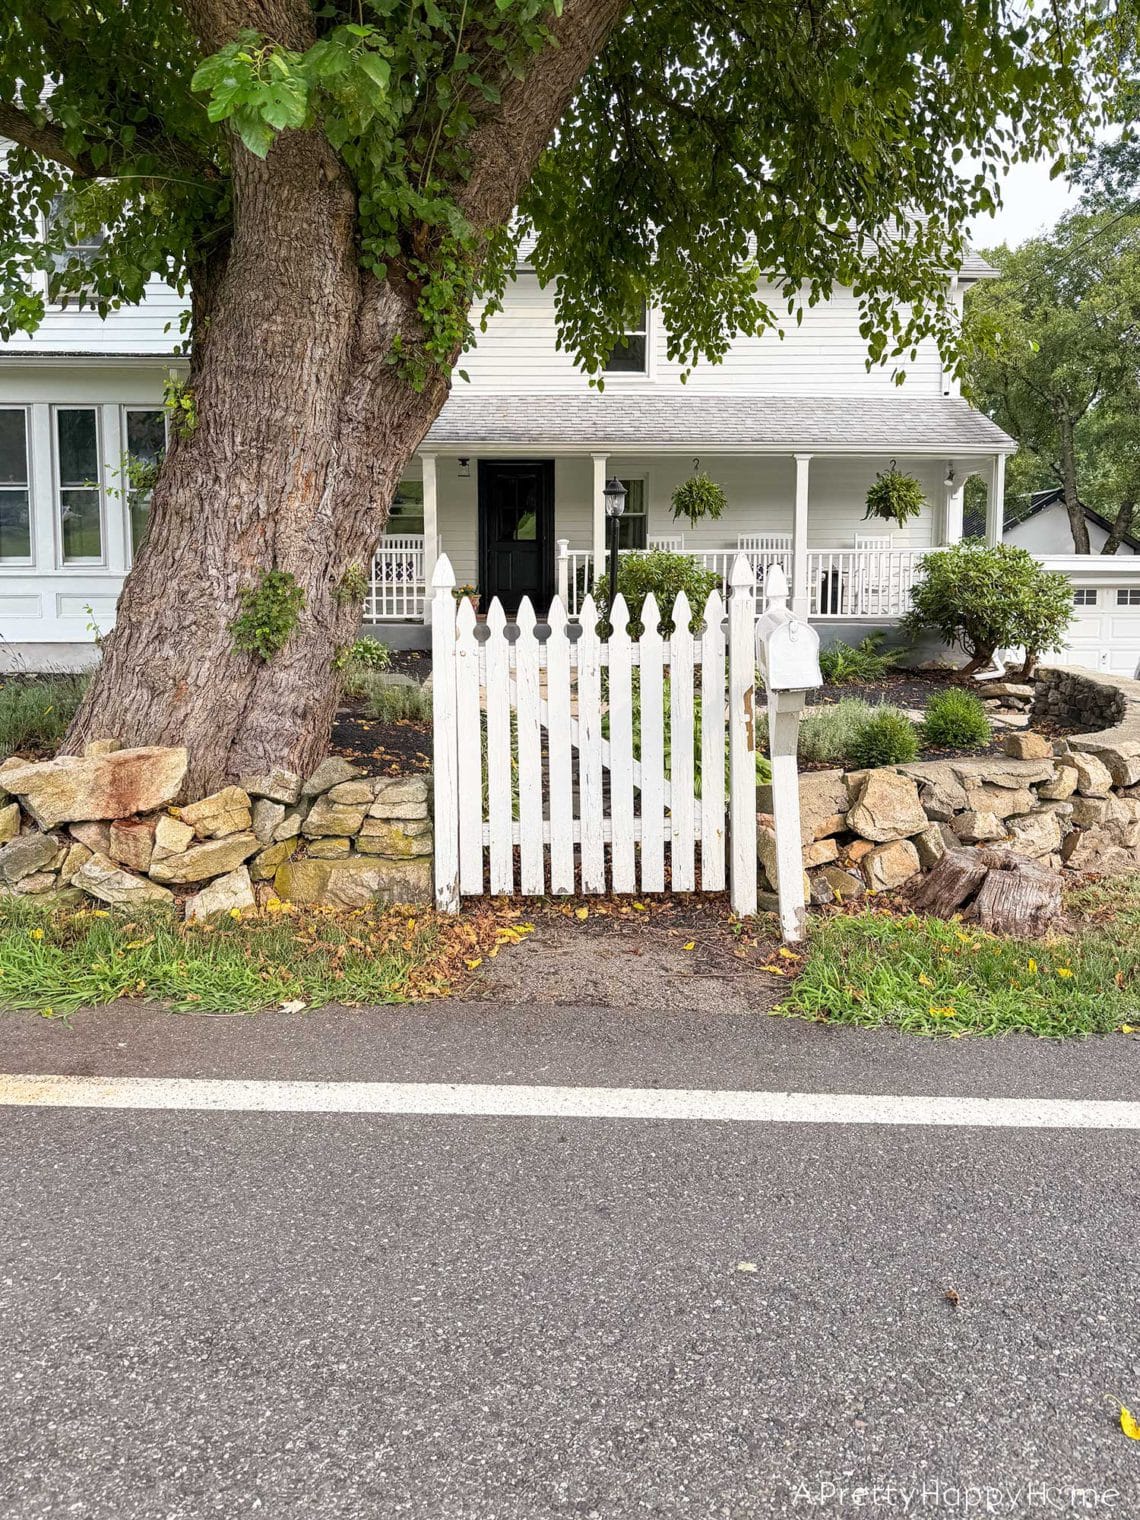
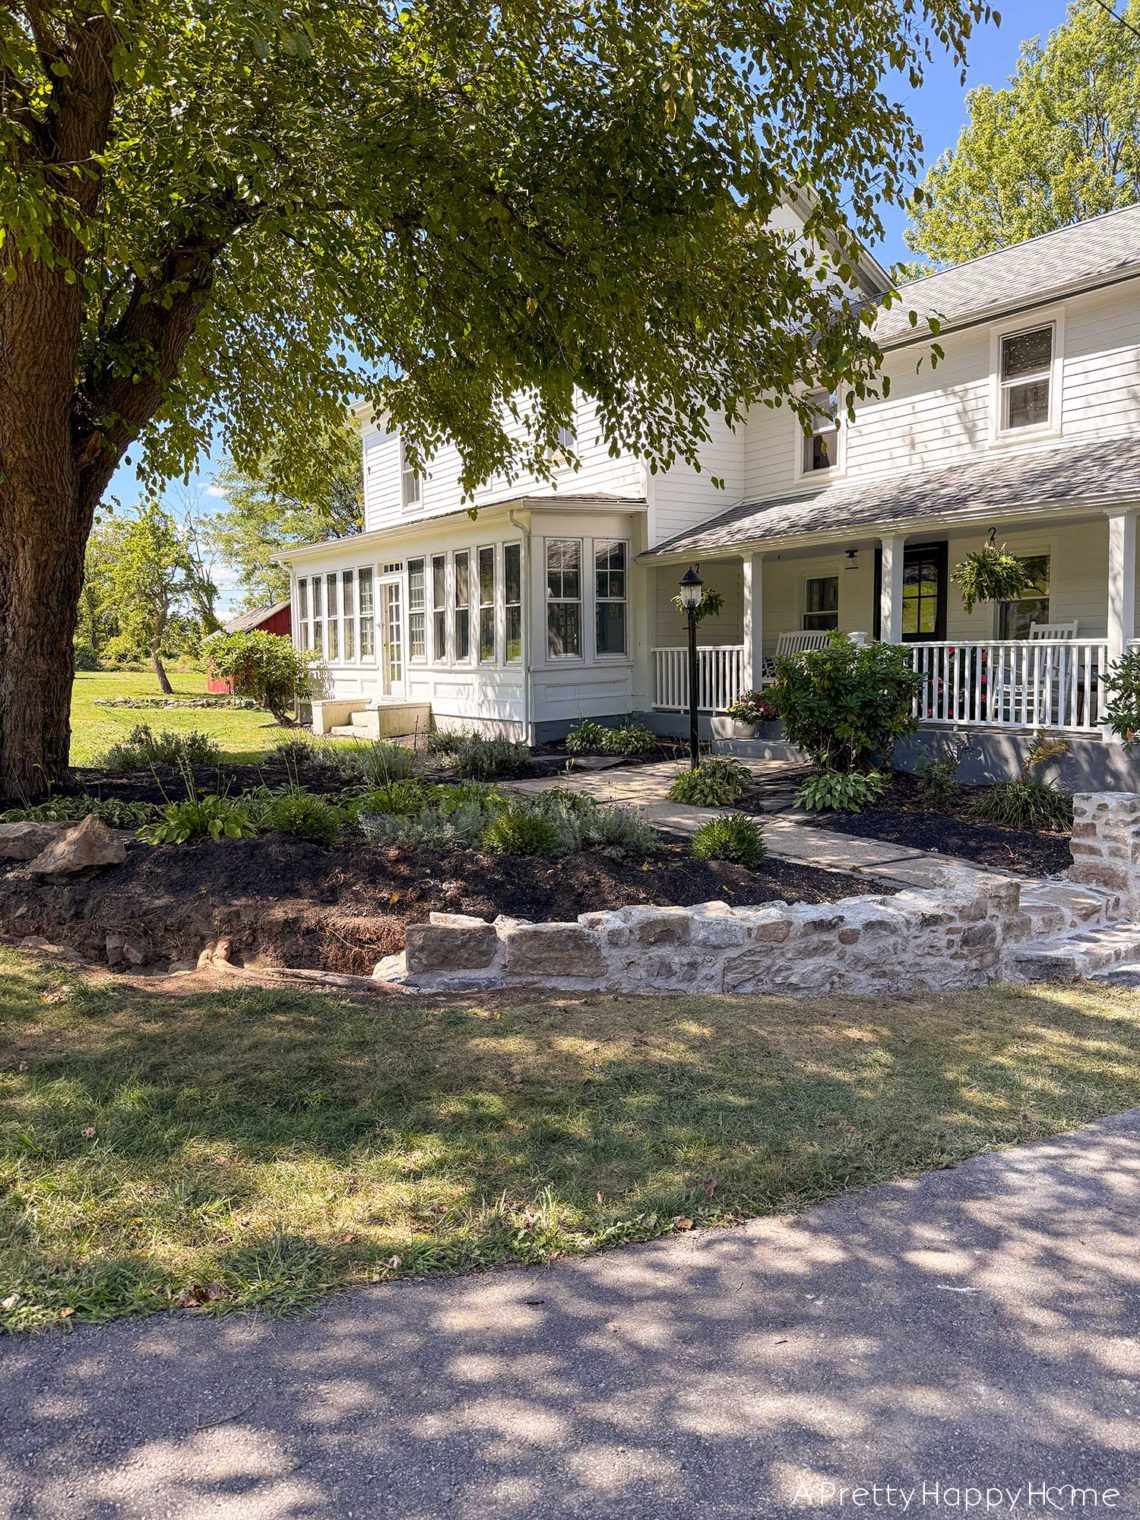
Curved Fieldstone Wall: Part 10, Mailbox and Gate Plan
Welcome back to our Curved Fieldstone Wall Series, where we attempt to rebuild the fieldstone walls in our front yard using historical masonry techniques. When we last left off, I had shared the progress on the second section of the wall and the potential problem with road salt. You can catch up on that here. Now it’s time to share the plan for the mailbox and gate. Don’t worry. There are also progress pictures on the wall itself. I wouldn’t deprive you in that way. To put it delicately, the gate and mailbox have seen better days. They both have some rot and peeling paint. The gate requires a complicated…
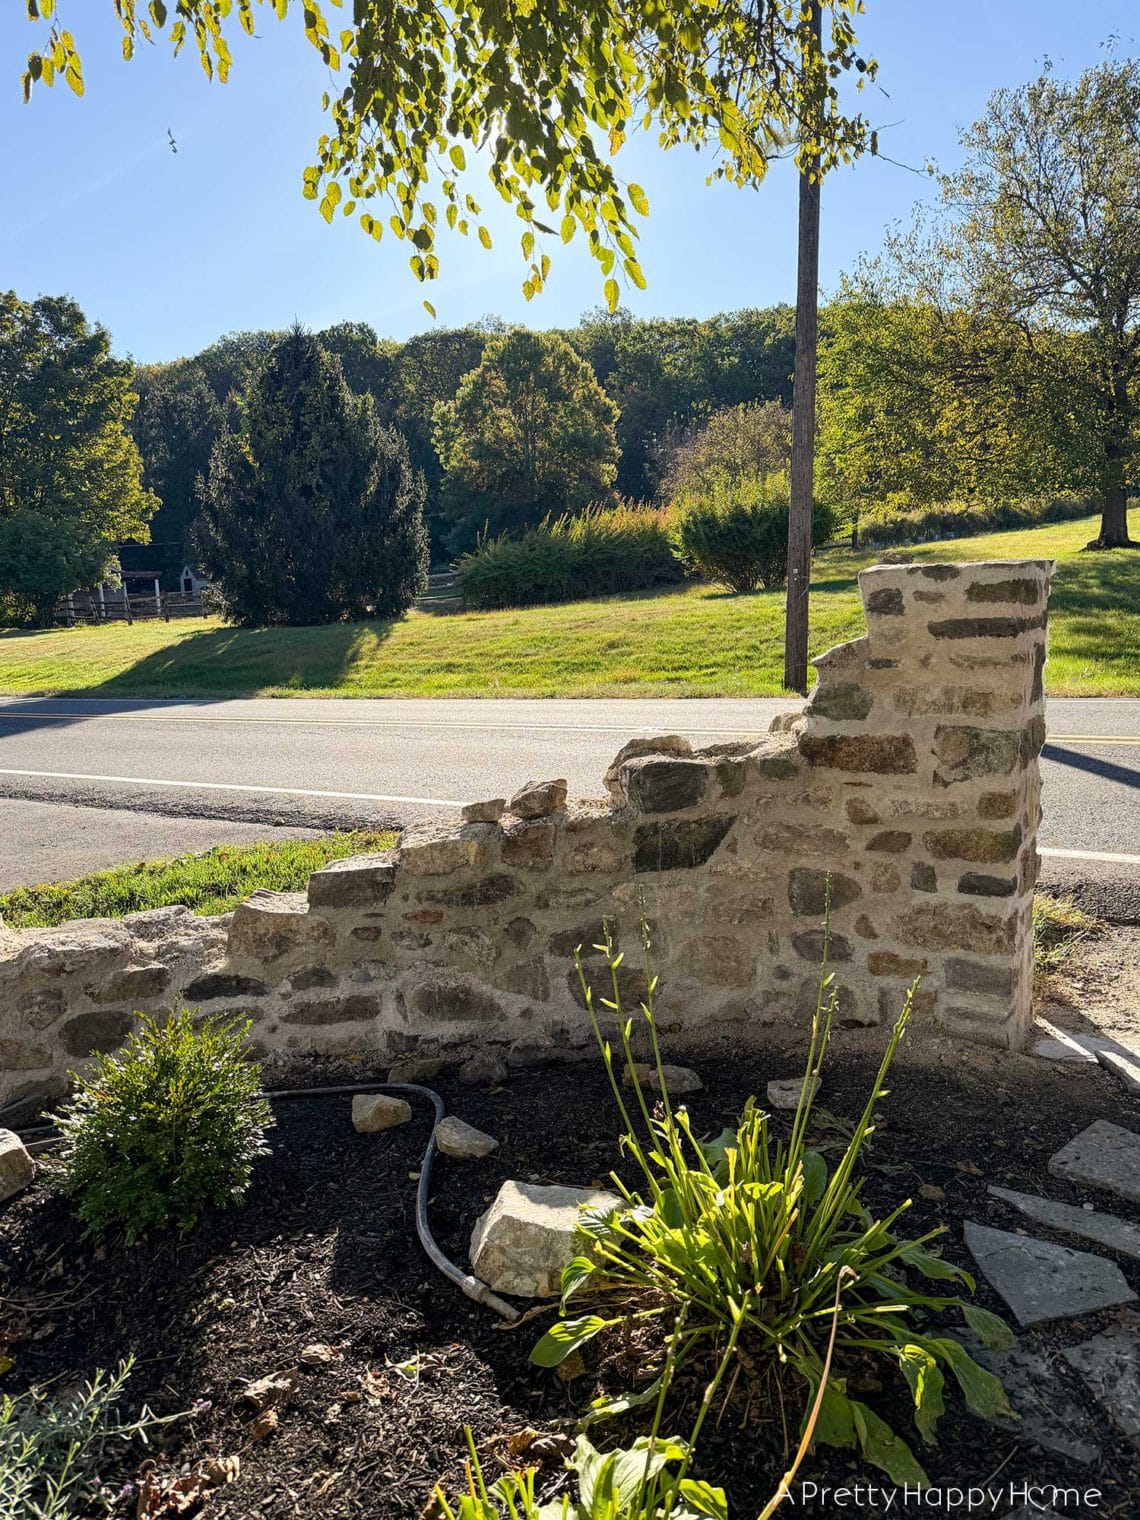
Curved Fieldstone Wall: Part 9, The Salt Problem
Welcome back to our Curved Fieldstone Wall Series, where we attempt to rebuild the fieldstone walls in our front yard using historical masonry techniques. When we last left off, I had shared the progress we had made on building the second section of the wall. You can catch up on that here. Today, I’ll share more progress (yay!) and discuss the one thing out of our control with this project – salt. Personally, I’m a big fan of salt. We need it to stay alive. It makes food taste delicious. What’s not to love? Guess what isn’t a fan of salt? Lime mortar. What are we using to build our…
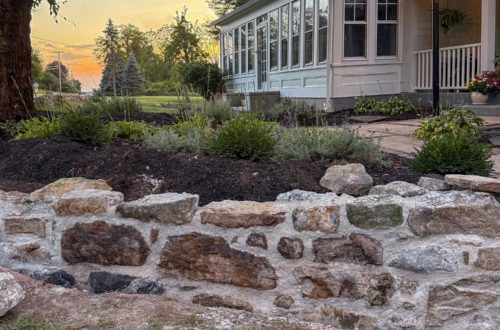
Curved Fieldstone Wall: Part 8, Progress Section 2
Welcome back to our Curved Fieldstone Wall Series, where we attempt to rebuild the fieldstone walls in our front yard using historical masonry techniques. When we last left off, we had built the first wall section, demoed the second wall section, and built stairs. Anyone tired yet? Ha! Now, it is time to connect the stairs to the second wall section and show you the progress we’ve made with the second wall. I’ve been working on it every day for a few hours, and the unvarnished truth is it’s a slow slog. The main reason why it is so slow is that we are reusing the rocks from the old…